Designer Dies

Designer Dies Natures Treasures II Release Day, Blog Hop & Giveaway!

Happy Weekend!

Such a happy fun day, as not only am I at the Stamping Together Festival in Port Sunlight (keep and eye on my social media stories), it is also Release Day for the Designer Dies Natures Treasures II.

Hopefully you have hopped on over from HERE, the start of the hop. And where I have introduced the new Designer Dies. You can also find links to all the Brand Ambassador blogs.

So let’s have a look at what I created today…

You might remember that on the first day of introductions I made a traditional shaker card using the solid leaf die. Well, I had this crazy idea of making a shaker card using the open leaf die too! Which is what I have done here.

It’s a little more time consuming, but I think the results are worth it. To achieve this I cut about 5 or six of the leaves from white card. I then used my fine tip glue to glue them together to create the height you would normally get from foam adhesive with a traditional shaker card.

I then glued the leaf in place on my card base, added the sprinkles and die cut the solid leaf from acetate to keep the sprinkles in and then added another white leaf die cut over the top. The sentiment is from Simply Said Blocks and I added some enamel dots from my stash.

For my second card today I wanted to recreate a card I made HERE, where I fussy cut the leaves. But I wanted to see how it would look with the leaves stamped and die cut instead.

As you can see I changed the colours slightly. Choosing some of the new Concord & 9th colours.

I think both versions of the card look good, but the die cut one was quicker and has more detail with the open leaf. However, if you didn’t want the open leaf die cut, that is still an option as you can stamp onto the reverse of the solid leaf die cut as the leaves are the same size, but in reverse.

That’s all I have here on the blog today. But I will be demoing the dies at the show in Port Sunlight today and I will do my best to share them on social media too.

Thank you for stopping by today.

Crafty Hugs 

Introducing… Designer Dies Natures Treasures II Day One

Happy Wednesday!

Hopefully you have hopped on over from HERE, where myself and Vinita are getting you over the mid week hump with the first of three days creativity introducing you to the NEW Designer Dies Natures Treasures II.

These dies didn’t quite arrive in time for the last release, hence why I have a mini surprise release this week! It seems weird releasing just one product, but I couldn’t have them sit on the studio shelf any longer.

So, as its a little different than normal I have changed up the introductions a little.

But enough talk, lets see them in action…

When I design I am constantly thinking of versatility. How can I provide more creative options with this design. So when it came to the dies that coordinate with the previously released Natures Treasures II clear stamp set, I also wanted them to work as stand alone dies. Where you don’t have to use the stamps, if you didn’t want to. I am pleased how I have achieved this.

For this first card I combined the stamps and the dies, but not in the usual stamping on the die cut way. I used the more solid stamped leaf to create a frame and then the open leaf dies to create a focal point inside the frame, that is adhered using foam adhesive.

I added a bakers twine bow and some Bottle Green Crystal Nuvo Drops and the sentiment is from Floral Vines.

For my second card, I went for the traditional shaker card…

New dies ALWAYS call for a shaker card in my opinion! Here I went for the easy shaker option using the solid leaf die cut.

The shaker element is Sprinkles: Cupcake Dreams from Little Things from Lucy’s Cards that I bought ages ago.

Again the sentiment is from Floral Vines and I finished off the CAS design with Dandelion Gloss Nuvo Drops.

Lastly for today I used the dies and stamps the traditional way, stamping and die cutting.

I always start by stamping the leaves and to get (an almost, as it isn’t 100% guaranteed) perfect die cut, I use a die cut mask.

And before I get to the other supplies I used, can we just appreciate the die cut Oceanside leaf at the bottom. Finally beautiful detail of the inside of the leaf being cut out. *insert all the heart eyes*.

The stamped lines are from Background Builders Classics and the sentiment is from Everyday Spring Sentiments.

That’s all from me today.

Thank you for stopping by & Crafty Hugs 

Have You Seen?

Happy Monday.

Today I am sending you some happiness, good health and sunshine wishes your way. I know that all around the world we are struggling to deal with the craziness of everything. Stay strong, listen to your government guidelines and spend some time creating to take your mind off it all.

I thought I would pop by to tell you about a Uniko feature in the newest issue of Die-Cutting Essentials that came out on Thursday.

I am super excited to share a little peek at the feature I did for the magazine using the newest Uniko Designer Dies Kindness Blooms collection. This collection of dies coordinate with the previously released Kindness Blooms clear stamp set and were released last month during our 8th Birthday celebrations.

This is my favourite card I made for the feature. One because it was super fun to make and two it shows most of the dies in the collection AND it also shows how the tiniest die in the collection can be used in a different way to create a fun background.

Yes, I really did use the tiny circle die to die cut all those individual holes in the background! I’ve also used both the solid flower die combined with the detail loopy flower die combined with the coordinating stamps. All the details and instructions for this card can be found inside the magazine. You can buy the magazine online HERE.

I’ve not managed to create anything new with this clear stamp set just yet, but I hope to this week if time allows. However, I did receive this beautiful card through the post this past week from a lovely customer, Anne S, who is clearly enjoying combining the stamps and dies.

It makes my day to see customers and friends finding enjoyment and creativity using the products I design. It inspires me to create and gives me new ideas of how to use them! It delighted me even more to receive this prettiness in the mail, which I will display in the studio. Thank you Anne 🙂

One last thing before I sign off for the day, it’s been a long one as I’ve not been sleeping well these past few days. Like most I am sure with all that is happening and on our minds.

Paper crafting, stamping, die cutting and making hand made cards is a wonderful therapy and distraction to all that is going on. So I thought that whilst Post Offices remain open here in the UK I would give you all a little discount code to use to treat yourself to something from the Uniko store.

Plus, with receiving the news yesterday that Happy Stampers Festival will not be going ahead at the end of April I have a lot of inventory and I am in need to create some space in the studio!

Thank you in advance for your support and custom. Each and everyone of you is truly appreciated. Stay safe & well.

Crafty Hugs

Stamp & Designer Die Focus – BIG & BOLD Snow

Hey & Happy Hump Day!

I’m still here dreaming of a white Christmas and I don’t think this feeling is going to pass any time soon! And as it doesn’t look like snow is expected any time soon I thought I would get my snow fix by inking up BIG & BOLD Snow and giving the NEW Designer Dies another outing.

Often these mini clear stamp sets can be overlooked as to how much you can do with them. But add in some coordinating designer dies and it can breathe a whole new life into the stamps and opens so many more possibilities.

Today I have a trio of cards to share with you using both the stamps and the dies…

StampFocusB&BSnow1

As you know I am a huge fan of aqua shades and when paired with snow or snowflakes, it’s no surprise it has to make an appearance!

StampFocusB&BSnow1d

I started with this card as I wanted to try out the stamp / die spotlight technique with the largest of the snowflakes in BIG & BOLD Snow, paired with the large snow stamp & matching die.

StampfocusB&BSnow1b

I started by stamping & die cutting the word snow, to see where I would place it on my card & where to place the snowflakes around it. I then did cut the snowflakes and temporarily adhered the layer to my base card to stamp the snowflakes. I finished the design off with some small accent snowflakes and some White Blizzard Nuvo Drops.

Next I wanted to create a one layer ombre card…

StampFocusB&BSnow1e

Thank goodness for stamping tools and the ease of creating a staggered ombre look and also for adding sparkle to a stamped layer. This is what I have done with the last darkest stamped snow.

StampFocusB&BSnow1c

To finish the design I used the positive snowflake die cuts from the first card, adding the stamped image inside the die cuts in Aqualicious ink and once I had adhered them to the card I finished the design off with some of the smaller stamped snowflakes and again White Blizzard Nuvo Drops.

Lastly for today I was inspired by this weeks Freshly Made Sketches sketch seen HERE and below my card. I decided to keep with the same aqua colour scheme, using my blender brushes to create the perfect base colour card.

StampFocusB&BSnow1f

And here is the sketch I followed…

FMS Final 407-001

I love how you find the perfect sketch to fit with the products you are currently using and this one came together pretty quick too. This time I used the smaller of the snow sentiments and added just one stamped and die cut snowflake.

StampFocusB&BSnow1a

That’s all I have to share with you today using these products, but I will back with some more new release product inspiration tomorrow. Heads up, if you’re on Instagram, be sure to check out my feed HERE later today as I have a Win it Wednesday coming!

Okay, best get some more work done before the daylight has gone!

Crafty Hugs


Festive Friday!

Happy Friday!

Here at Uniko HQ I am finally caught up with the fun and chaos of Happy Stampers Festival! I absolutely LOVE doing the show, but it does bring a lot of extra work pre and post show. Especially when I am prepping for the release of NEW products too 😉

Those lucky enough to be able to come to Happy Stampers got the chance to buy the new products (bar one) and if you caught my Instagram stories on Saturday you will have seen a BIG peek at the products!

If you missed both, fear not, I have a whole bunch of festive cards to share with you today using the New Release, which will be available on the website tomorrow – yay! I’m working my little socks off to have it ready to go for 8 or 9pm BST.

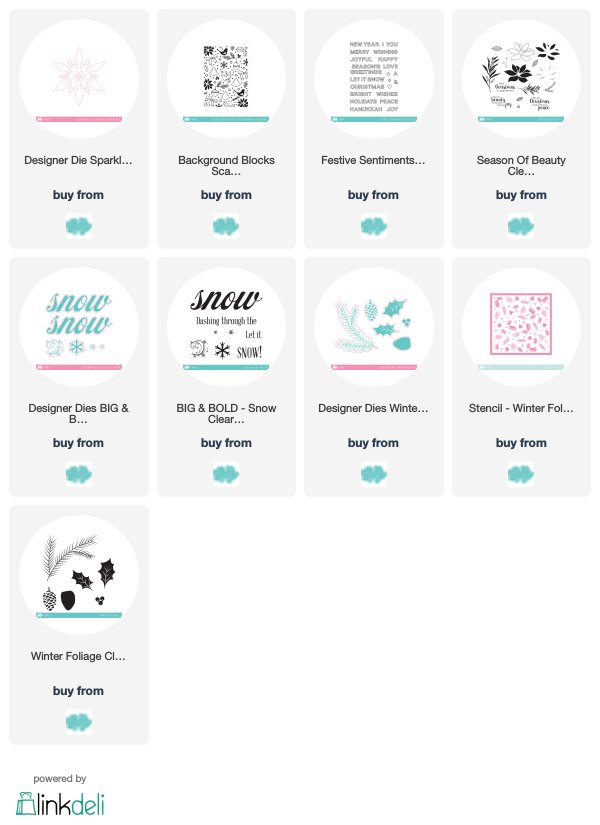
In this release there is three new clear stamp sets, two coordinating designer die collections, a stand alone die which does coordinate with a previously released clear stamp set AND there is one new stencil design.

Oct19Release4

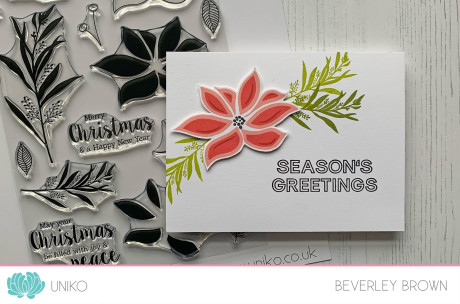
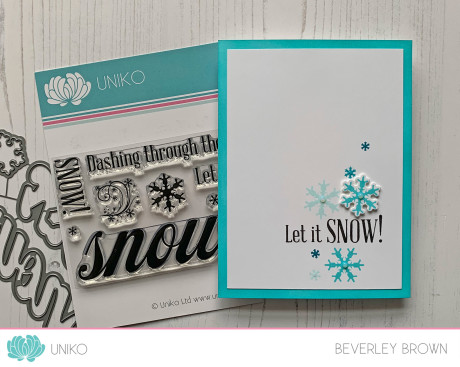
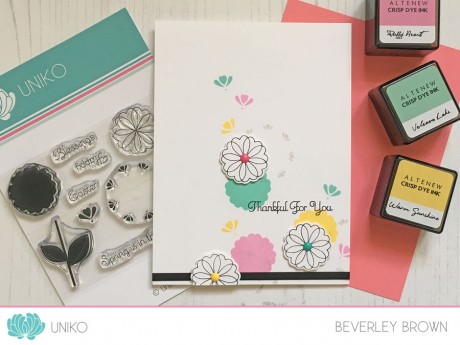
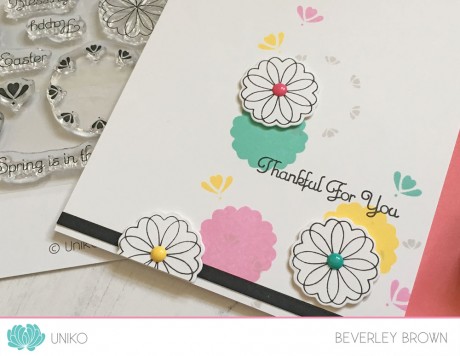
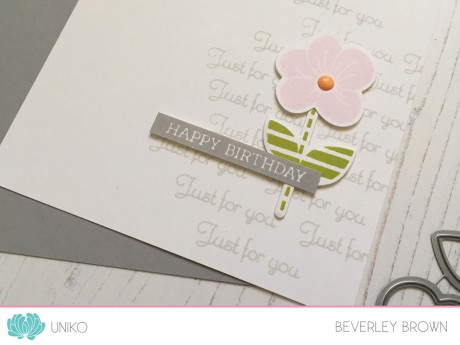
On this first card I have used Season Of Beauty clear stamp set combined with a sentiment from Festive Sentiments Outlined.

Oct19Release4a

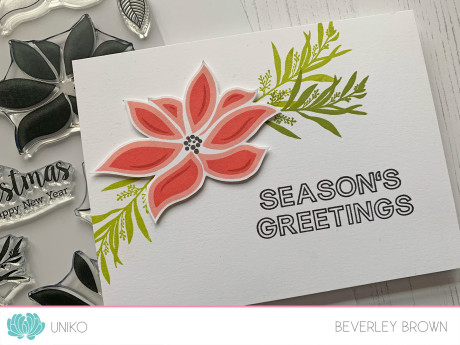
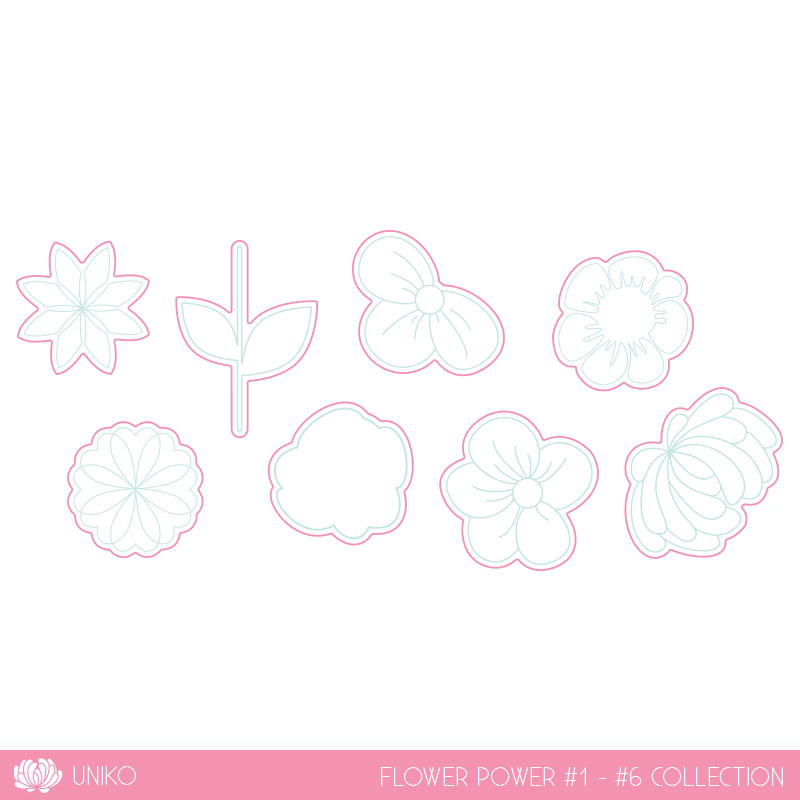
Season Of Beauty is a large £16 clear stamp set which features this beautiful modern layering poinsettia styled flower, along with wintery foliage and accents, plus a trio of festive sentiments.

Even though I have ‘themed’ the stamp set to be festive, the style of this flower and the foliage can easily be used all year round in all seasons, by changing up the colours. You will see this in more of the samples I have to share tomorrow.

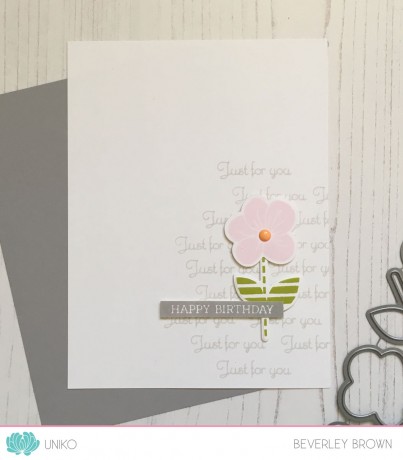
The next clear stamp set being released is Festive Sentiments Outlined. With the popularity of Sentiments Outlined released in July, it was a no brainer to bring out a festive version!

Oct19Release2

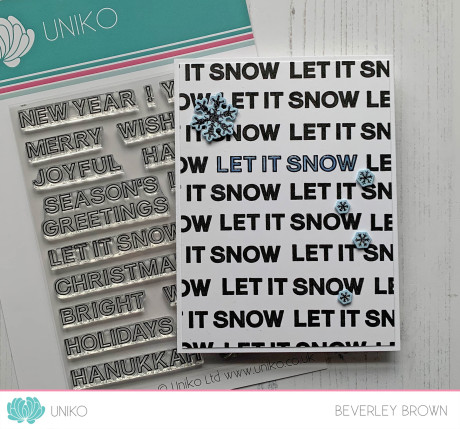
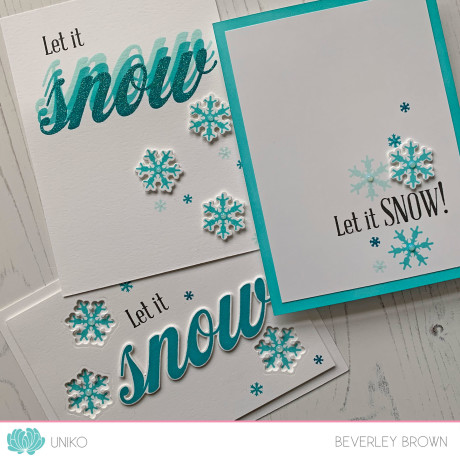
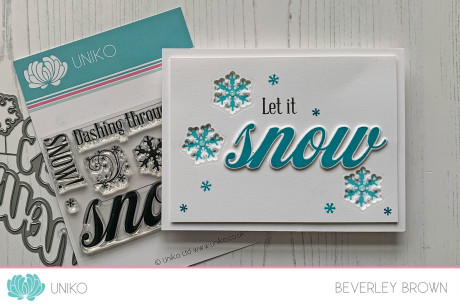
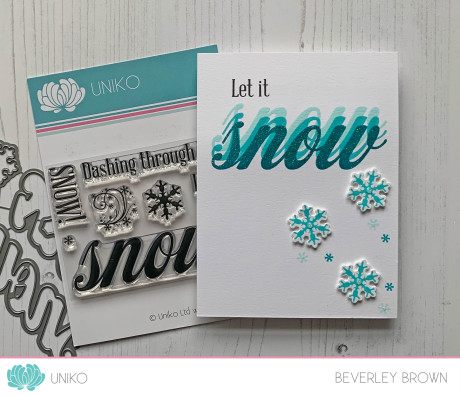
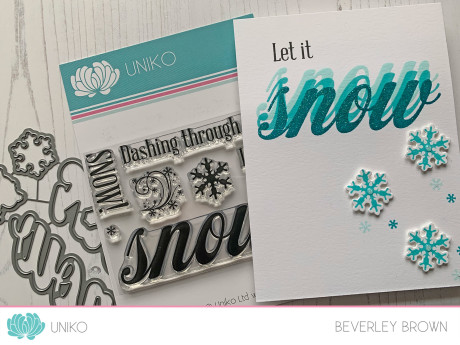
Unlike Sentiments Outlined, I have designed this stamp set to be a little more flexible in building your own sentiments. Plus, some can be used all year round and not just for your holiday cards. Though some, like the ‘Let it Snow’ I have used on this card come as one sentiment.

Oct19Release2a

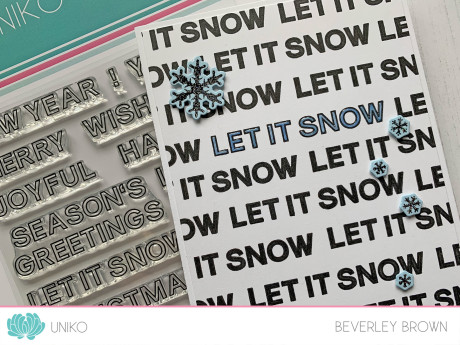
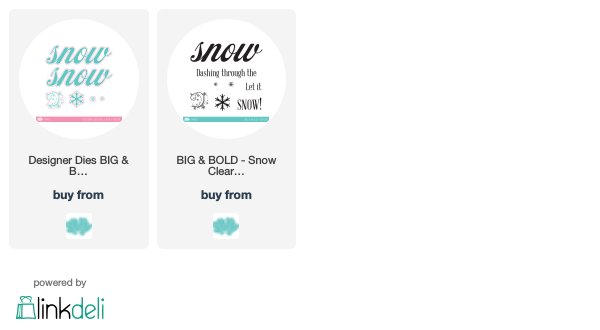
I couldn’t resist doing this all over design again like I did HERE with Sentiments Outlined. It is fairly time consuming, especially the colouring in of the sentiments in black, but I love the look! I used some blue tones to colour the focal ‘Let it Snow’ sentiment and I also added some clear gloss Nuvo Drops to that sentiment. This time I decided to add a little embellishment of some sparkly stamped and die cut snowflakes from BIG & BOLD Snow.

The last of the clear stamps for this release is an addition to the Background Blocks series. I love this series of single stamps as they are great for creating a quick cards for all sorts of occasions.

Oct19Release6

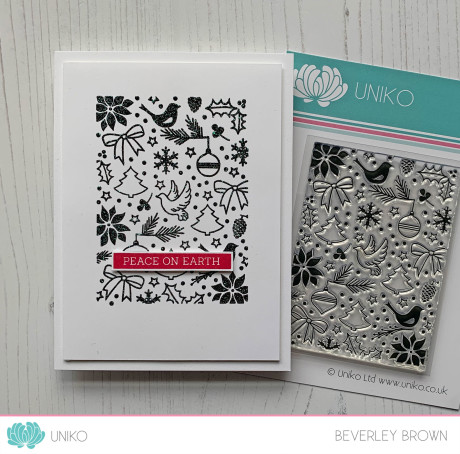
Here I introduce you to Background Blocks Scandinavian Christmas. As you can see it is a very similar design to the previously released Stencil Scandinavian Christmas.

Oct19Release6a

This card was so quick and easily mass producible, if needed! I simply stamped the block in VersaFine Onyx Black ink and heat embossed it with my favourite ‘go to’ embossing powder for festive makes, Stardust! I’ve then adhered the stamped panel to my card base using foam adhesive and added a simple sentiment from Simply Said Blocks Christmas.

Okay, that’s all the stamps for this release, but how about a look at the Designer Dies and Stencil design!

Oct19Release1

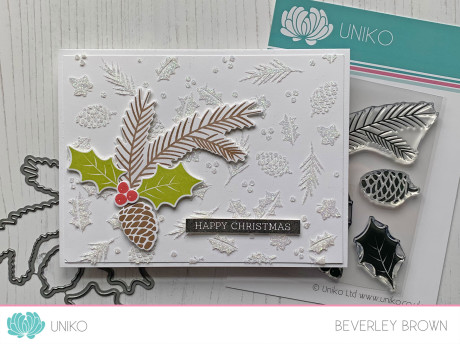
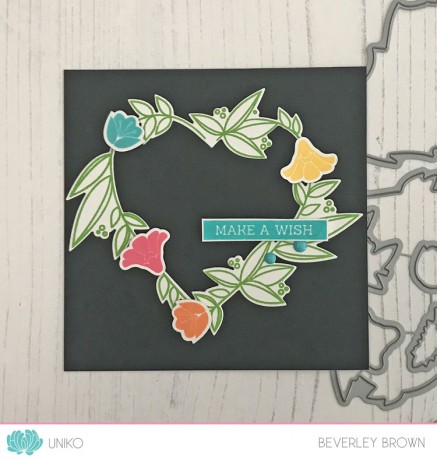
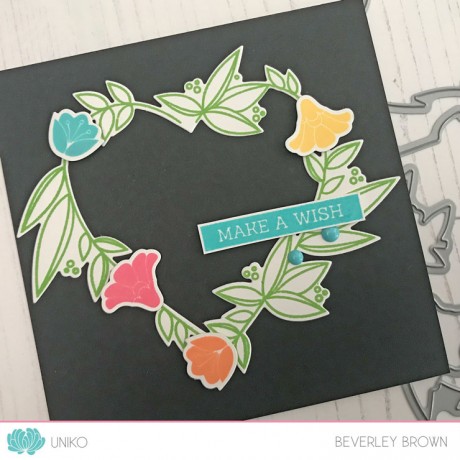
First up is Designer Dies Winter Foliage Collection to match the previously released and ever popular Winter Foliage clear stamp set. To say I am excited about these dies is an understatement! They have been a long awaited addition and I can’t wait to really sit down and play with them!

Oct19Release1a

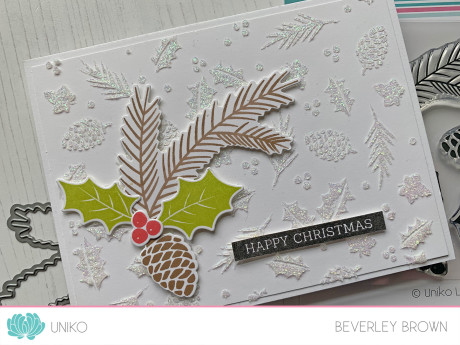
Here I have used all but one of the coordinating dies and just look at this background. This photo really doesn’t show how sparkly this stencil design is. I’ve used the new Stencil Winter Foliage and the last of my Nuvo Moonstone embossing paste. You will recognise quite a few of the images in this stencil design, taken from a mixture of Uniko clear stamp sets, such as Background Builders Vines Winter Additions.

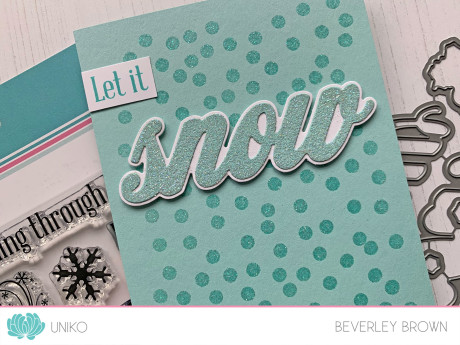
Next I have another set of coordinating designer dies, this time to match another of the BIG & BOLD clear stamps, BIG & BOLD Snow, which leads me onto my next card!

Oct19Release8

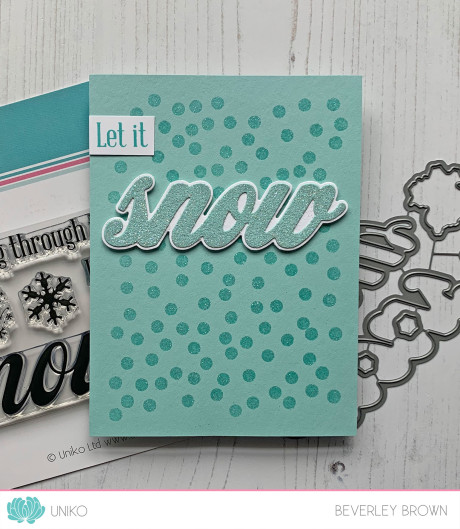
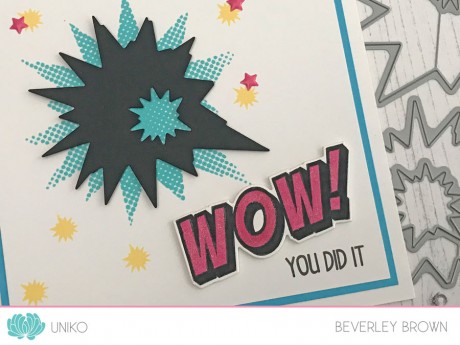
Here I have reached for some lovely Pool Party card stock and stamped & embossed the Large Scattered Polka Dot Background with WOW! Clear Sparkle embossing powder. I then die cut the Snow and Snow shadow and added lots of glittery loveliness to the die cut snow *huge heart eyes*.

Oct19Release8a

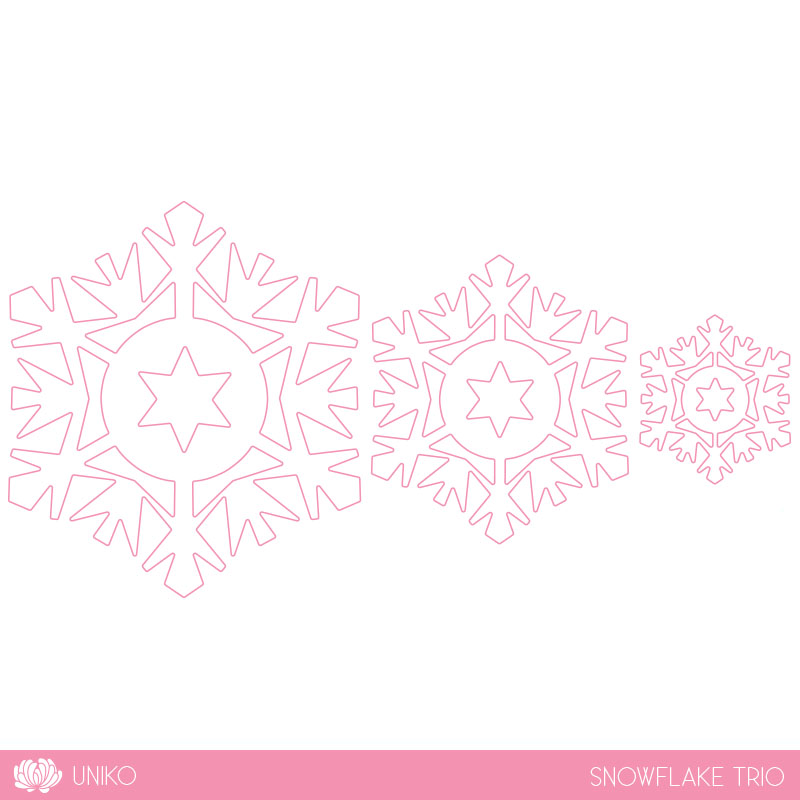
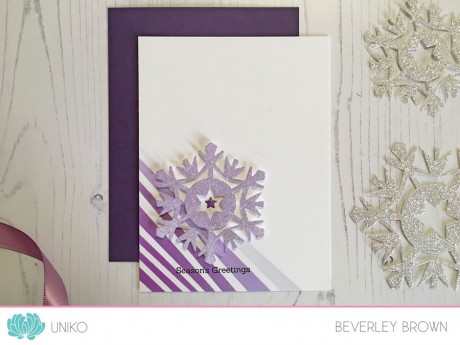
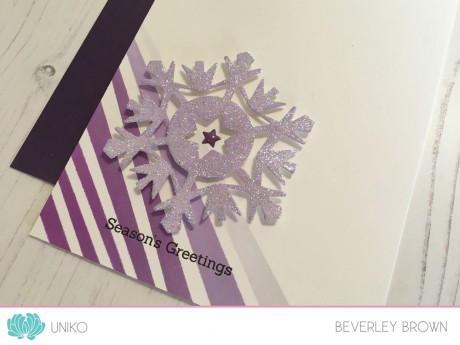
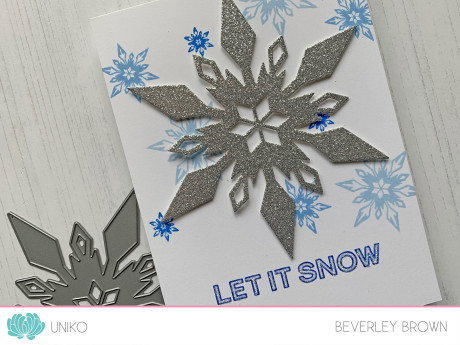
AND lastly, but by no means least I introduce the last of the designer dies and a beautiful stand alone one at that, Designer Die Sparkling Snowflake.

Oct19Release5

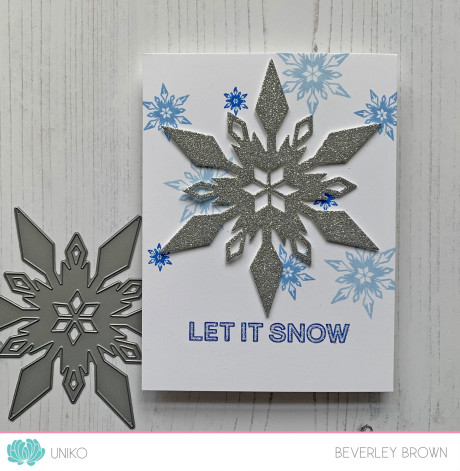
Just look at this beauty! Do you recognise the design of the snowflake? Yep, that’s right, it’s my favourite design from the previously released and much loved Stunning Snowflakes. You can see the stamped snowflakes behind this sparkly snowflake and again the sentiment from Festive Sentiments Outlined.

Oct19Release5a

So that concludes the October Release! What do you think? I’d love to know and which is your favourite, I think mine has to be the Designer Die Sparkling Snowflake, I am a sucker for snowflakes after all 😉

Okay, now I am off to finish adding all these lovely products to the website and now that I have an unexpected Bean free night AND the football is on to keep hubby occupied, they might be up early!

Thanks for stopping by!

Hugs


Introducing… Designer Dies Explosion Collection

Hey!

Welcome to day 7 and the last of the May 2018 Release product introductions. That means tomorrow IS Release Day – Whoohoo!

Anyway, I am super excited about today as the product we are introducing is some NEW matching Designer Dies to previously released and popular Uniko clear stamp sets. As I mentioned yesterday too, I love matching dies, they provide so many more techniques and ways to stretch your stamps.

OK, so let’s see these dies and the clear stamp sets they match…

Hopefully you can see that I have created this designer die collection in a way that it mainly matched the Explosion! Additions clear stamp set. It does feature a die to match the explosion stamp in the original Explosion! set, but as you will see from my card below you don’t need to use the stamps with the explosions!

IntroEDD2

I started by stamping the halftone explosion onto my white square layer in Altenew Aqualicious ink. I then die cut the 2nd largest explosion that matches the original Explosion! clear stamp. I thought it would be fun to add an inner explosion die cut so that the halftone could be seen through when layered.

IntroEDD2a

The black die cut explosion is adhered to the card using foam adhesive. I added a die cut, stamped and raised WOW! to the card adding the sentiment ‘You Did It’ and some stamped yellow tiny explosions.

I hope I have shown some of the possibilities these dies add to the stamps?! As always the Design Team have amazed me with their creativity, be sure to hop around for even more inspiration using these new Designer Dies…

Hugs

Release Schedule…

Sneak Peeks 1st – 4th May 2018, these little teasers give you hints at what is in store!

Introducing… 5th – 11th May 2018, here you will see a closer look at the products being released with a daily blog hop with the Uniko DT.

Release Day! Saturday 12th May 2018 9am BST you will get to see the products in their entirety and purchase them HERE on the website! As usual there will be a Design Team Blog Hop & GIVEAWAY!


Extra PRIZE Info! Alternative prizes will be offered to those that may already own the prize offered. Winners will be announced on Saturday 11th on the Winners Page HERE


Introducing… Designer Dies Originally Organic Additions Collection

Hey & My Apologies For My Lateness!

Welcome to day 6 of the May 2018 Release product introductions!

I am super excited about today as the product we are introducing is some NEW matching Designer Dies to a previously released and popular Uniko clear stamp set. I love matching dies, they provide so many more techniques and ways to stretch your stamps.

OK, so let’s see these dies and the clear stamp set they match…

So many fun possibilities with these dies and clear stamp set now 😉 And one of my favourite cards to make is shaker cards!

Hopefully you have hopped along with the design team and seen the shaker card I shared HERE yesterday. Thank you for all your lovely comments too. I would just like to give a shout out to Sarah P, as it was Sarah who suggested a separate die for the inside and outside of the heart wreath 🙂

Ok, so I have one more card which (hopefully) shows the delicacy of the heart wreath when cut with both the inside and outside dies…

IntroOOADD2

I adhered the wreath using glue, so it was flat to my black card base. I then die cut and stamped some colourful flowers adhering them with foam adhesive. The sentiment is from Simply Said Blocks II and the enamel dots are Stampin’ Up!

IntroOOADD2a

That’s all I have to share here, but there is plenty of inspiration from our Guest Designer & Design Team.

Hugs

Release Schedule…

Sneak Peeks 1st – 4th May 2018, these little teasers give you hints at what is in store!

Introducing… 5th – 11th May 2018, here you will see a closer look at the products being released with a daily blog hop with the Uniko DT.

Release Day! Saturday 12th May 2018 9am BST you will get to see the products in their entirety and purchase them HERE on the website! As usual there will be a Design Team Blog Hop & GIVEAWAY!


Extra PRIZE Info! Alternative prizes will be offered to those that may already own the prize offered. Winners will be announced on Saturday 11th on the Winners Page HERE


November 2017 Design Team Blog Hop & GIVEAWAY!

Hey!

It’s time for another Uniko Design Team Blog Hop & GIVEAWAY – Whoohoo!! For those of you who are new around these parts I will explain what this post is all about…

Here at Uniko HQ it is just myself behind the screen, blogging, designing, packaging stamps & orders through the Uniko online shop, customer service and all the things in between. I *usually* release new product every other month for a number of reasons, but mainly so I can keep up with everything!
On non – release months like this month I like to set myself and the Design Team a challenge to look back at a previously released product and give it some more love.
Usually I choose a product that was released the previous year or a once favourite that hasn’t seen much air time! This month however, I decided to look back at a few products Uniko released in October 2017 HERE.

Specifically the Uniko Designer Dies and NEW Uniko Stencils…

Designer Die Snowflake Trio £15, Copyright Uniko Ltd 2017

Designer Dies Flower Power #1 – #6 Collection £12, Copyright Uniko Ltd 2017

Uniko Stencil Scattered Polka Dots £4.50, Copyright Uniko Ltd 2017

Uniko Stencil Wonky Stripes £4.50, Copyright Uniko Ltd 2017

So, I have a little trio of cards to share with you today using some of these products. I was hoping to have more than three projects, but my plans were foiled yesterday by a poorly bean with a high temp, which consequently meant no nursery and no free time for this mummy! Hopefully what I do have to share will inspire you?!

First up a snowflake card…

UnikoNov17BH2

For this card I was inspired by this weeks Freshly Made Sketches sketch seen HERE and below. The angled section on the sketch made me instantly think of the Wonky Stripes stencil.

FMS Final 312-001

I reached for my newest Altenew Shades Of Purple inks and masked off a section of the stencil before pouncing the ink onto my card base from lightest to darkest to match the lower left angled section of the sketch.

UnikoNov17BH2a

The snowflake is the medium size of the trio and after die cutting from white card I then applied Lavender Fields ink and then applied a sparkly covering of Stampin’ Up! glitter 😉 The sentiment is from Simply Said II.

Next I wanted to give the new Flower Power 1 – 6 Collection of dies some love…

UnikoNov17BH1

Firstly I decided to reach for Flower Power #4 one of the flowers I tend to neglect 🙁 I decided to create a cascade effect of all the elements contained in the set, reaching for my trusty colour combination to inspire me. With it being the season of thanks I used a sentiment from Flower Power #3.

UnikoNov17BH1b

All the stamps in this series are designed to coordinate and mix and match with one another to help stretch your supplies and provide you with more creative options.

UnikoNovBH1c

Lastly, I reached for one of my favourites, Flower Power #2. This flower is inspired by Cherry Blossom and as I have been designing Spring themed clear stamps in the studio I was inspired to use this flower.

UnikoNovBH3

I stamped a subtle background using the ‘Just For You’ sentiment and layered my stamped and die cut flower over the top adhering with foam adhesive. I then decided to pair the ‘Happy Birthday’ from Simply Said Blocks.

UnikoNovBH3a

That’s all I have to share with you today, but I know the Design Team have a wealth of inspiration to share with you, prepare to be WOWED! Be sure to comment along the hop for your chance to win ALL the products being revisited. You have until Midnight (GMT) Saturday 18th November to comment and the winner will be announced Sunday 19th November 2017.

Happy Hopping!

CLICK HERE to see more from Carol

CLICK HERE to see more from Deborah

CLICK HERE to see more from Izzy

CLICK HERE to see more from Jane

CLICK HERE to see more from Lindsey

CLICK HERE to see more from Rahmat

CLICK HERE to see more from Sarah P

Hugs