Introducing (Page 8)

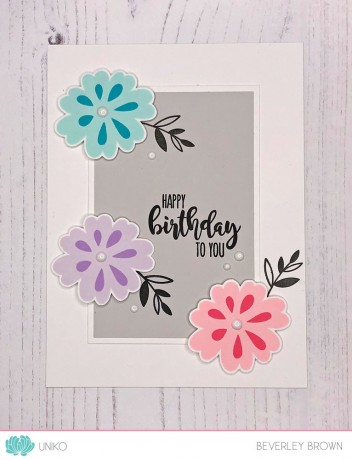
Introducing… Stencil Abstract Triangles & Birthday Wishes

Hey!

Welcome to Day 2 of our 7th Birthday & February 2019 Release product introductions. How fun & colourful was yesterday? It sure brightened up my Wednesday! If you missed it, you can catch up HERE.

I’m back again today with my guest designer and the design team to show you LOTS of inspiration! This time we are introducing a new Stencil Abstract Triangles & Birthday Wishes Clear Stamp Set. Hopefully you have hopped on over from the start HERE where I have introduced these 2 new products a little.

How about a closer look at the cards I have made using them…

IntroDay2a


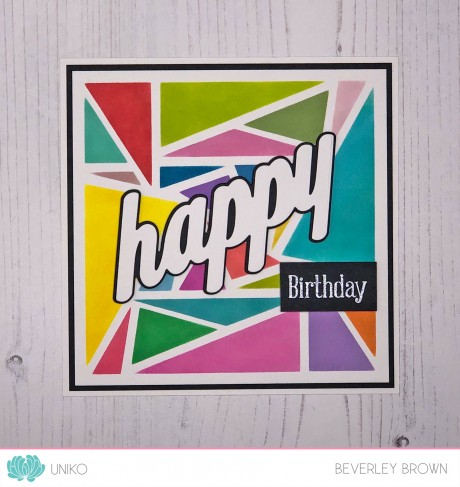
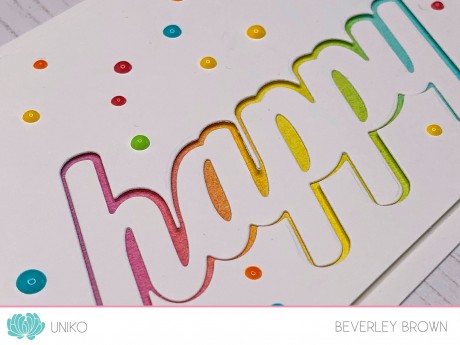
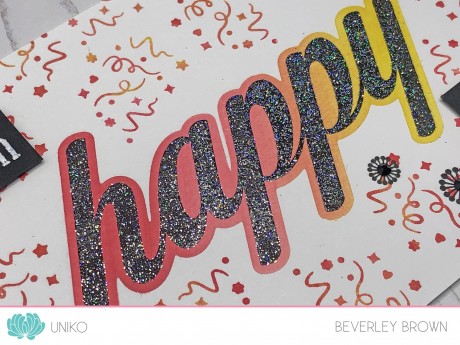
I had this crazy idea to rainbow the Abstract Triangle stencil and I am glad I did as the results are FAB! I used my Altenew Inks for this as I have more colours to choose from and I didn’t want to repeat the colours too much. It was just a matter of masking off each triangle to apply the colour and move onto the next.

IntroDay2f

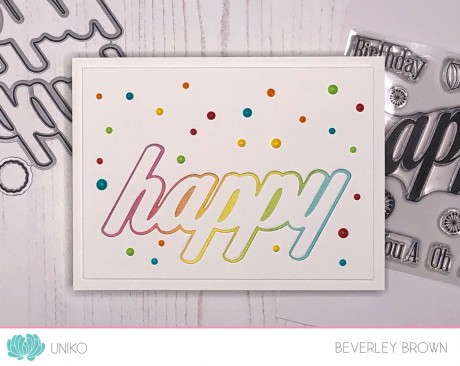
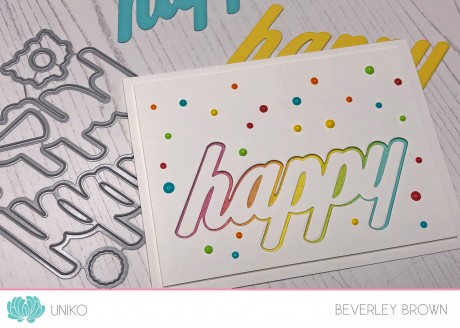
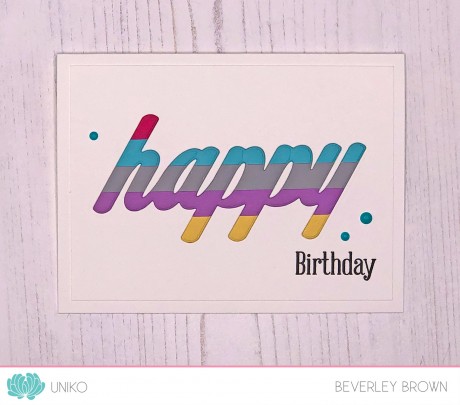
I trimmed my card to exactly 6 x 6 ” and place my stencil central, this left a nice border around the edge. I layered it onto a black card base and added the BIG & BOLD Happy die cuts & clear stamp sentiment to finish the design.

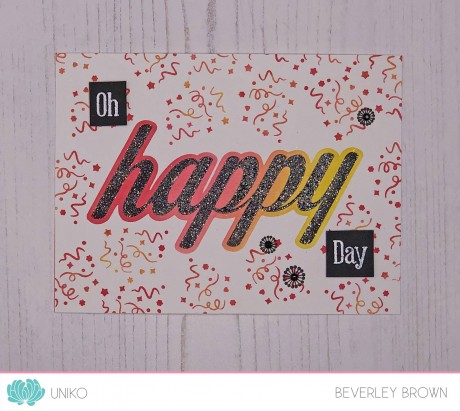
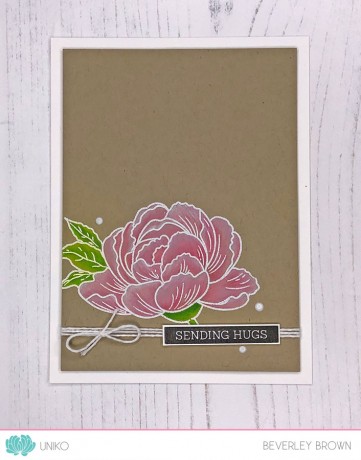
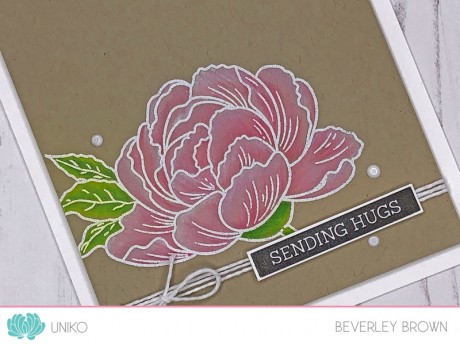
Next I used the same technique of placing my stencil to create a border down the vertical sides. This time I used Distress Oxide Inks and I trimmed my panel horizontal to create a slightly raised panel when adhered to my base card.

IntroDay2b


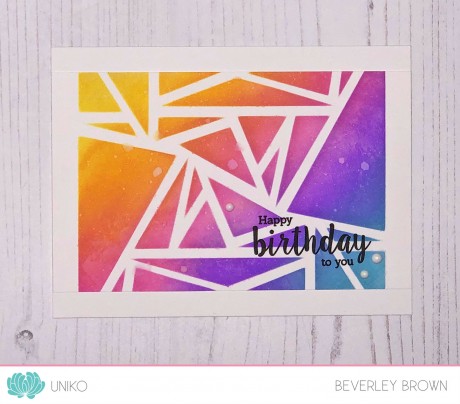
I added a slight sprite of water to the ink blending, added another of the sentiments from Birthday Wishes and a trio of Nuvo Gloss White Drops.

IntroDay2e

Lastly I have one more card using Birthday Wishes and to continue the rainbow theme I created a watercolour rainbow block panel for my sentiment to be stamped onto.

IntroDay2c

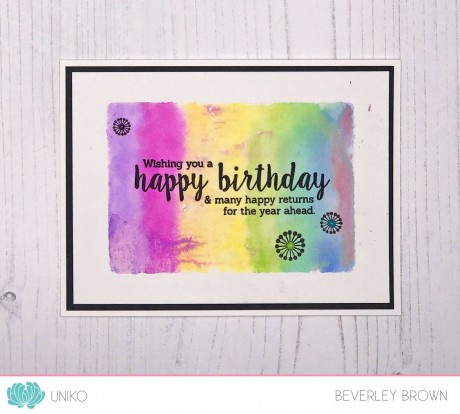
I used smooth watercolour card, an acrylic block & Zig Clean Color Brush Pens. I coloured my acrylic block with the Zigs in a rainbow format, spritzed them and also my panel of watercolored card and stamped it in place. I had a little ink movement as I lifted, but still the results were good.

IntroDay2d

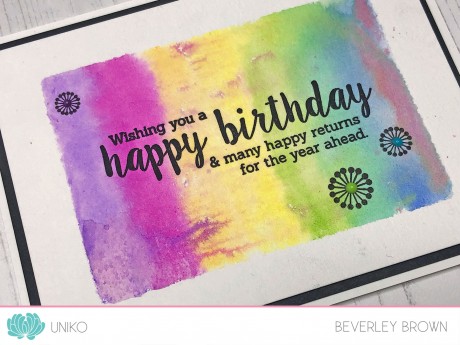
I used my MISTI tool to stamp the sentiment as even though the watercolour card is smooth, it still took a couple of stamps to get a crisp image. The trio of circle stamps are from yesterdays BIG & BOLD Happy clear stamp set and I also added some colourful Nuvo Drops to their centres.

That’s all I have to share today using these products, but I know Ruth our Guest Designer this month along with the Design Team have SO much more to share with you.

Hop on by to see what Ruth has created HERE and this is the order of the hop following Ruth…

Also, don’t forget the enter the HUGE giveaway over HERE to WIN Stamps For A Year! If you need help entering the giveaway as you don’t have a blog or social media to link, send me an email and I will assist you 🙂

WINstampsforayear

Thanks so much for stopping by & joining in on the 7th Birthday February Release fun 🙂

Hugs


Introducing… BIG & BOLD Happy Clear Stamps & Designer Dies

Welcome to Day 1 of our 7th Birthday & February 2019 Release product introductions.

This is the fun part where myself, my guest designer and the design team get to show you LOTS of inspiration! You get to see all the sneak peeks I shared yesterday in action on cards & projects over the next few days leading up to 11th February, Release Day!

Hopefully you have hopped on over from HERE, where I have introduced todays products a little and all the links to the blog hop.

Okay, now to some inspiration…

IntroB&Bhappy1b

I thought I would start off with this rainbow happy card. Just seeing the rainbow of colours sparks joy and happiness to me!

IntroB&Bhappy1a

This card uses just the BIG & BOLD Happy Designer Dies, I wanted to show how they can be used on their own. Though I have used some favourite colours and products too to make the dies shine!

I started out by masking a rectangle off on my base card. I then used Distress Inks & blended them together to create a nice rainbow that would flow from ‘H’ to ‘Y’. I then trimmed a top layer of white card to fit inside the base card with a slight border around the edge and die cut the ‘happy shadow’ to create a window to see the rainbow of colours.

IntroB&Bhappy1c

This die cut window panel is adhered to the card base using foam adhesive. I then die cut the ‘happy’ word & adhered it direct to my card base inside the window. Hopefully you can see the dimensions of the window & word in the photo above.

The card is finished with lots of yummy Nuvo drops to match the rainbow. I decided to keep the front of the card sentiment free and will add a follow on sentiment inside the card for the occasion it is sent out for.

For my next card I used mainly the clear stamp set…

IntroB&Bhappy2

This is almost a one layer card, it is just the raised ‘Oh’ and ‘Day’ which makes it a two layer card. It is also a little less CAS for me & I nearly didn’t show it here today because of that!

Anyway, I did (sorry if you don’t like it) and here is how I made it. I started out by creating a window mask out of printer paper to lay over my base card & ink blend through. This time I used Distress Oxide inks in Festive Berries, Worn Lipstick, Spiced Marmalade & Fossilised Amber.

IntroB&Bhappy2a

Once my ink blending had dried, I used my MISTI stamping tool to stamp the large happy inside the ink blended shadow & heat embossed with Stardust EP. I stamped the confetti spray around the happy, which I inked up in a trio of the colours I used to ink blend with. I then added a trio of circle accents from the clear stamp set in black and the smaller sentiments. These are stamped & embossed with detail white EP onto black card and adhered using foam adhesive.

I have one last card to share with you today using these products, this time I went back to my usual CAS style…

IntroB&Bhappy3

This one again mainly uses the dies as I was having so much fun with them! I tried my hand at the inlaid die cutting technique and added in colourful stripes for a little more interest. I actually made 2 cards with this technique, but I will share the other one with you on release day!

I started by adhering 1 cm strips of left over coloured card to a thin white piece of card using double sided tape & glue adhesive. I then die cut the word happy. I’ve then created a base card and panel like my first card at the top of the post.

IntroB&Bhappy3a

Before adhering my white card panel to the card base using double sided tape I die cut the happy from this too, setting aside the die cut & the inner pieces aside. The striped die cut is adhered inside the die cut window and then I added the white inner die cuts to fill in the gaps. Added the birthday sentiment and a trio Nuvo Drops to finish.

That’s all I have to share today using these products, but I know Ruth our Guest Designer this month along with the Design Team have SO much more to share with you.

Hop on by to see what Ruth has created HERE.

Also, don’t forget the enter the HUGE giveaway over HERE to WIN Stamps For A Year! If you need help entering the giveaway as you don’t have a blog or social media to link, send me an email and I will assist you 🙂

WINstampsforayear

Thanks so much for stopping by & joining in on the 7th Birthday February Release fun 🙂

Hugs

Introducing… Pure Florals Peony Clear Stamp Set

Hey!

Welcome to Day 4 of the December 2018 Release product introductions.

I am so happy you have decided to pop by again. Today is the last of the December production introductions and I have saved a new favourite till last. Pure Florals: Peony 🙂

I have one more bonus card to share with you today using the smaller bloom from the clear stamp set…

IntroPFpeony2

How about some classic colouring on kraft card stock with pencils? I wouldn’t class myself no where near an expert at colouring and I think this is a perfect choice and combination of mediums to get lovely results. I used 3 shades of pink Prismacolor Pencils plus white for the bloom and 3 greens for the leaves.

Once I had stamped the flower in VersaMark ink and heat embossed in white EP I started colouring. I always start with adding shading with the darkest colours and finish with the lightest and white to blend them together.

IntroPFpeony2a

To finish the card, I added some simple white bakers twine, a sentiment from Simply Said Blocks II and some of my favourite Gloss Simply White Nuvo Drops!

As it is the season of giving, each day of the introductions I will be randomly selecting one lucky comment from either this blog post, the Uniko website blog post, Facebook or Instagram to receive an eGift Certificate code to the value of £10! So be sure to leave a lovely comment 😉 Winners will be announced on Tuesday 11th December before the release!

Winners will be announced tomorrow Tuesday 11th December before the release at 9pm GMT!
Thanks for stopping by today!

Hugs

Introducing… Wonderful Day Clear Stamp Set

Hey!

Welcome to Day 2 of the December 2018 Release product introductions.

I am so happy you have decided to pop by again. The countdown to the December Release is in full swing and this is the fun part where you get to see the sneak peeks I shared HERE in action on cards & projects.

Yesterday I introduced 2 NEW Uniko Stencils called In The Forest and Let it Snow. You can catch up HERE and HERE.

As December is a super busy time for everyone, it is just me doing the product introductions for this release. Though the Uniko DT will be joining me on Release Day for our traditional blog hop 🙂
Anyway, I have one more card to share using this new clear stamp set called Wonderful Day…
IntroWonderfulDay3
For this card I focused on using the solid flower images and used 2 shades of Altenew inks for my stamp layering. I love these inks for their colours & their ease in not having to match colours for stamp layering! This card was pretty quick to make 😉
IntroWonderfulDay3a

I used Dew Drops & Aqualicious, Soft Lilac & Lavender Fields and Frosty Pink & Coral Berry for my colours. I stamped another of the sentiments from the set onto a small piece of Papertrey Ink Soft Stone card and also added just the small leaf stem to the flowers. I am in love with Simply White Gloss Nuvo Drops and I can’t stop using them on all my cards!

That’s all I am sharing here today using this new clear stamp set, but if you haven’t already, be sure to check out the cards I shared over HERE 😉

As it is the season of giving, each day of the introductions I will be randomly selecting one lucky comment from either this blog post, the Uniko website blog post, Facebook or Instagram to receive an eGift Certificate code to the value of £10! So be sure to leave a lovely comment 😉 Winners will be announced on Tuesday 11th December before the release!

Winners will be announced on Tuesday 11th December before the release!
Thanks for stopping by today!

Hugs

Introducing… Uniko Stencils – In The Forest and Let it Snow

Hey!

Welcome to Day 1 of the December 2018 Release product introductions.

This is the fun part where you get to see the sneak peeks I shared yesterday in action on cards & projects. As December is a super busy time for everyone, it is just me doing the product introductions for this release. Though the Uniko DT will be joining me on Release Day for our traditional blog hop 🙂
So I have a couple more cards to share using the 2 new stencils…
IntroDec18Stencils2
For this first card I couldn’t resist using the white stencil medium again! I just love the glossy finish it gives and also the subtle dimension to designs.
IntroDec18Stencils2a
I kept the design simple by framing my stencilled panel, adding a little ribbon loop to the edge & a sentiment from the popular Simply Said Blocks Christmas clear stamp set released back in October.
Lastly I have one more card to share using the Let it Snow stencil…
IntroDec18Stencils4
I decided to pair it with another older and popular favourite, BIG & BOLD Snow clear stamps. After inking the stencil with Altenew Ocean Waves & Dusk inks I added some Clear Wink of Stella to the snowflakes & some Simply White Gloss Nuvo Drops, slightly off centre to the dots in the design.
IntroDec18Stencils4a
I used my MISTI tool to stamp the large ‘snow’ sentiment in Desert Night ink and then again in VersaMark ink to heat emboss with Stardust EP. Some therapeutic fussy cutting & my favourite 1mm thick foam adhesive to assemble the card 😉
That’s all I have to share today using these new stencils. I do have a card HERE using them, so be sure to check it out! I will be back tomorrow with another product introduction and lots more inspiration.
As it is the season of giving, each day of the introductions I will be randomly selecting one lucky comment from either this blog post, the Uniko website blog post, Facebook or Instagram to receive an eGift Certificate code to the value of £10! So be sure to leave a lovely comment 😉 Winners will be announced on Tuesday 11th December before the release!

Thanks for stopping by today!

Hugs


Introducing… BIG & BOLD Merry and Background Builders: Christmas 2018

Hey!

Welcome back to day 4 of the October 2018 Release product introductions.
This is the fun part, you now get to see all the sneak peeks in action. The Design Team have worked their socks off and created an abundance of inspiration to share with you over the coming days 🙂

Thank you for all the comment love yesterday here and on social media. If you missed the first 3 days of introductions, you can catch up HERE, HERE and HERE.

Today we are introducing the final two clear stamp sets, BIG & BOLD Merry and Background Builders: Christmas 2018.
IntroBBchristmas2018a
This card was totally inspired by one the lovely Keren Baker shared on Instagram HERE. I loved how Keren had weaved the paper strips and so I wanted to recreate this with stamps. One of the stamps in Background Builders: Christmas 2018 is a line of small diagonal lines. Which when stamped & overlapped, it creates a plaid style effect.
IntroBBchristmas2018bThe sentiment is from the new Simply Said Blocks Christmas and I added in the holly leaves from Winter Foliage. I used Nuvo Drops to create the holly berries.
As usual my AWESOME Design Team have created projects to share with you all too. Be sure to hop along, commenting along the way. You never know, I might just pick some random comments to WIN some prizes this release 😉

Sarah P

WOW! This has been a fun few days of product introductions and I for one have loved seeing how my Design Team bring the products to life. So, we have reached the end of the product introductions, which means tomorrow is the BIG day!

We will have our usual Reveal, Design Team Blog Hop & GIVEAWAY at 9am tomorrow here on the blog AND the RELEASE will go LIVE at 9pm GMT over HERE on the website.

Hugs


Introducing… Winter Botanicals: Sweet Broom & Quilted Stencil

Hey!

Welcome back to day 3 of the October 2018 Release product introductions.

This is the fun part, you now get to see all the sneak peeks in action. The Design Team have worked their socks off and created an abundance of inspiration to share with you over the coming days 🙂

Thank you for all the comment love yesterday here and on social media. If you missed yesterday, you can catch up HERE, where myself & the DT introduced 2 Stencil Designs and an addition to the Simply Said Blocks series. You can catch up HERE with day 1, where myself and the Design Team re-introduced Background Builders: Christmas and Jolly Christmas clear stamp sets.

Today we are introducing Winter Botanicals: Sweet Broom & another Stencil, Quilted. Hopefully you have hoped on over from HERE where I have shared a couple of cards that we made at last weekends Uniko Stamping Retreat.

I’ve just the one card today to share, using Winter Botanicals: Sweet Broom…

IntroWBsweetbroom1


My thinking behind this card was that I wanted to recreate the feel of first frost (or first snow as parts of the NE of the UK have experienced yesterday) on winter foliage.

IntroWBsweetbroom1a

I chose to use Altenew inks in two shades of grey to stamp the outline and inner detail of the foliage images, then added lots of glitter to the white spaces left. There is so much sparkle on this card! The sentiment is from Pure Florals: Poinsettia.

IntroWBsweetbroom1b

That’s all I have to share today, but my AWESOME Design Team have created projects to share with you all too. Be sure to hop along, commenting along the way. You never know, I might just pick some random comments to WIN some prizes this release 😉

Sarah P

WOW! That was another inspirational hop, so many new ideas of how to use these new stencils and sentiment stamps. I hope you enjoyed the hop & will come back tomorrow for the last product introductions.

Hugs


Introducing… Stencils Scandinavian Christmas & Christmas Folk Snowflake AND Simply Said Blocks Christmas

Hey!

Welcome back to day 2 of the October 2018 Release product introductions.

This is the fun part, you now get to see all the sneak peeks in action. The Design Team have worked their socks off and created an abundance of inspiration to share with you over the coming days 🙂

Thank you for all the comment love yesterday here and on social media. If you missed yesterday, you can catch up HERE where myself and the Design Team re-introduced Background Builders: Christmas and Jolly Christmas clear stamp sets.

Today we are introducing 2 new stencil designs Scandinavian Christmas & Christmas Folk Snowflake AND 1 new clear Stamp Set, Simply Said Blocks Christmas! Hopefully you have hopped on over from the beginning of the hop HERE. Be sure to pop over if not to have a look at how I used the Christmas Folk Snowflake Stencil.

Here are a couple more cards using todays products…

IntroStencilScandi1

This stencil features lots of motifs that are from previously released clear stamp sets, such a Peace On Earth, Rustic Christmas & Background Builders: Vines Winter Additions.


I kept my card pretty simple when it came to inking through the stencil, I feel as though I am still a beginner when it comes to using them in my card making! Again I used Candid Apple DI and left off the sparkle this time, as I knew I wanted a sparkly dove from Peace On Earth. The sentiment is also from Peace On Earth and the die cut polaroid frame is Lawn Fawn.

IntroStencilScandi1a

Next up I had an idea to use Simply Said Blocks Christmas on it’s own, to form a bright and modern looking Christmas tree…

IntroSSBchristmas1

I did ‘cheat’ a little as the HAPPY sentiment & tree stump is from Simply Said Blocks and the star is from Jolly Christmas! I kept the rest of the card super white & simple so that the bright colours, sentiments and design took centre stage.

IntroSSBchristmas1a

All the tree elements are adhered to the card using foam adhesive and I added a little Nuvo Glitter Drops in White Blizzard to the star.

I hope I have inspired you a little, but I know my AWESOME Design Team will with what they have created. Be sure to hop along, commenting along the way. You never know, I might just pick some random comments to WIN some prizes this release 😉

Sarah P

WOW! That was another inspirational hop, so many new ideas of how to use these new stencils and sentiment stamps. I hope you enjoyed the hop & will come back tomorrow for the next product introductions.

Hugs


Re-Introducing… Background Builders: Christmas AND Jolly Christmas

Hey!

Welcome to the first day of the October 2018 Release product introductions.
This is the fun part, you now get to see all the sneak peeks in action. The Design Team have worked their socks off and created an abundance of inspiration to share with you over the coming days 🙂
Today we are re-introducing Background Builders: Christmas AND Jolly Christmas clear stamp sets. These two clear stamp sets were first introduced WAY back in October 2013 HERE and HERE. You can also find more ‘old’ inspiration using the clear stamps HERE and HERE on Pinterest.

Hopefully you have hopped on over from HERE at the start of the hop. I have shared a couple of new cards there using these 2 re-released clear stamp sets.

I’ve made a couple more cards to hopefully inspire you…

IntroBBChristmas2

Firstly I wanted to pair the snowflake builder stamp with the Designer Dies Snowflake Trio. I tried my hand at some partial die cutting too!

IntroBBChristmas2a

After stamping the snowflake background I added tiny drops of Nuvo Glitter Drops in White Blizzard to all the snowflake centres for a little bit of subtle sparkle. The sentiment is a new one from another clear stamp set we will be introducing later this week. The pearls are from Little Things By Lucy’s Crystal Collection – Sweet Pea.

IntroBBChristmas2b

I was having so much fun getting reacquainted with Background Builders: Christmas, that I used it for my second card to share with you today too!

IntroBBChristmas3

Even though I absolutely LOVE snowflakes, I think the 2 step stamp holly in this set trumps the snowflakes! It is beautifully festive and pairs with other Uniko clear stamps, such as this sentiment from All Occasion Sentiments #4.

IntroBBChristmas3a

After a busy few weeks I was feeling a little tired and ‘meh’ so I treated myself to some more Altenew inks and this little ‘Lil Inker Bow Die. It is too darn cute and pairing it with some old Papertrey Ink polka dot paper was the perfect finish to this clean and simple card.

As usual my AWESOME Design Team have created projects to share with you all too. Be sure to hop along, commenting along the way. You never know, I might just pick some random comments to WIN some prizes this release 😉

I hope you enjoyed the hop & will come back tomorrow for the next product introductions!

Hugs

Introducing… BIG & BOLD Hello and Framed Florals

Hey!

Welcome back to day three of the August 2018 Release product introductions. Thank you for all the lovely comments and support around social media for yesterdays introductions, I do love reading them all 🙂

Today we are introducing another 2 new clear stamp sets, BIG & BOLD Hello and Framed Florals. Hopefully you have hopped on by from the Uniko Blogspot blog HERE, where I have shared cards using the new stamps.

Here are a couple more I have made. First up, BIG & BOLD Hello…

IntroB&Bhello2

This was another one of the card designs I created for the Uniko Summer Stamping Retreat, however, this is a different colour way from the original as I actually mailed that card out!!

IntroB&Bhello2a

The bold sentiments in the BIG & BOLD series are so fun to create ombre shadow effects like I have on this card. Plus, the beauty of having a stamping tool like the MISTI makes it a breeze! Again, I have used Altenew inks as they really do take the thinking out of matching colours 😉 I’ve used the Sweet Dreams collection on this card.

Next up is a card using Framed Florals…

IntroFflorals2

This time I have used the ‘no line’ colouring technique using Prismacolor Pencils and I was a little unsure as to how it would turn out when I started, but I am rather pleased with the result.

IntroFflorlas2a

I started out by stamping the image onto white card using Altenew Limestone ink. I then simply coloured over the stamped image with my pencils.

The layout of my card is inspired by the current sketch over at CAS(E) this Sketch! seen HERE and below. I had to turn the orientation of my card for the image to fit with the sketch.

CTS_285

Ok, that’s all I have to share with you today using these new sets, but why not grab a cup of your favourite beverage and hop along with myself and the team…?

Well, I thoroughly enjoyed that hop and I am all inspired to get inky! I’d love to know your thoughts on these clear stamp sets and which is your favourite of the two, that is if you can decide?!

That’s all from myself and the Design Team today and all 5 of the new clear stamp sets have been introduced, which means…. TOMORROW is RELEASE DAY!!

Hope to see you then for the full reveal, release, Blog Hop & GIVEAWAY!!

Hugs