Blog Hop (Page 4)

11th Birthday Release In Review Brand Ambassador Blog Hop & Giveaway!

Hello & Happy Friday!

As you may remember, there was a delay with post and a few of the Brand Ambassadors didn’t have chance to fully showcase the 11th Birthday products on the official release post HERE. So I thought it would be nice to have a Release in Review Blog Hop. Plus, you get to see lots more creativity in one place using all the new goodies.

Hopefully you have hopped on over from HERE and the start of the hop. And you won’t want to miss leaving a comment on all the stops as of course I have a giveaway!

Shop The Latest Arrivals 

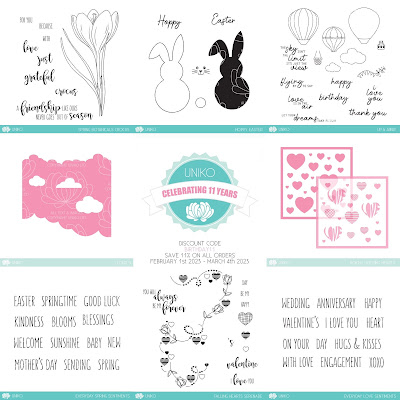
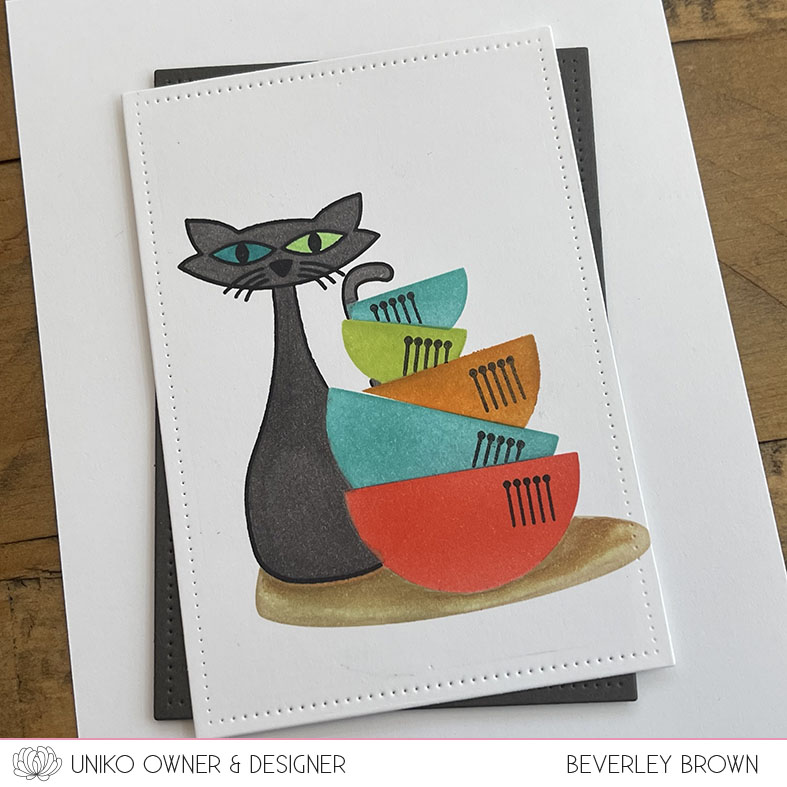
Now let’s get to the inspiration I have for you today using some of the products you can see above.

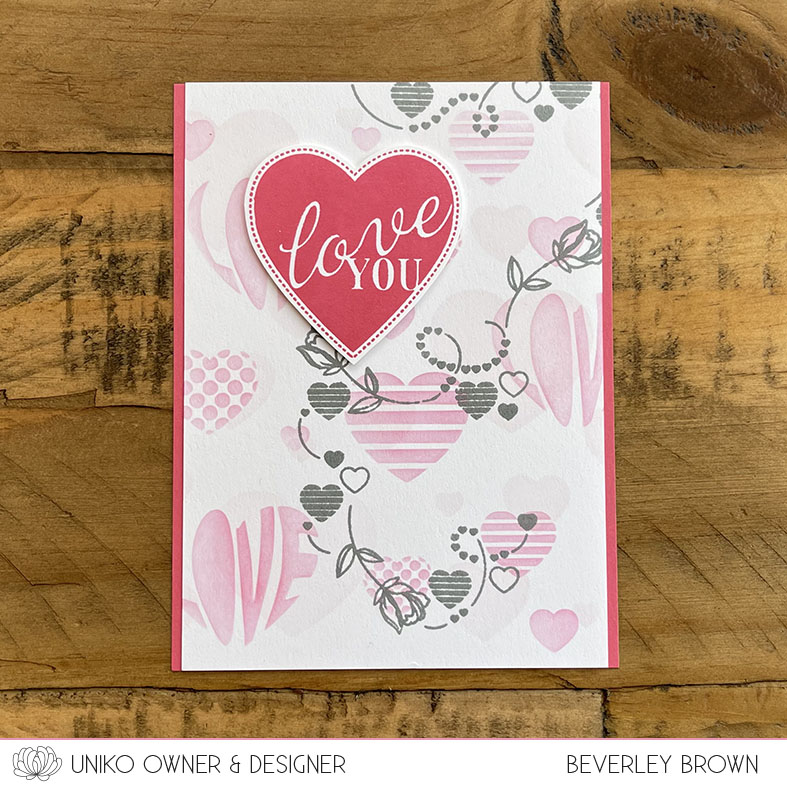
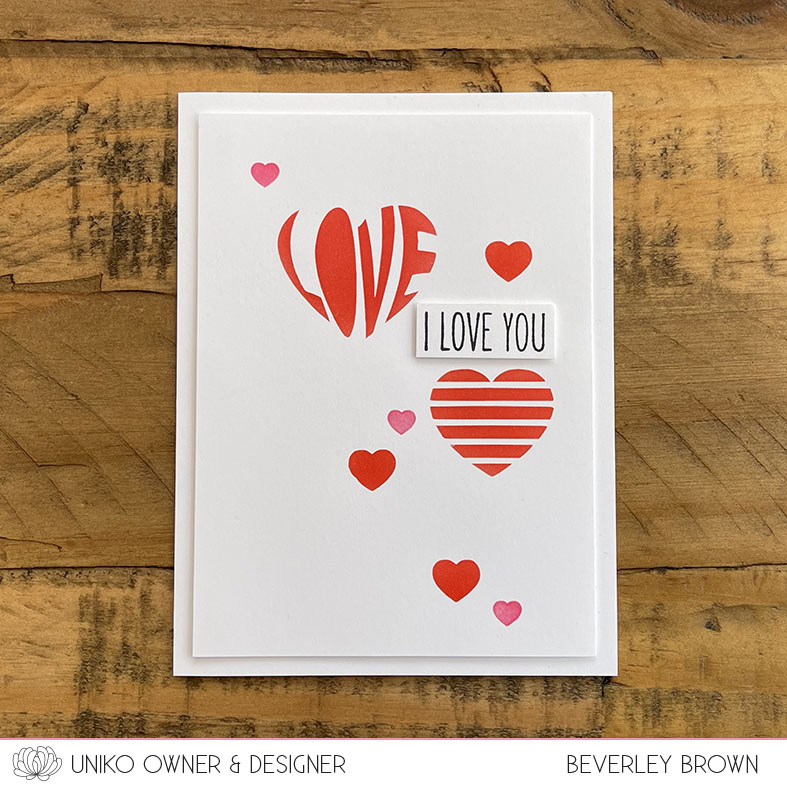
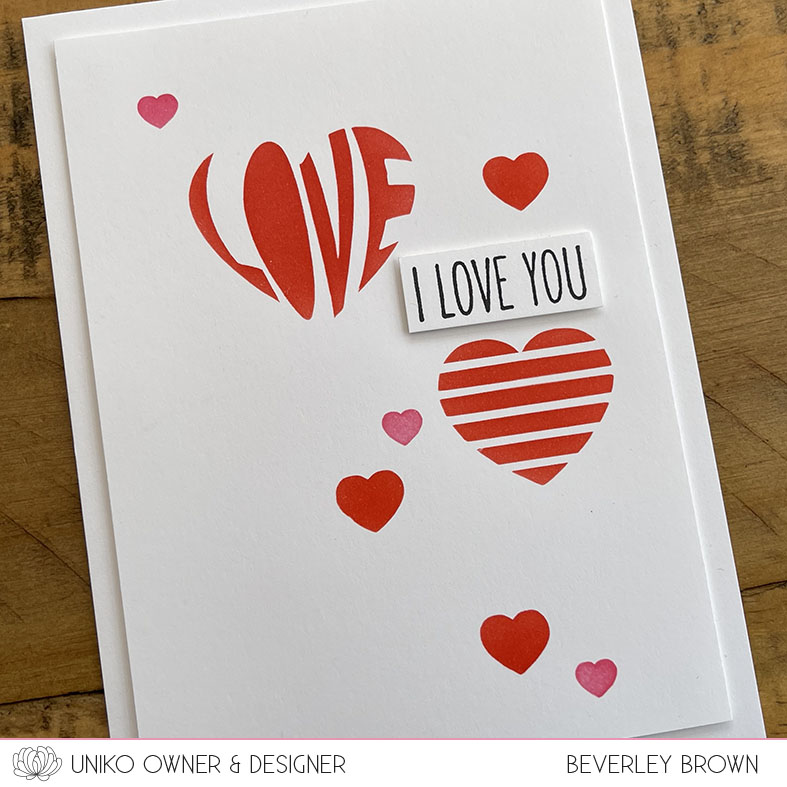
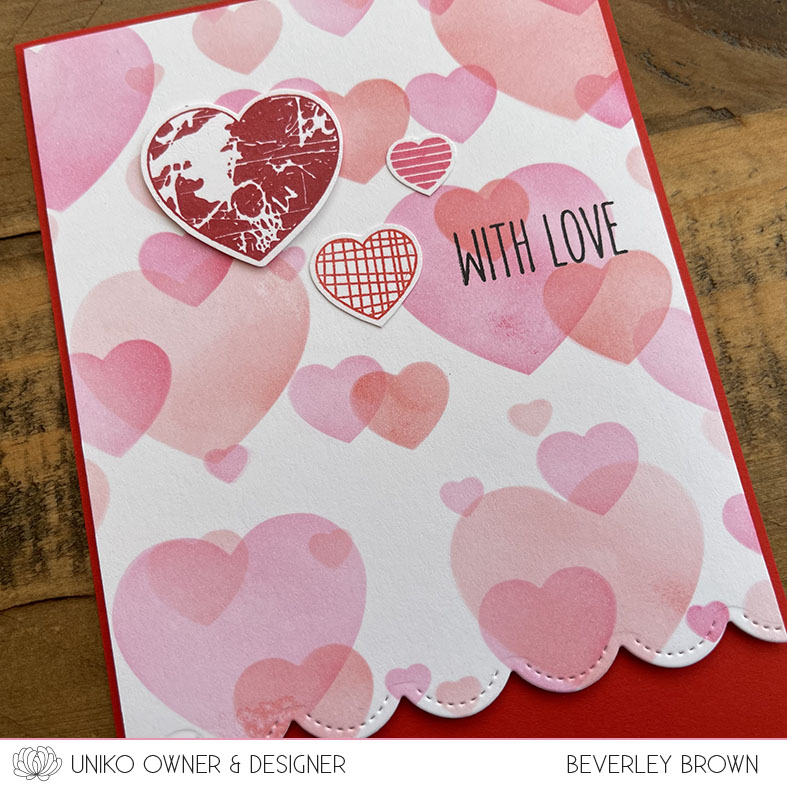
First up I was inspired to use the Stencil – Bokeh Layering Hearts to create this fun and colourful card.

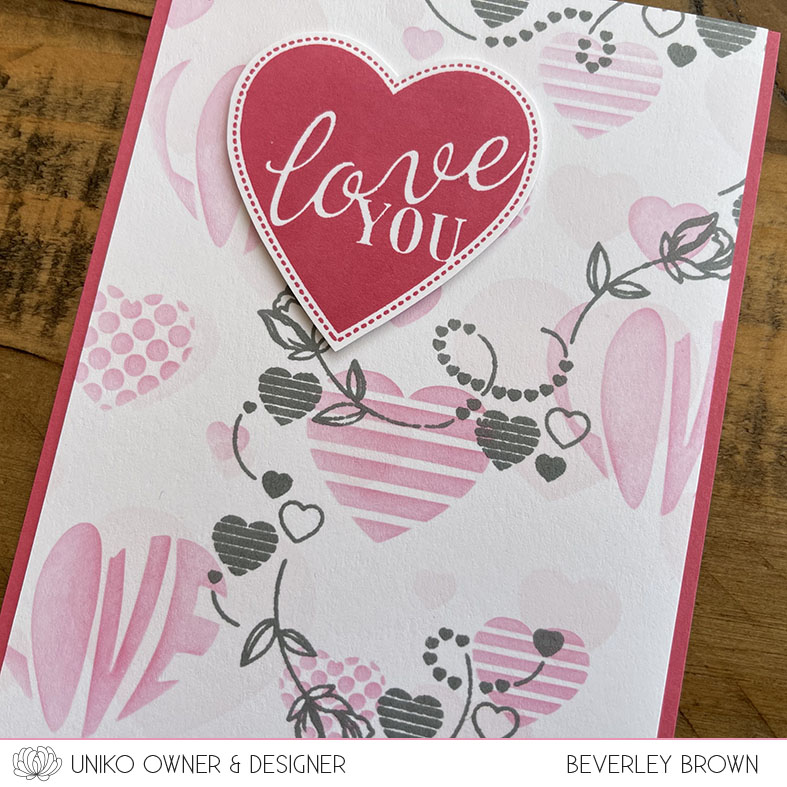
Obviously the name of the stencil implies the idea behind it, to create a soft out of focus layered look. But when I design products I look at ways to get more creative options.

Like I have used on my card today. The large heart is sized perfectly for the LOVE word to fit inside. Once I had a selection of inked hearts I adhered them with foam adhesive, layering them slightly and added a few heart enamel dots and a partial stamped sentiment from Up & Away.

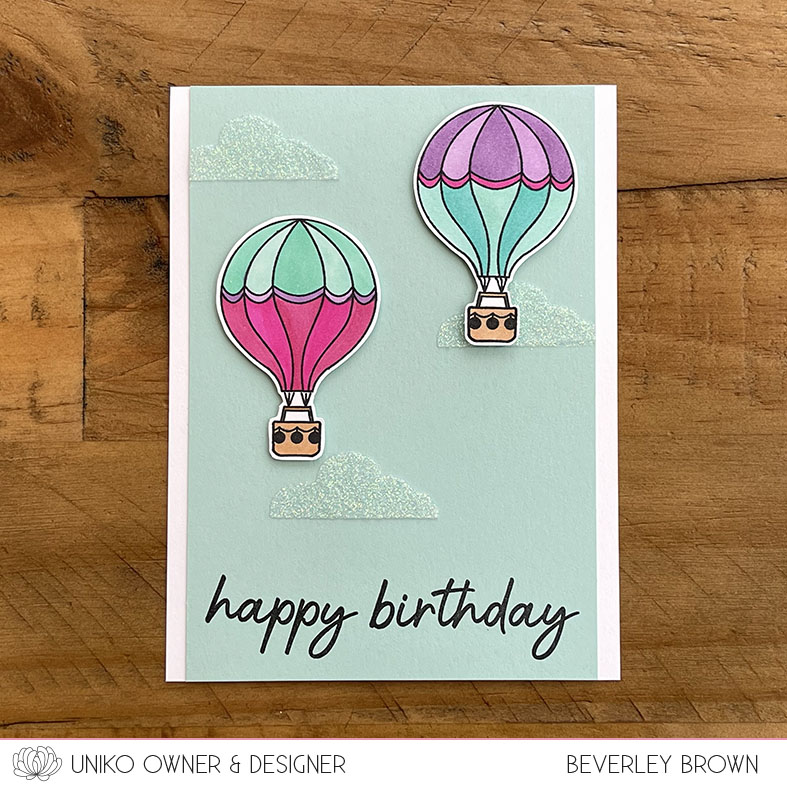
Talking of Up & Away, that’s what I used for my next card today…

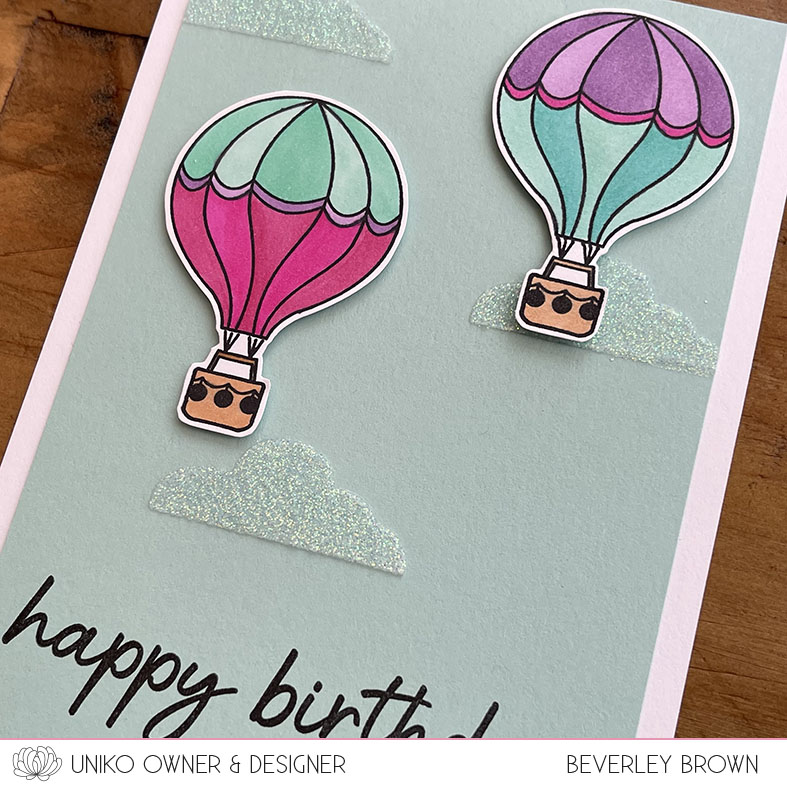
Today I decided to make a slimline card. I started by stamping the sentiment and the smaller hot air balloons. I then masked the hot air balloons before ink blending a soft sunny sky.

I then added some soft clouds using the Stencil – Cloud 9 before removing the masks and colouring the balloons with Copic Markers.

Lastly I added one of the larger hot air balloons, that is stamped with the Background Blocks Graffiti Texture. I then adhered the fussy cut balloon using foam adhesive.

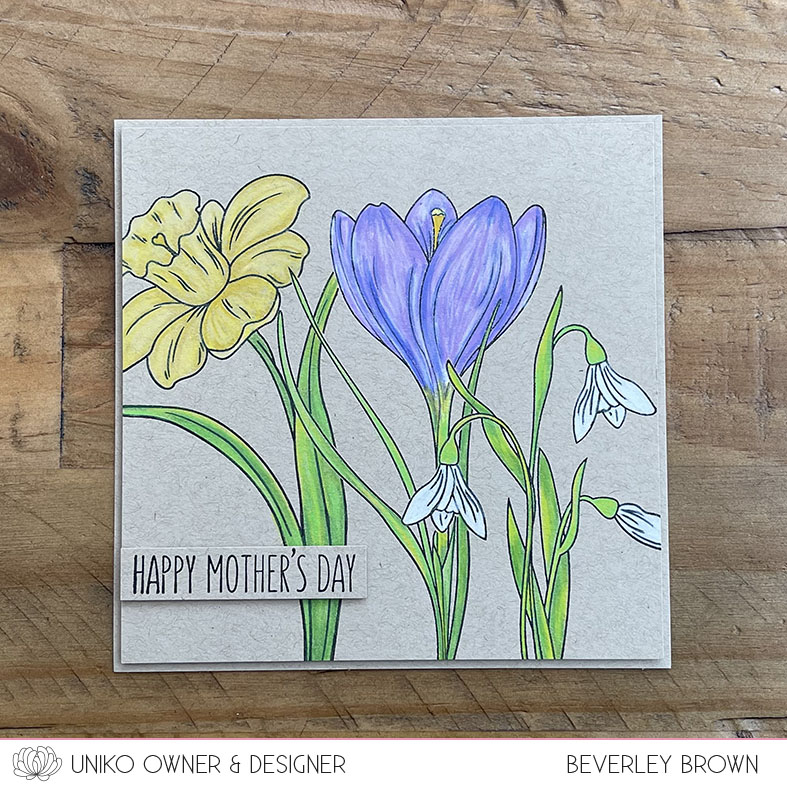
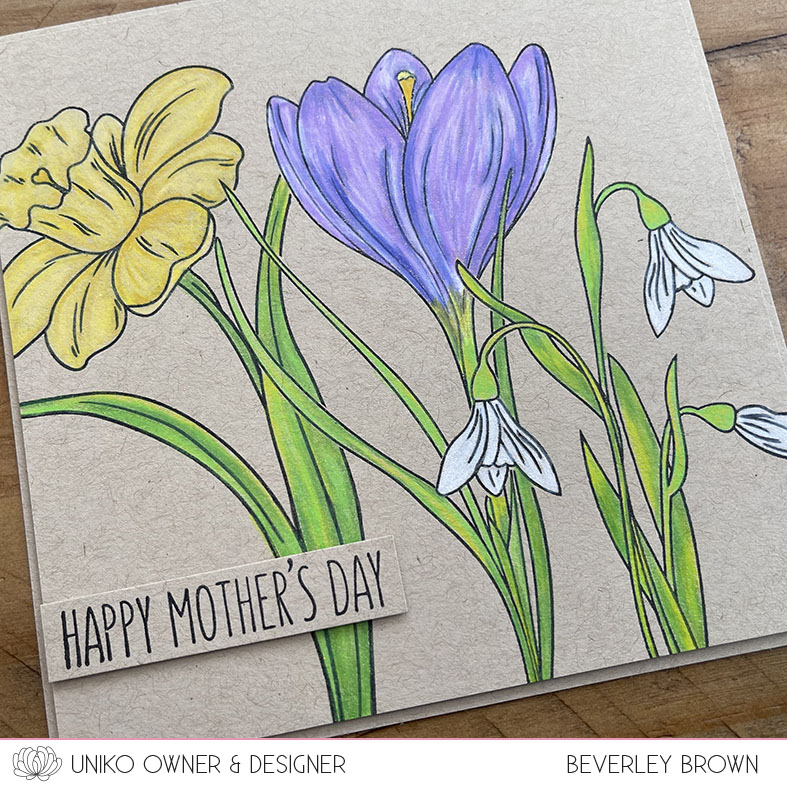
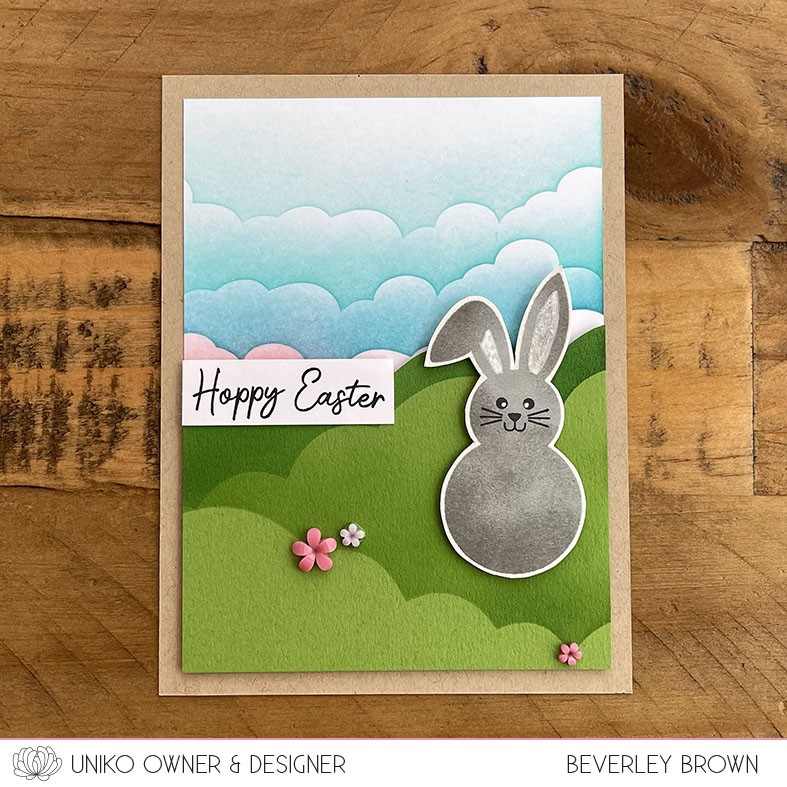
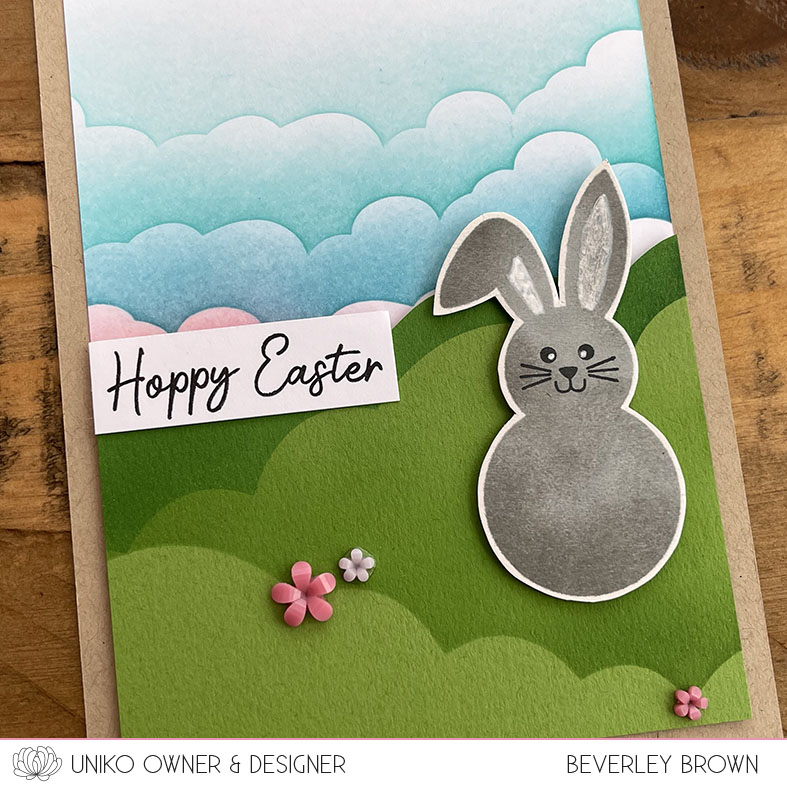
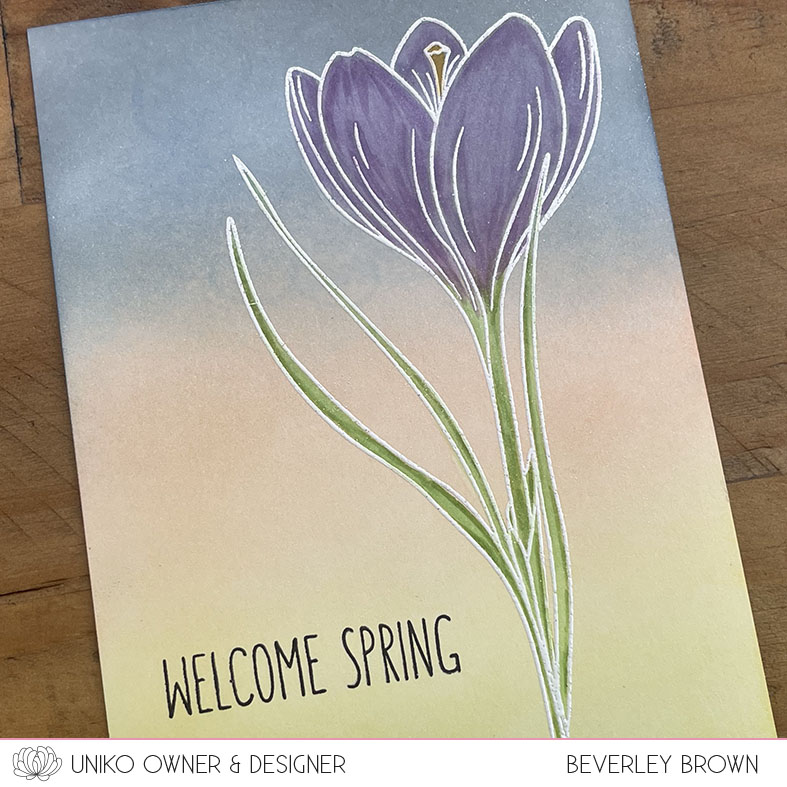
For my third card today I continued the sky theme and combined Stencil – Cloud 9 with the clouds from Up & Away.

Kraft card stock is perfect for white fluffy clouds! And I couldn’t resist using the love is in the air sentiment again.

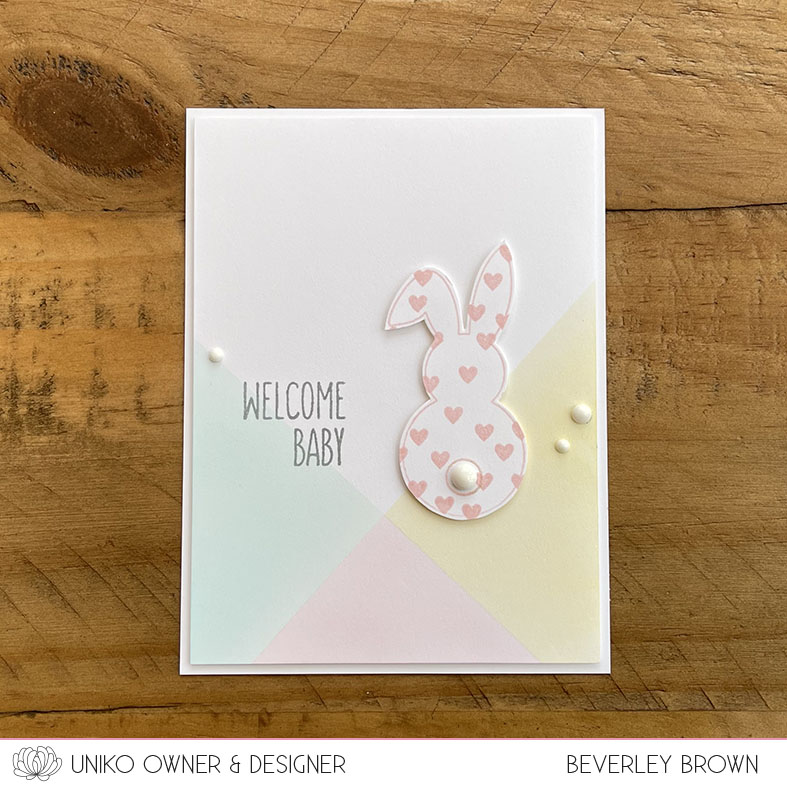
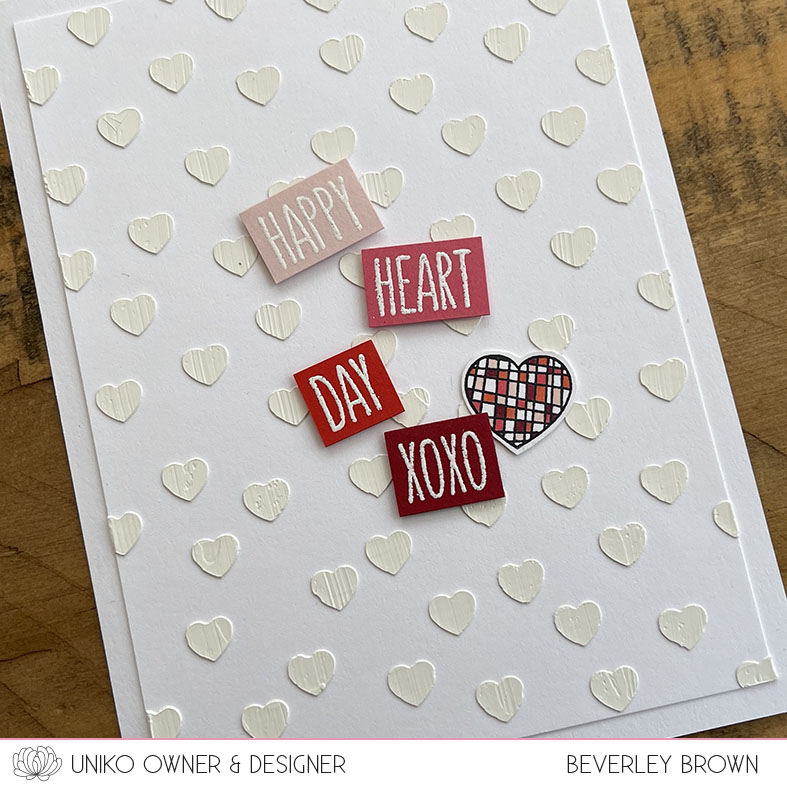
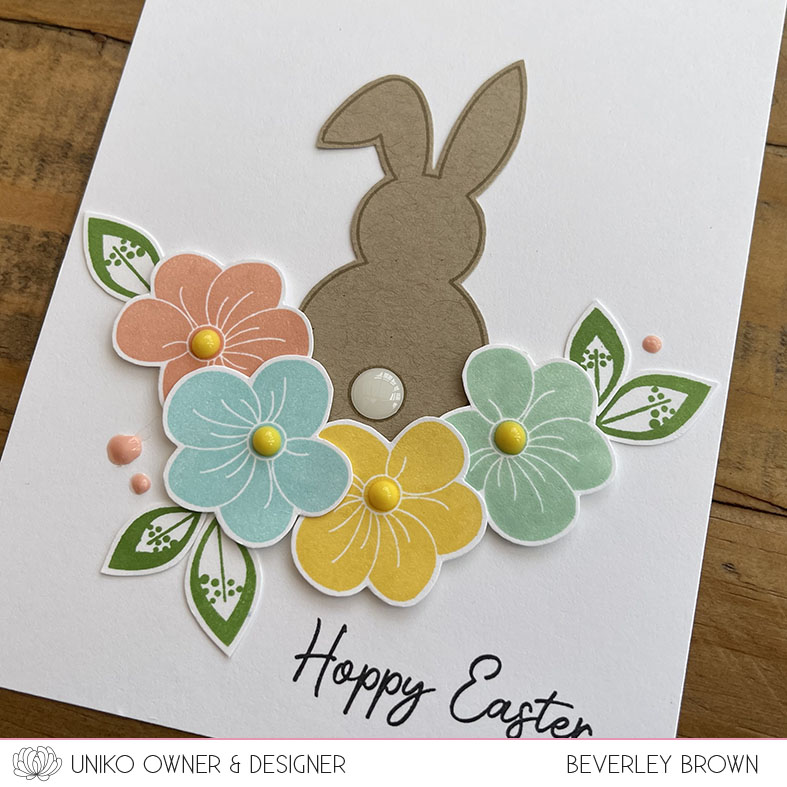
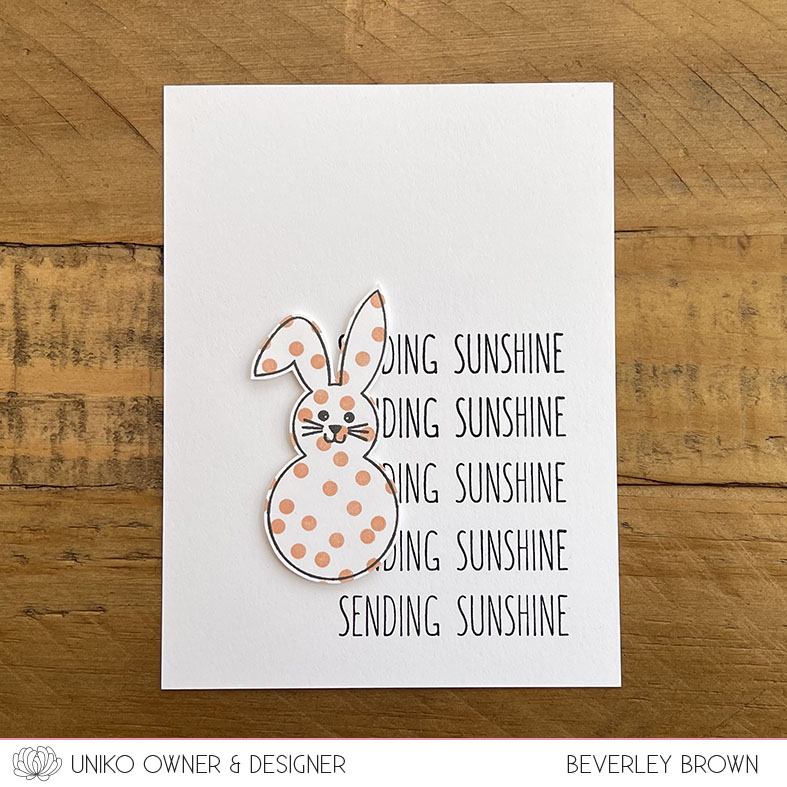
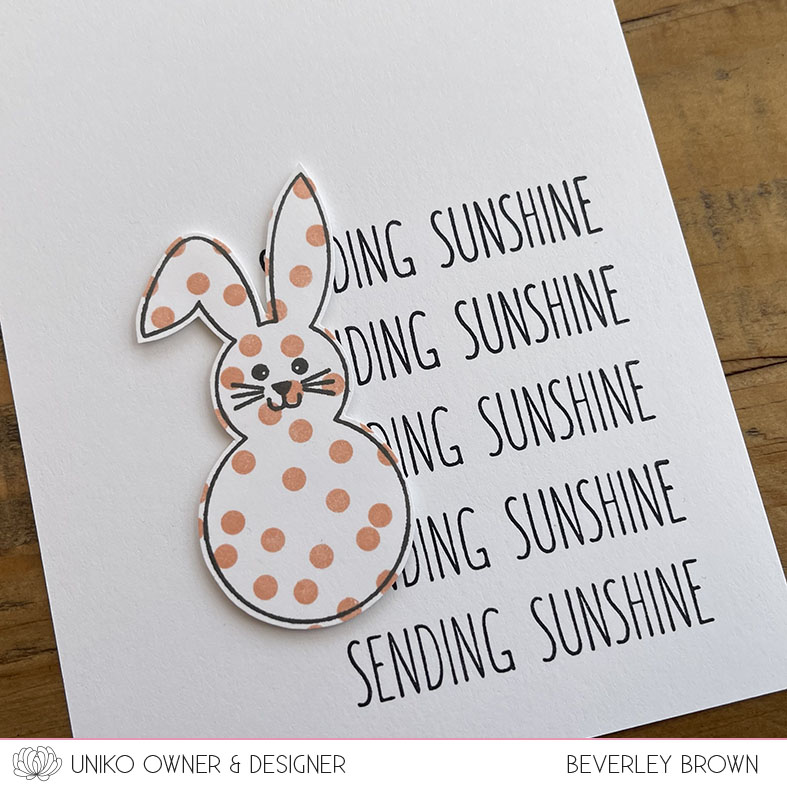
Lastly for today I couldn’t resist using Hoppy Easter to create another fun and colourful card.

I stamped the solid bunnies in a selection of colourful inks and used my MISTI stamping tool to help me line and space them. I then had a great idea to add fluffy bunny tails. I’m hoping The Beans won’t realise I raided their craft box for them!

I think they turned out super cute, though it adds quite a bit of bulk, so definitely a card that won’t be posted! The sentiment is from Everyday Spring Sentiments.

That’s all from me today, but be sure to check out all the wonderful inspiration from the Brand Ambassadors.

Now for the giveaway. I am going to choose one lucky winner to receive a Uniko Clear Stamp & Stencil Bundle worth a minimum of £30. It will be a mix of the new release featured in the hop with a few of my favourites mixed in too.


Simply leave a comment along all stops of the hop before midnight BST Saturday 8th April 2023 and I will randomly select a lucky winner and announce ASAP after the closing date.
Crafty Hugs 

Uniko’s 11th Birthday Reveal, Release, Brand Ambassador Blog Hop & GIVEAWAY!

Woohoo 🎉 🙌 🥳 


The day is *finally* here and our 11th Birthday Release is now available HERE on the Uniko Website! Hopefully you have hopped on over from HERE where I have formally introduced the new products and you will also find the Brand Ambassador blog hop. There is a £30 eGift certificate up for grabs, so be sure to hop along and comment.

Now let’s see some of the new products in action…

For my first card today I wanted to create a Spring flower garden. I started by stamping and masking the Spring Botanicals Snowdrop, then the new Spring Botanicals Crocus and then Spring Botanicals Daffodil.

I stamped on Kraft card as I knew I wanted to colour with Prismacolor Pencils and use white and light grey for the snowdrops. I finished the card off with the Mother’s Day sentiment from Everyday Love Sentiments and Everyday Spring Sentiments.

Next up I decided to make a welcome baby card using the bunny from Hoppy Easter.

I started by stamping the Large Background Scattered Polka Hearts in Ballet Slipper ink. I then stamped the outline bunny and bunny tail before fussy cutting them out.

I created the background with a bit of masking and soft ink blending. You might notice a little black ink smudge which I covered with some white Nuvo Drops! The sentiment is another from Everyday Spring Sentiments.

Lastly for today it was only right that I showcased Up & Away and Stencil – Cloud 9.

I already had these balloons stamped, coloured and fussy cut, so apart from waiting for the sparkly clouds to dry, this card was pretty quick to make.

The hot air balloons are adhered using foam adhesive for a little dimension and don’t you just love the sparkle of the clouds.

I hope you like the new products and have enjoyed the fun over the past few days. Be sure to stick around over the coming week/s as I have so much more to share! 

Until then, happy shopping 😉
Crafty Hugs 

Officially Introducing… Falling Hearts Serenade, Everyday Love Sentiments and Stencil – Bokeh Layering Hearts

Welcome to the final day of product introductions for our 11th Birthday Release. 

Today myself and Brand Ambassador Steph are ‘officially’ introducing three products that will now be available on the Uniko website after being launched on the How To Craft Network (HTCN) back at the end of January. 

If you missed watching me on the HTCN you can catch up HERE and see the inspiration I shared using the products. 

So let’s have another look at these in action…

I started by practicing my soft ink blending through stencils with the Bokeh Layering Hearts. The first layer of solid hearts is really soft. I used Concord & 9th Ballet Slipper ink and I hardly inked my brush. I then layered the stencil with the patterned and detailed hearts over the top and lightly inked with Honeysuckle.

I finished off by stamping the Falling Hearts Serenade with Dove, a beautiful light grey ink before adding the Love You heart from Always & Forever.

Next are all cards I made for the HTCN show, but I don’t think I have shared here on the blogs.

This first CAS card uses just one of the Bokeh Layering Hearts stencils and I selectively placed and inked the hearts in a cascade down the front. I finished off with one of the Everyday Love Sentiments.

For my third card today I used the solid hearts layer of the stencil two times, flipping for each of the colours.

I then added a stamped and fussy cut heart from BIG & BOLD Love along with the two smaller hearts from Falling Hearts Serenade and a sentiment from Everyday Love Sentiments.

You’ll notice that the shape of the stamped hearts are the same as the stencil, so there are lots of layering options with the two clear stamp sets mentioned above and Background Builders Hearts.

Lastly for today I decided to pair a selection of stamped and heat embossed sentiments from Everyday Love Sentiments with the previously released Stencil – Scattered Polka Hearts.

I’ve used white texture paste through the stencil for a little added dimension with it being white on white and I adorned the sentiments with this fun little accent heart from Falling Hearts Serenade.

So that’s it, that wraps up all the introductions for this release. It might be small, but it packs a creative punch and we are excited to reveal them all tomorrow at 9am GMT with our usual Blog Hop and Giveaway. 


Hope to see you then.
Crafty Hugs 

Introducing… Up & Away and Stencil – Cloud 9

Welcome to Day 3 of the product introductions for our 11th Birthday Release. 

Hopefully you have hopped on over from HERE, where today myself and the Brand Ambassadors are showcasing two products that go hand in hand, Up & Away and Stencil – Cloud 9.

Let’s have a look at these in action…

On this first card I have combined both products and I have also used the sentiment that inspired me to create this sentiment.

The meaning behind this sentiment is, we often think that the sky is the limit and that’s what we aim for. Yes, the sky is a pretty big place. But why put a limit on our dreams and potential. The sky is the view of our potential that is awaiting us if we follow our dreams and keep striving to be better each day.

Next I opted for a twilight sky ink blended background…

This time I used one of the larger hot air balloons which I coloured with Copic Markers and paired with one of the mix and match sentiment options.

Lastly for today I decided to pair Up & Away with Background Blocks Rays.

I multi stamped the background block with Concord & 9th Buttercup and Marmalade and then stamped the sentiment below.

I stamped the clouds in Aqua sky before fussy cutting and then added a hot air balloon coloured with Copics.

That’s all from me today.

I will be back tomorrow with the last of the product introductions. This clear stamp set, along with all we are introducing this week will be available on Saturday 4th March 9am GMT. 

Crafty Hugs 

Introducing… Hoppy Easter and Everyday Spring Sentiments

Welcome to Day 2 of the product introductions for our 11th Birthday Release. 

Hopefully you have hopped on over from HERE, the start of the Brand Ambassador inspirational blog hop. Today myself and the Brand Ambassadors are showcasing Hoppy Easter and Everyday Spring Sentiments.

Let’s have a look at these in action…

First up I am stepping outside of my comfort zone with a little bunny scene. I used a new stencil we are introducing tomorrow to create the cloudy sky and the rolling hills.

I used the solid bunny from the set and inked him with shades of grey. I then used a white gel pen to add the detail to the ears. These little flower accents have been hanging around my desk for ages, they were a little freebie I got from Stampin’ Up! They were the perfect finishing touch with the sentiment from the Hoppy Easter set.

Next I couldn’t resist pairing the bunny with Flower Power #2, you know me, I am always inspired when restocks arrive.

This time I used the outline bunny and stamped it on Kraft card stock, along with the bunny tail, which I added an enamel dot to.

I then surrounded the bunny with flowers from Flower Power #2 and leaves from Flower Power #6. I added Nuvo Drops to the flowers and again the Hoppy Easter sentiment.

For my last card today I used Everyday Sentiments paired with the bunny.

You know I love this font style, so I couldn’t resist adding to them with some Spring themed words.

This time for the bunny I stamped Background Blocks Scattered Polka dots and then stamped the bunny and fussy cut it out. I adhered the bunny with foam adhesive.

So what do you think of this cutie? Can you see it hopping into your basket?! 
We will be back tomorrow with more to share. This clear stamp set, along with all we are introducing this week will be available on Saturday 4th March 9am GMT. 

Crafty Hugs 

Introducing… Spring Botanicals Crocus

Welcome to Day 1 of the product introductions for our 11th Birthday Release. 

Hopefully you have hopped on over from HERE, the start of the Brand Ambassador inspirational blog hop. Today myself and the Brand Ambassadors are showcasing the newest addition to the Spring Botanicals Collection, Spring Botanicals Crocus. 

Let’s have a look at this flower in action…

I started with my usual clean & simple style. I stamped and coloured the crocus with Prismacolor Pencils and then fussy cut the image out. I started cutting the two wispy leaves first and then followed the flower round.

I’ve then adhered the flower to a white card base using foam adhesive. My sentiment choice is from another clear stamp set we are introducing later this week! I finished off with a few enamel dots from my stash.

For my second card today I went with a ‘quicker’ colouring option. I highlight ‘quicker’ as in reality it took me a while to mask & ink each of the horizontal stripes!

I’d used these colours on another card I am sharing later this week and I really liked them, hence why I chose to use them with the Background Blocks Horizontal Stripes. I used my MISTI stamping tool and plenty of masking paper to achieve the look.

I then stamped the crocus over the top in black ink. This time I opted for one of the sentiments from the set.

Lastly for today I put my ink blending to the test. I was going for a rainy spring morning sky with the sun just rising. I used Concord & 9th Dove, Midnight, Grapefruit, Buttercup and Sprout.

I then heat embossed the crocus in white before colouring with Copic Markers and again opting for a sentiment from the same set as my first card.

That’s all for my inspiration today using this clear stamp set. But be sure to hop along the Brand Ambassadors to see what they have come up with.

We will be back tomorrow with more to share. This clear stamp set, along with all we are introducing this week will be available on Saturday 4th March 9am GMT. 

Crafty Hugs 

Let The Celebrations Begin 🎉

Hello & Happy February! 

Welcome to a fun month of celebrations, giveaways, LOTS of inspiration and a NEW Release at the end of the month.

Although January felt like the longest month, it doesn’t seem a year since our 10th Birthday celebrations! Last year was a big milestone and probably another year to add to one of the hardest. However, with your support and custom, Uniko is here to celebrate another year.

THANK YOU ❤️

It wouldn’t be a birthday month without a party. So as tradition holds we have our usual Birthday Card Link Party! The party started over HERE, so be sure to head on over for all the details, the PRIZE and link up!

Here is what I was inspired to create for the occasion…

My usual CAS style and a one layer wonder too! Like Julie HERE, I was inspired to use the smaller elements from the Stencil – MOD Circles Background Builder. I’ve had this sketched out since I designed the stencil, I just needed a little time and mojo to create it!

With it being Uniko’s 11th Birthday, I felt I needed to pay homage to our brand colours, I think they worked well.

The sentiment is from Floral Vines, I simply masked to ink and stamp it stacked inside the white rectangle. And of course, I added some Nuvo Drops!

I hope you join in on the fun and look forward to seeing the gallery brimming with birthday cards.

Crafty Hugs

January 2023 Release, Brand Ambassador Blog Hop & Giveaway!

Hello, Happy Friday 13th AND Happy January 2023 New Release Day!

I’m super excited to share these new products with you and they are now officially available to purchase HERE over on the website.

Hopefully you have hopped on over from HERE, where I have formally introduced the new products and you can find all the Brand Ambassador links.

Enough talk, as I know you are here for the inspiration!

First up I went for a modern, retro, ‘mix media’ style card combining the NEW Background Block Linear and Mid Century Modern Frames paired with the Stencil – Mid Century Modern Shapes, burst from Mid Century Modern Florals, trio of dots from Floral Vines and sentiment from Everyday Sentiments.

I’m pretty happy with how this turned out. I opted for my usual trio of colours and inked the two largest blobs from the stencil. I then went in and added some star bursts, little dots and partial stamping of the new background. I finished off with some out of my comfort zone ink splatters and a tiny bit of glitter sparkle to the outline dots.

I think this card pretty much shows how the Mid Century Modern collection can be brought together to make a pretty fun card!

Next I opted for a bit more of a clean and simple design.

This time I opted for some zesty greens to ink the Stencil – MOD Background Builders Circles. A little bit of masking to ink the darker shade for the striped areas.

I decided to pair it with another of the Mid Century Modern Frames to create a clean & simple masculine card. I popped the frame up with foam adhesive and added a few Nuvo Drop accents.

Lastly for today I had to use Mid Century Modern Purrfect Day!

This time I paired the solid kitty with Background Blocks Linear. I absolutely love adding this colour treatment to the block. I think it adds the fun element without overwhelm.

I added a little fine liner collar to the cat and added a little rhinestone gem for a tiny bit of sparkle.

That’s all from me today, but I can guarantee you will be seeing more of these new products!

Don’t forget to leave a comment and visit the Brand Ambassador blogs/social media, as I will be randomly selecting one lucky winner to receive the ENTIRE RELEASE. I will announce the winner Saturday 21st January 2023.


I hope you like the new products and have enjoyed the fun over the past few days. Be sure to stick around over the coming week/s as I have so much more to share! 


Until then, happy shopping 😉
Crafty Hugs 

Introducing… Mid Century Modern Purrfect Day and Stencil – MOD Background Builders Circles

Hello & Happy Thursday,

Welcome to Day 3 and the final day of the January 2023 Release Introductions.

Today I have two products to introduce. First, a mini clear stamp set called Mid Century Modern Purrfect Day. And a Stencil – MOD Background Builders Circles. Now if you watched me on How To Craft Network back in November 2022, you might recognise the stencil from my show then. 

Let’s have a look at them in action.

The Stencil – MOD Background Builder Circles is designed just like the previously released Stencil – MOD Background Builder. In that it can be a single focal point, or it can easily be repositioned to fill an entire background.

As you can see for this first card I have used it as a focal point backdrop for my Mid Century Modern kitty from Purrfect Day.

I decided to colour the outline kitty with a dark grey Copic Marker and matched his eyes to the sorbet colour of my background. The sentiment is from Simply Said Blocks.

For my second card I used both the stencil and stamp set again to create a little scene.

This took a bit of patience and masking to stack the bowls and then mask again to stamp the cat and stencil the mat underneath. But I think it turned out pretty well.

As you know I like to pack in little elements that will provide creative opportunities and the stencil has 4 individual elements in the corners. Of which I used to create the stacked bowls. The detail stamped on the bowls is from Mid Century Modern Florals. The brown mat is created using a partial ink of one of the shapes from the Stencil Mid Century Modern Shapes.

I kept my card sentiment free and added to the wonky stacking by adding a dark grey die cut behind the focal image and then foam mounted to my base card.

That’s all the purrfect inspiration from me today!


Be sure to check out each of the Brand Ambassador blogs or social media for more inspiration and leave some love. You can find links HERE.


That’s all the introductions, which means tomorrow is Release Day! Myself and the Brand Ambassadors will be back tomorrow with more to share and all the products will be available at 10am GMT on the website.


Hope to see you!
Crafty Hugs 

Introducing… Mid Century Modern Frames

Hello & Happy Wednesday,

Welcome to Day 2 of the January 2023 Release Introductions.

Today the Brand Ambassadors and myself are here to get you over that mid week hump with some fun inspiration. There is no denying that I love the shapes and patterns of this era in design & I think this frame set with mix & match sentiments brings another fabulous addition encompassing this.

Let’s have a look how I have used this new clear stamp set…

First up I opted for a Kraft card base over my usual white. I wasn’t lying yesterday when I said you would see more of the Background Block Linear! I’ve stamped that lengthways across the top section of my card in black ink.

I’ve then stamped and fussy cut one of the three frames from the set, added my sentiment and coloured the frame using Copic Markers. I’ve adhered the frame using foam adhesive and added a few enamel dots from my stash to finish.

For my second card I chose another of the frames and sentiment choices. This time I stamped the frame onto a white card panel. I then used a pencil & ruler to mark a column to trim of a section and around the image to reveal my stencilled base card pattern.

I opted for the Stencil – Mid Century Modern Squares, that I have stencilled with Concord & 9th Sorbet ink onto Sorbet card for a tone on tone effect. I used Copic Markers to colour the frame and in hindsight I wish I had left a little more white on the frame.

The white panel is then adhered to the sorbet card base using foam adhesive.

Just the two cards today showcasing this set, but I know the Brand Ambassadors have created wonderful inspiration to share. Be sure to hop along HERE and check out their socials to see.

We will be back tomorrow with more to share with the final two products and all the products will be available at 10am GMT Friday 13th January 2023.

Crafty Hugs