Birthday Celebrations (Page 2)

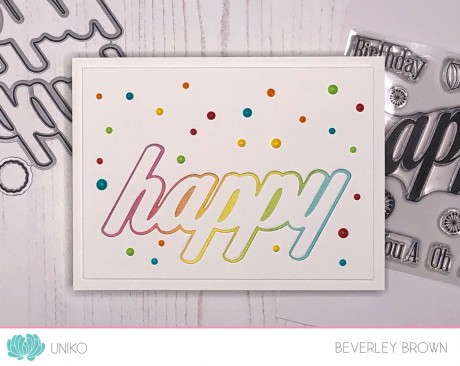
Introducing…Background Blocks Cogs, Background Blocks Splatters and Everyday Sentiments

 Hello & Happy Hump Day!

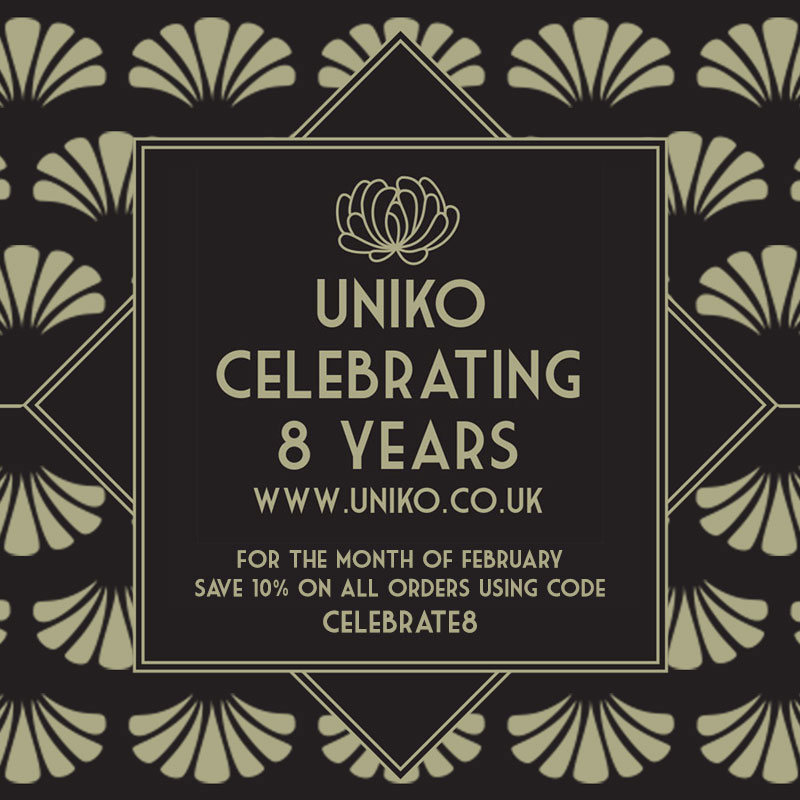
Welcome to Day 1 of the 10th Birthday February 2022 Release product introductions. Myself and the Uniko Brand Ambassadors are here to cheer up your mid week with some fabulous creative inspiration.

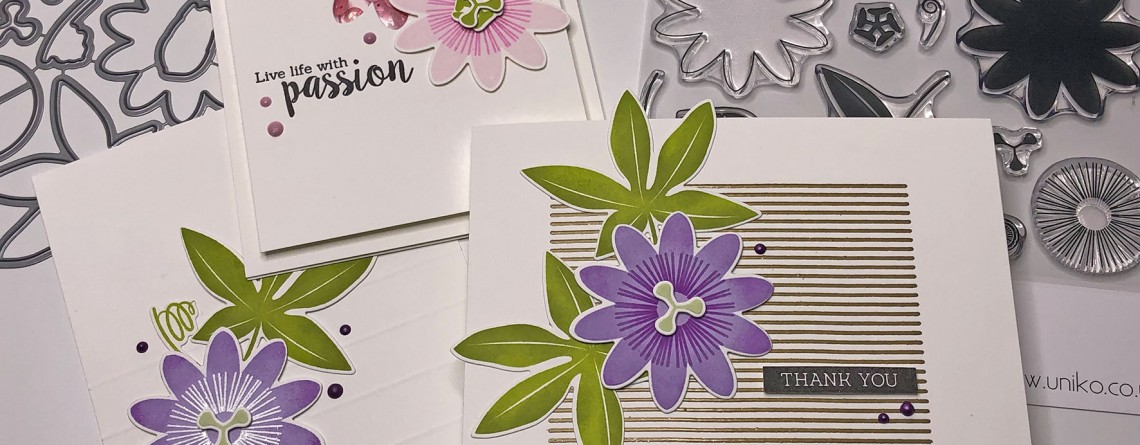
Today we are introducing three new stamp sets that I am sure you will want to add to your Uniko collection, Background Blocks Cogs, Background Blocks Splatters and Everyday Sentiments.

I am delighted to be adding to this growing series of Background Blocks and especially ones that lend themselves to masculine makes. The addition of these sentiments open up so many options too. The ways the Brand Ambassadors have used these are genius and inspiring, so be sure to hop along with us. You can find the start of the hop HERE.

All the products will be available for purchase at 10am GMT Sunday 27th February 2022.

Okay, lets get to the good stuff!

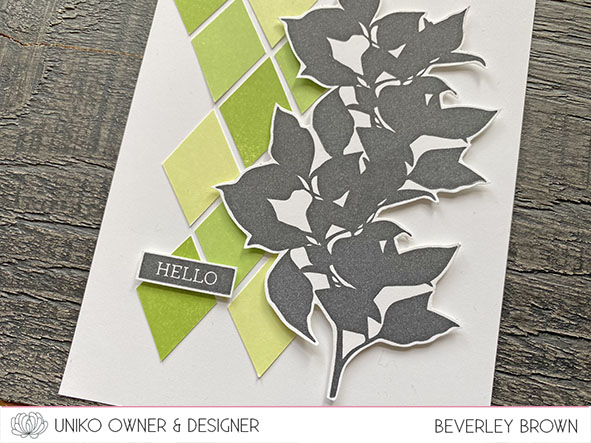
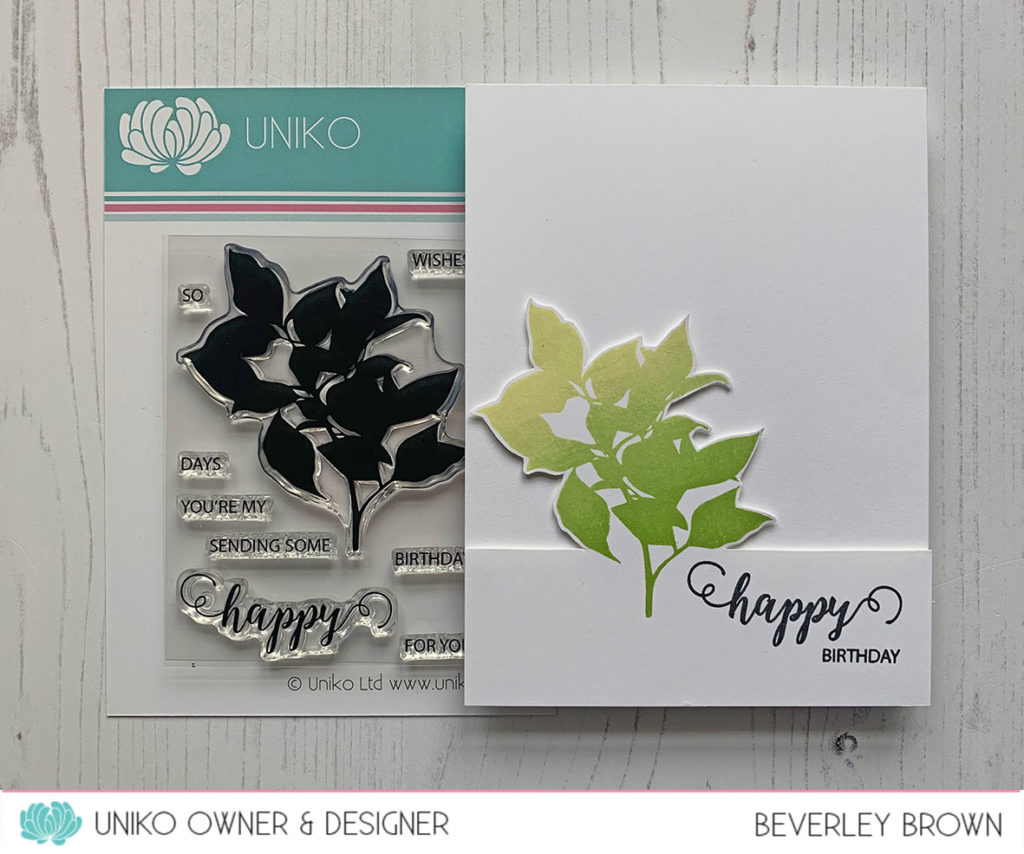
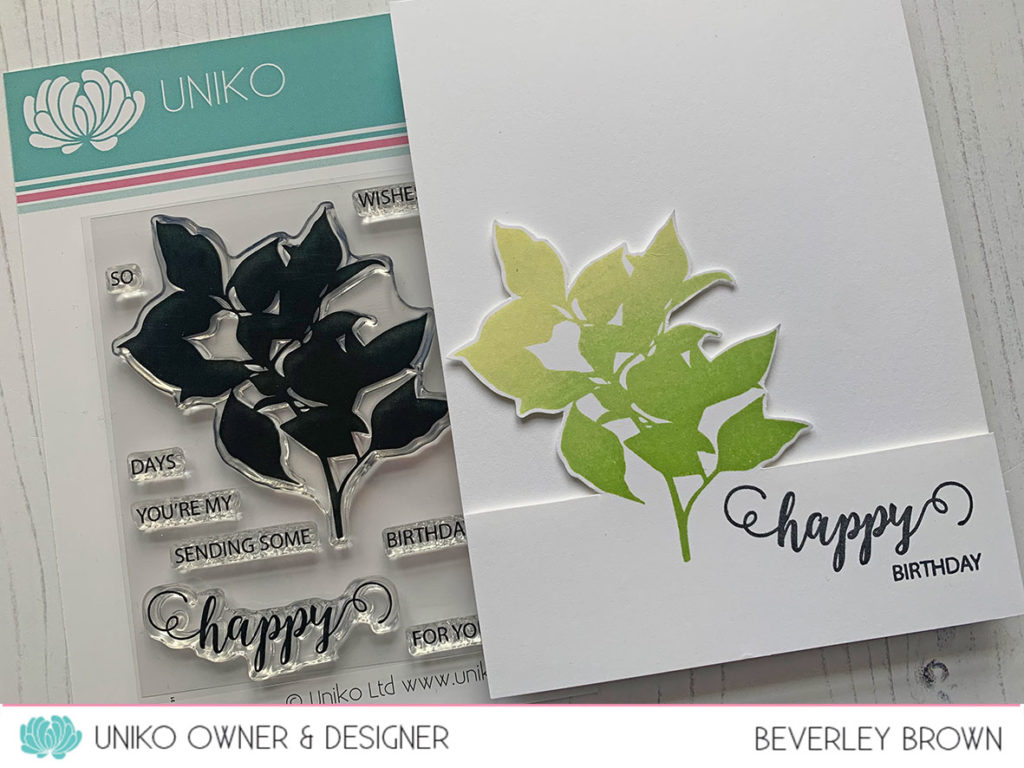
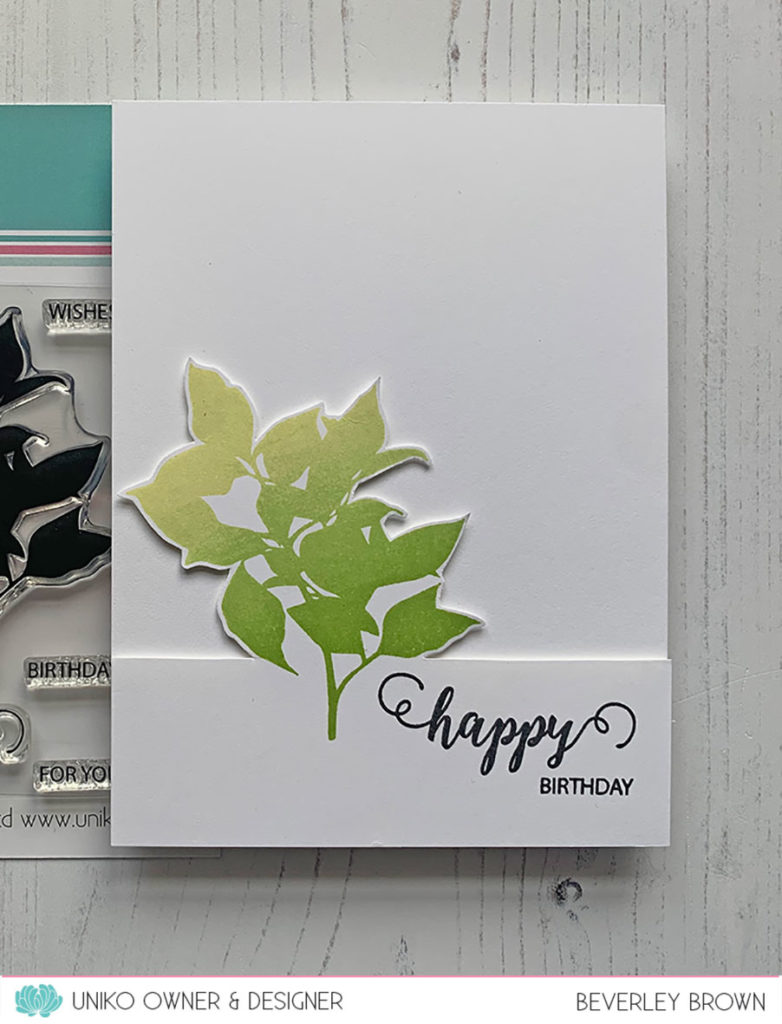
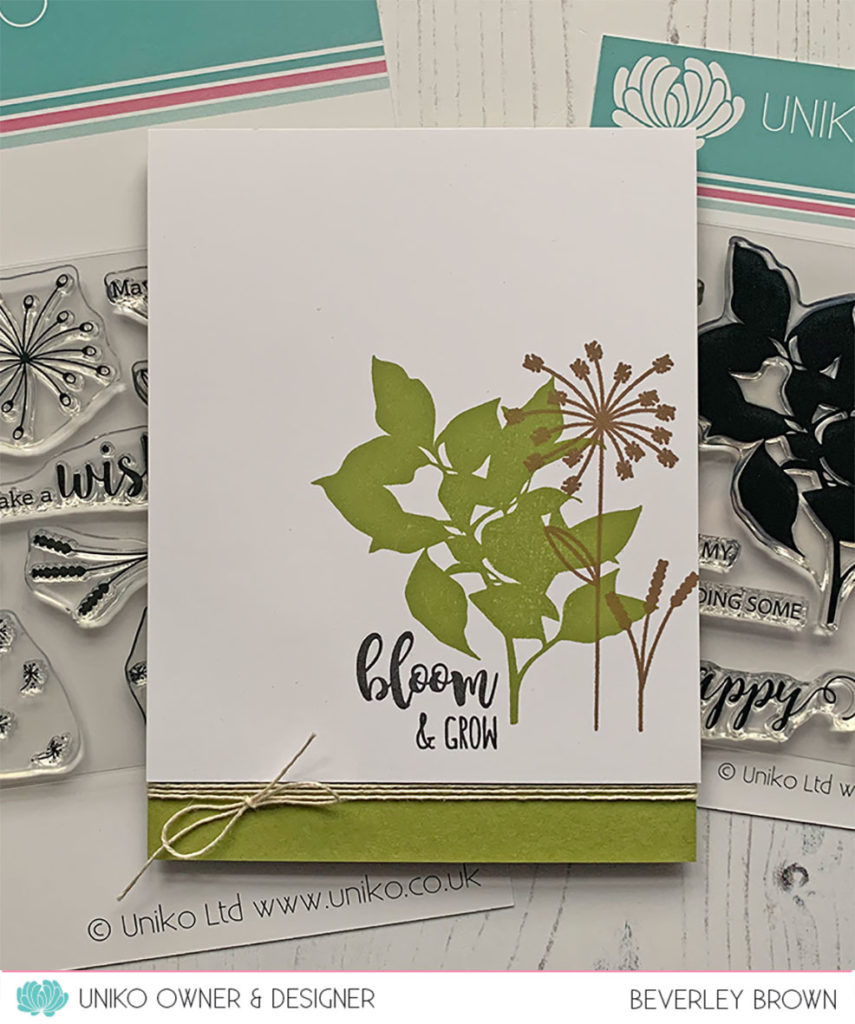
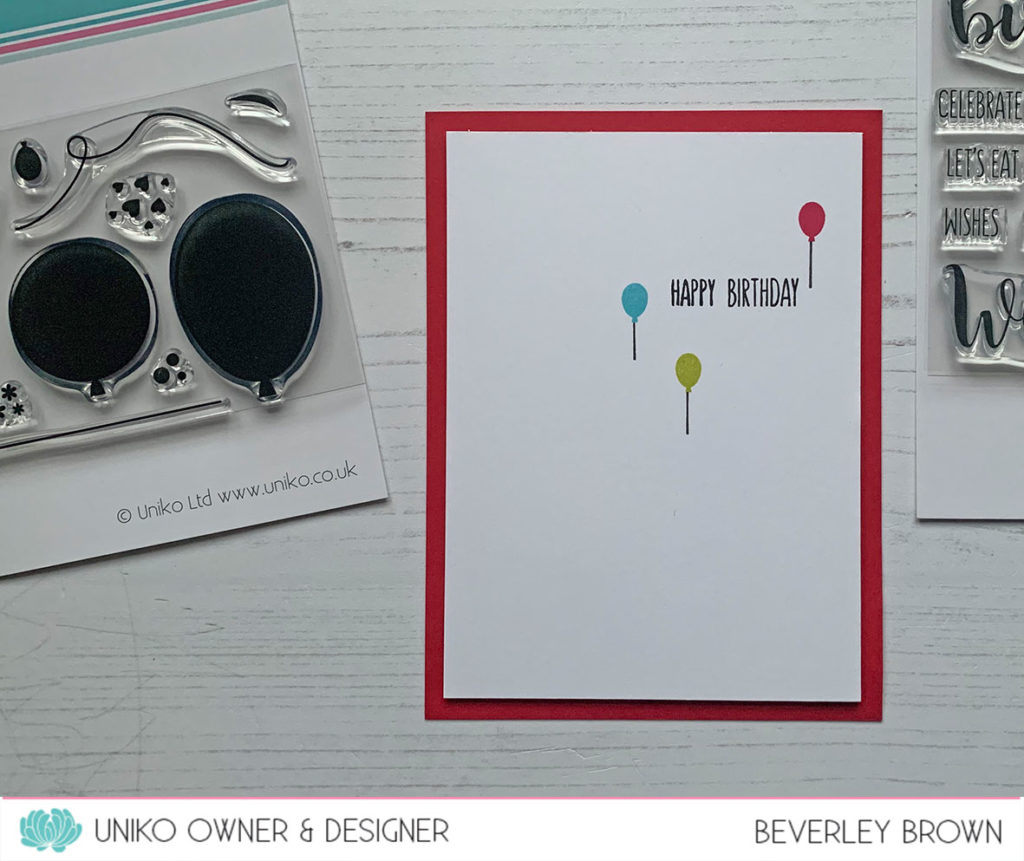
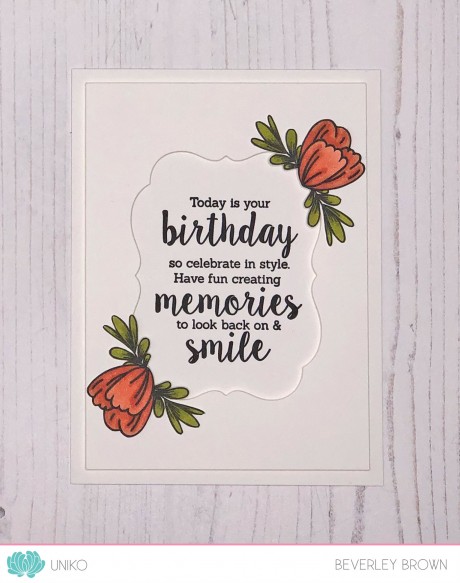
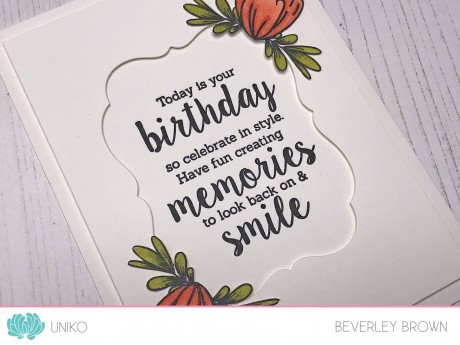
My first card today uses Background Builders Cogs and I built my sentiment using Everyday Sentiments.

I started by stamping the cog block onto my Concord & 9th Mushroom card stock base in VersaFine Clair Nocturne ink. I then stamped it again onto white card and fussy cut a few of the cogs out.

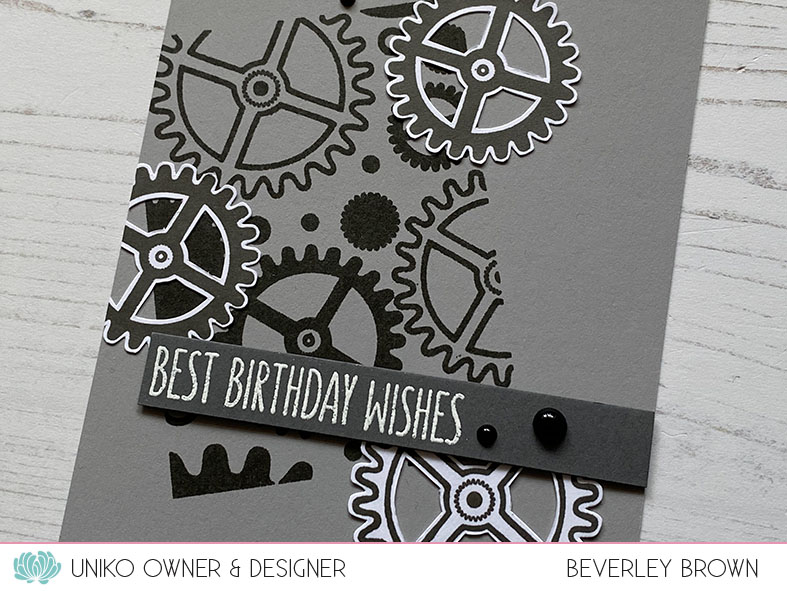
The mix of sentiments are heat embossed embossed onto a strip of PTI Smokey Slate card and adhered using foam adhesive. I’ve then scattered the fussy cut cogs and added some Nuvo Drops in Gloss Ebony.

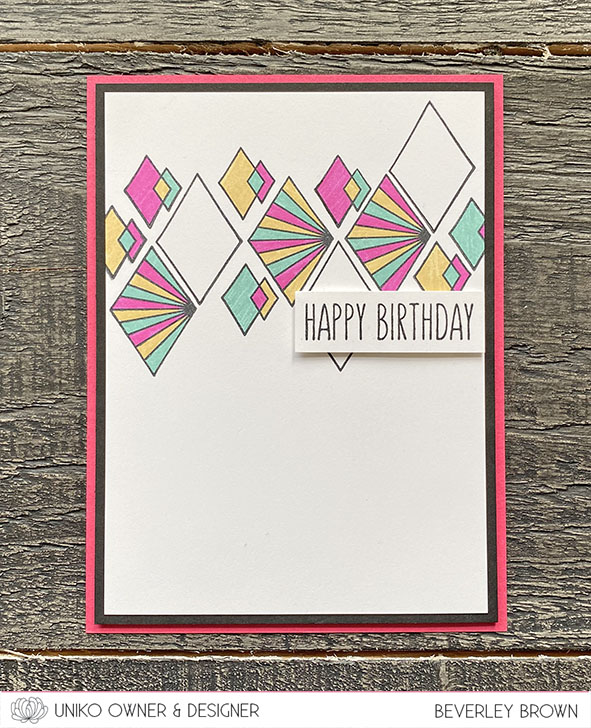
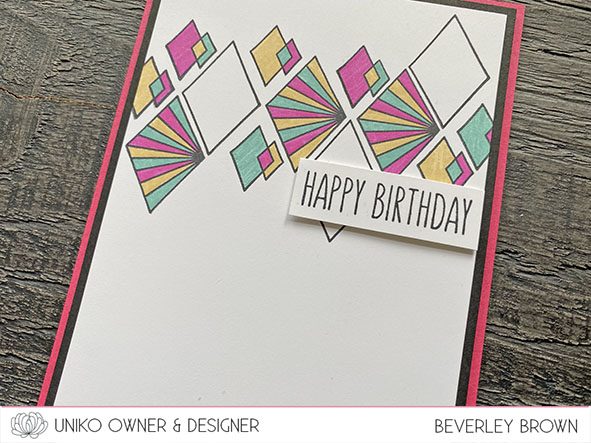
For my second card I used Background Blocks Splatter. I started by inking the background with a mix of Concord & 9th Sorbet and Honeysuckle.

I then accented my card with the two balloons from Balloon Bash and another sentiment from Everyday Sentiments. This time some White Blizzard Glitter Nuvo Drops to finish.

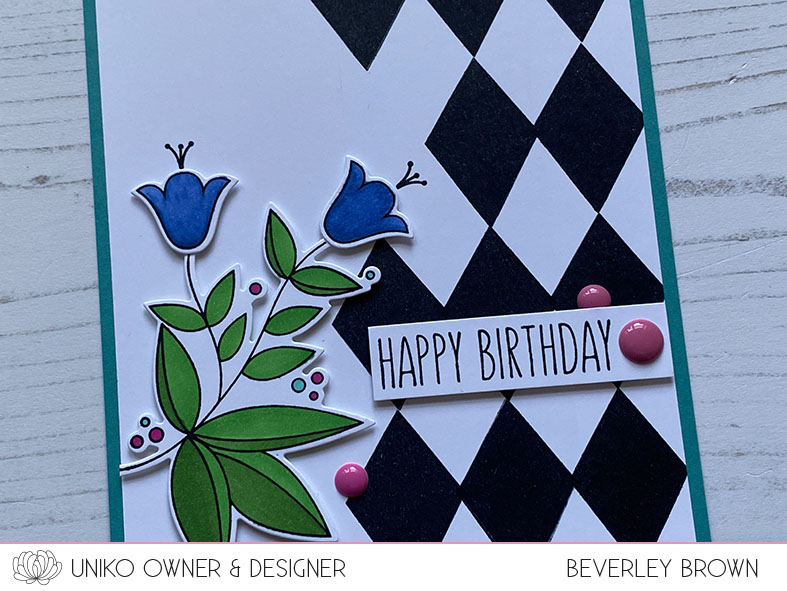
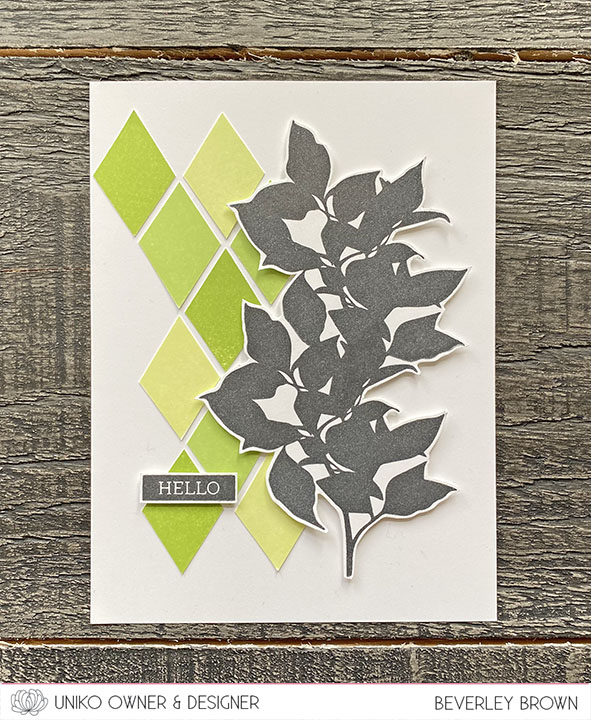
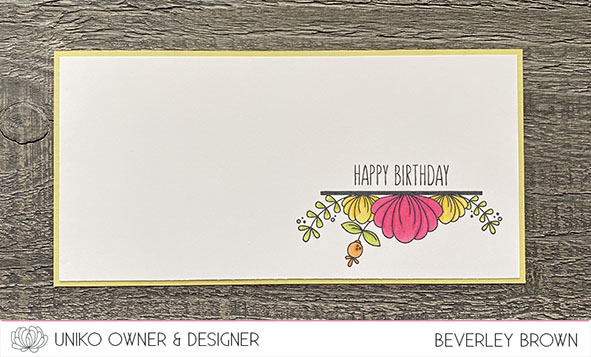
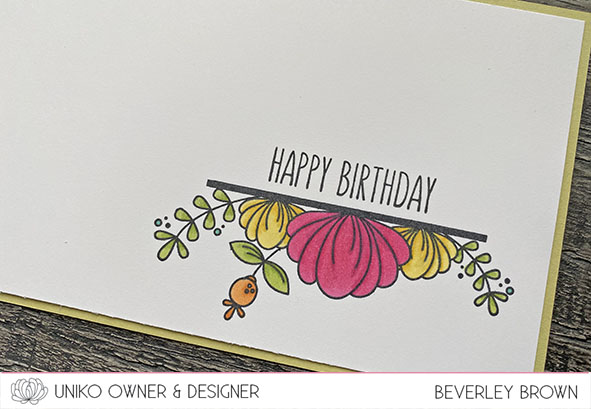
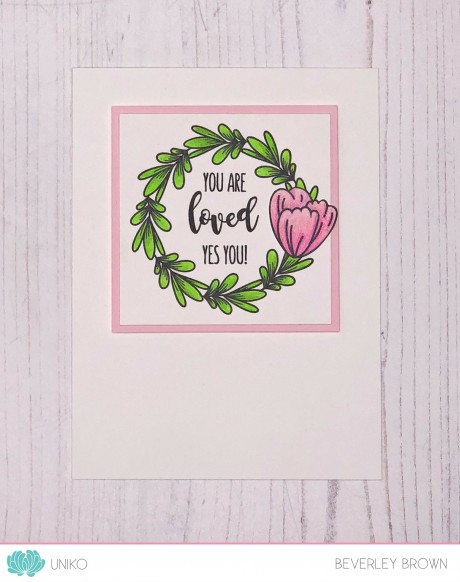
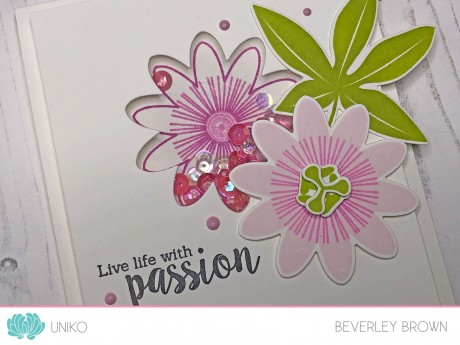
Next I wanted to show how both these ‘masculine’ orientated backgrounds can be feminised. So I created two matching cards, just switching out the background.

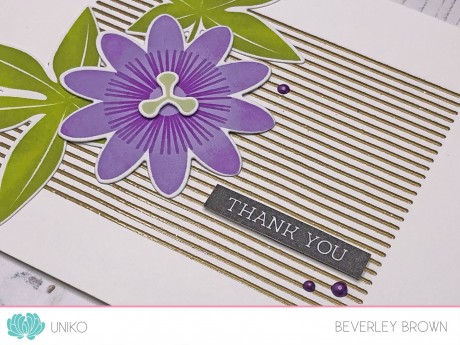
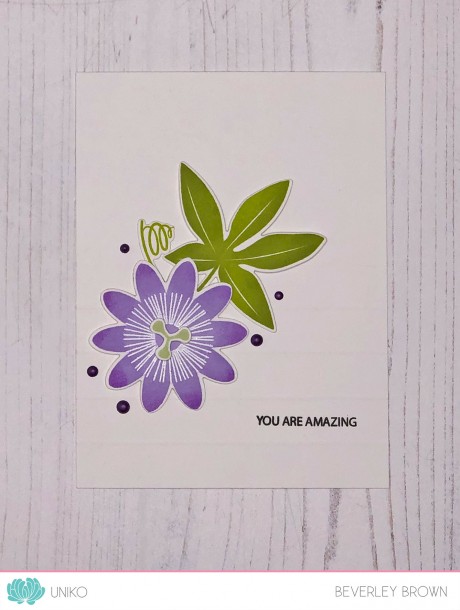
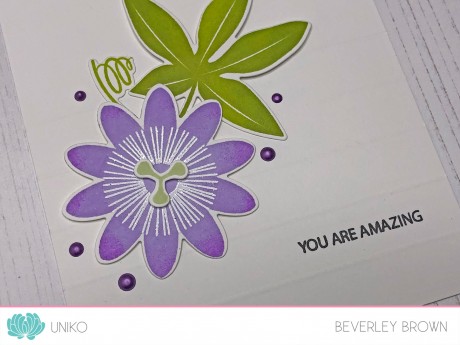
It’s been ages since I last inked up Beautiful Blooms III, so I chose this as my floral. I used the same Concord & 9th ink colours for both cards, Ballet Slipper, Sorbet & Honeysuckle for the flower. Sprout, Parsley, Clover & Evergreen for the backgrounds & foliage.

After fussy cutting the stamped floral I adhered it to my card using foam adhesive. I added then stamped the Thank You sentiment from Everyday Sentiments and a few enamel dots to finish.

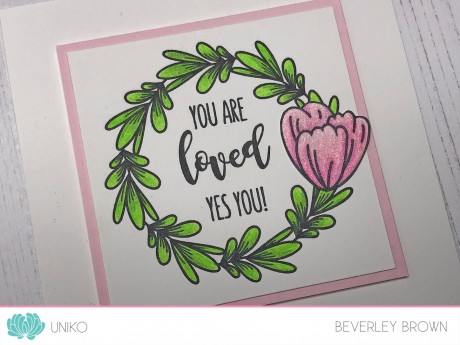
I then repeated everything for this second card, though I did switch up the sentiment layout and enamel dot placement.

I can’t decide which I like best as they both turned out really pretty! That’s all from me today using these three products. I will be back tomorrow with more to share.

Crafty Hugs

HAPPY February and HAPPY 10th Birthday Month Celebrations – Quest 1 The Linky Party

Hello, Happy Tuesday, Happy February

AND 

HAPPY 10th Birthday Month Uniko! 

This month is all about celebrating 10 years of Uniko and I’m excited for all of the fun we have planned. Part of our celebrations we have ten quests for you to complete. Each quest will give you the opportunity to win a prize. And if you complete all ten quests correctly there will one random draw special prize of a £100 eGift Code to spend in store. 

Today sees the beginning of the first quest. Simply create a birthday card using Uniko products and share it using the linky at the bottom of THIS post over on the Uniko Blogspot Blog. 

Need some inspiration? The Uniko Brand Ambassadors have you covered, so be sure to check it all out over in the post too!

I had grand plans of having a variety of birthday cards to share with you today, as to be honest it was hard deciding what Uniko products to showcase for this special occasion.

All of the clear stamps, designer dies and stencils I have designed over the years hold that something special. A reason for being and a connection to a memory. It felt like I was choosing a favourite child and neglecting the other!

So what did I choose?

Inspiration took over and this was the end result! A mix of geometrics, florals and current favourite sentiment! Originally Organic, Background Builders: Delightful Diamonds and Floral Vines.

What do you think?

Are you surprised by my choice of stamps?

I do hope you will join in on the fun. There is plenty of time to join in on this first quest. The deadline for submission is midnight (GMT) on Sunday 27th February 2022.


Quest 1 Prize – A Uniko Birthday Themed Product Bundle 
Quest 1 RulesUse Uniko Products Only*.No back linking. Linked cards/projects must be new.Maximum Enteries 3 Per Person.
*If you don’t own any physical Uniko products you are welcome to use THESE FREE Uniko Digital images to create your card.  

Crafty Hugs

May 2021 NEWS & Restocks!

 Happy Friday!

It’s always a good day in The Studio when a bunch of restocks arrive 😊 and today is that day! A few of these clear stamp sets have been out of stock for a while – my apologies for that. 

I feel like things are getting back to ‘normality’ and I am able to spend more of my day in The Studio now  that The Beans are back at school, I finally have more time to start investing and restocking again. However, I am taking things slowly and at a speed I can manage, it’s just me here in The Studio! Plus I always want to bring you new stuff too!! 

I’ve had a few emails about when Designer Dies will be restocked, so to hopefully answer some future emails I will post here! I will be restocking dies, but I don’t currently have a date as to when this will be, my apologies for this I know you love dies and it’s frustrating when they’re out of stock. 

Uniko dies are manufactured in the US, so along with this factor and the pandemic, they are also a BIG investment for a small business like Uniko. With not attending any craft shows since October 2019, plus being closed to orders during lockdown in 2020 due to the pandemic, I have had to decide what to feed Uniko funds into and currently my decision is for restocking stamps, stencils and new releases of these products. I hope you understand my decision and believe me, it isn’t easy making them. 

Anyway, lets have a look and see what clear stamp loveliness is lining the Uniko shelves again…

Background Blocks Graffiti Texture

Background Blocks Halftone

Background Builders Squared

Pure Florals Gerbera

I’m excited for these stamps to be back, a selection perfect for those masculine cards needed for Fathers’s Day and the Gerbera Daisy perfect for all those Summery cards! 
I hope there is something back in stock that you’ve been waiting for. If you have emailed me about a particular restock, they’re on the list for the next batch in June. 

Before I go today, it’s my BIRTHDAY and I’m 21 again – haha! So in celebration I have a discount code AND a selection of birthday products are on SALE

Ok, it must be time for cake now! Have a lovely day and weekend 😊 

Crafty Hugs 

9th Birthday February 2021 Release in Review Brand Ambassador Blog Hop & GIVEAWAY!

Happy Weekend!

I couldn’t help but stretch our 9th Birthday February 2021 Release celebrations on for a little longer! Now the Uniko Brand Ambassadors have their goodies we can have one last party and showcase these new clear stamps and stencil with a Release in Review Brand Ambassador Blog Hop & GIVEAWAY!

Hopefully you have hopped on over from HERE where I have introduced the hop and shared a little info. So how about I share a few cards that I have made using some of the new clear stamps…

First up is this card using Background Builders Delightful Diamonds paired with the silhouette from Happy Days. Originally I had planned to stamp the diamonds direct onto my base card, but I was having an off day with my stamping and it went array. So instead I fussy cut them out and adhered them to my card base with double sided tape instead!

Once I had created this trellis design I wanted to use a silhouette image. I have a couple in stamp sets, Just Because and Happy Days. I chose the one from Happy Days, but you will notice on my card the silhouette is taller.

I decided to get creative and tried stamping it on top of the first to make it taller and it worked. I love it when some ideas I have come off first time! I have then fussy cut the silhouette out, adhered with foam adhesive and added a simple ‘Hello’ sentiment from Simply Said Blocks.

This lead onto my next card, another using Background Builders Delightful Diamonds and another card I had planned out in my head.

This time I wanted to create a band of diamonds across the top of my card. I selected the outline style diamonds to stamp so that I could add some colour.

I’ve finished the card off by layering with black and raspberry pink card and also with a sentiment from Floral Vines. Two very different looking cards using the same stamp set.

Lastly for today I have a card using the popular Floral Vines stamp set which is now back in stock, though be quick as the stock level has dropped since they arrived back in!

I decided to jump on the slimline card band waggon, though the initial trend might be not as hot as it was, I don’t know! The design would have easily fit on a standard size card, but I do love the extra white space.

Here I have simply stamped the main image from Floral Vines, coloured with alcohol markers and added the birthday sentiment from the set. A really quick and simple card.

That’s all I have to share today using the stamps, but be sure to hop on along the Brand Ambassadors blogs to be inspired and WOWed by all the creativity.

Hannelie

Izzy 

Jane 

Julie

Rahmat

I hope you have enjoyed this release in review as much as I did. Don’t forget to comment to win & be sure to check out the winners post HERE from the 9th Birthday February 2021 Release celebrations as I am still waiting to hear from a few winners!! 

Crafty Hugs 

February 2020 & 8th Birthday Reveal, Brand Ambassador Blog Hop & GIVEAWAY!

Hey & Happy Sunday!

Welcome to the February & 8th Birthday product reveal, blog hop & GIVEAWAY! Hopefully you have hopped on over from HERE where I have formally introduced all the products available for purchase at 9pm GMT.

I have a trio of cards to share with you today. First up a super CAS card using Happy Days.

I can see this little set being a ‘go to’ for quick cards. Here I started with a panel of white card as big as my card base. I drew a faint pencil line a few centimetres from the bottom, making sure to leave enough space for my sentiment.

I then inked the silhouette foliage in Limeade, Lime & Fresh Leaf Altenew inks and stamped onto my card. I made sure to stamp part of the stem under the line as I wanted to cut along the line and around the image. This is then popped up onto my card base using foam adhesive.

For my next card I used Happy Days again, but this time I had an idea to combine it with Organic Wishes.

My idea was to capture new fresh spring leaves amongst the winter foliage and I used the ‘Bloom & Grow’ sentiment from Spring Botanicals Tulip.

Another quick stamped and CAS card. This time I added the stamped panel to a lime green card base using foam adhesive & tied some linen thread around the bottom section to add a rustic touch.

Lastly for today & continuing the Spring garden theme I decided to ink up and colour Spring Botanicals Tulip.

I decided to stamp & emboss the tulips in white onto a panel of kraft card. I then coloured the tulips using Prismacolor Pencils. I find colouring on kraft really forgiving when you don’t want to spend a huge amount of time colouring!

I used a trio of red/pink for the flowers and a trio of green for the leaves & stem. I used a little bit of blending solution to achieve a nice smooth finish. I decided not to add a sentiment on the front of the card & will add one inside if I choose to send the card.

That’s all I have to share with you today, but I know my Brand Ambassadors have so much wonderful creativity to share with you too.

Carol 

Hannelie

Izzy 

Jane 

Julie

Linda

Rahmat

Sarah

Wiebke 

Be sure to comment on all the Brand Ambassador blogs for your chance to win the ENTIRE Release! You have until Midnight GMT Saturday 29th February 2020 to leave a comment. The winner will be announced Sunday 8th March 2020 along with all the other 8th Birthday Celebration Winners 😉

Thanks for stopping by today.

Crafty Hugs

Uniko’s 8th Birthday Linky Party!

Hey!

This month Uniko turns EIGHT and we have a month full of celebrations in store, with a NEW release at the end of the month and LOTS of inspiration from myself and the Uniko Brand Ambassadors along the way.


Today we are kicking the celebrations off today with a linky party! It wouldn’t be a birthday celebration without a PARTY, right? And the Party starts over HERE on the Uniko blogspot blog.

Simply create a birthday card, any theme, any style and using any product you like and link it up via the linky below. You don’t have to have a blog to enter, you can link your card from your Instagram, Facebook, Pinterest or like with ALL Uniko Challenges you can email me your entry to add.

You don’t have to use Uniko products, but I’d LOVE to see you using your Uniko stash (including Uniko Digital Freebies via the link above or ones from Magazine Features) AND there is an extra opportunity to win a prize if you do 😉

Before I get to those, how about some creative birthday inspiration from me…

I’ve had this card idea in my head for a while and today seemed the perfect occasion to make it for. I used BIG & BOLD Wish clear stamps and Designer Dies BIG & BOLD Wish to stamp and cut the rainbow of 8 candles.

I used my usual go to Altenew inks for the rainbow of colours and I love how pretty they look lined up across the card. I’ve adhered the die cuts using 1mm thick foam adhesive.

Instead of a ‘happy birthday’ sentiment on the front I decided to use ‘Make a Wish’ from Birthday Sentiments clear stamp set. One because when you blow out candles the tradition is to make a wish.

But also because ten years ago I made a wish and the wish was to run my own stamping & paper craft business and here I am celebrating EIGHT years of my little business.

Thank you for making my wish come true and for keeping my wish alive. Now before I get all soppy, how about you check out the birthday inspiration from my awesome Brand Ambassadors. There might even be the odd sneak peek at some new stamps coming at the end of the month 😉

Carol 

Hannelie

Izzy 

Jane 

Julie

Linda

Rahmat

Sarah

Wiebke

Need a little more incentive to join in on the fun? How about some prizes…

  • Main Winner Chosen By the DT – £25 eGift Certificate
  • Random Uniko Stamps Winner – In Stock Clear Stamp Set of Winners Choosing (any value)
  • Top 5 Chosen By DT – In Stock £5 Clear Stamp Set of Winners Choosing
  • Randomly Selected comment from the Design Team Hop In Stock £5 Clear Stamp Set of Winners Choosing

Thats a total of EIGHT chances to win! 


Winners will be announced Sunday 8th March 2020 along with all the other 8th Birthday Celebration Winners 😉

ALSO… why not take advantage of this fabulous discount code too! The code celebrate8 is valid for the whole month of February 2020 and can be used on any order placed, even if you place multiple orders during the month!

Crafty Hugs

Uniko Sponsors “Less is More” 9th Birthday

Happy Weekend!

It’s birthday month for one of my favourite challenges, the wonderful “Less is More”. They are celebrating 9 years, so a massive Happy Birthday to them and a HUGE congratulations too.

Uniko is proud to be sponsoring them this month and today they kick off with a new challenge HERE. “Less” is the cue meaning tiny and few.

I also joined in as a Guest Designer and made a card for the challenge to hopefully inspire you!

I don’t think I have ever made a card that is as clean and simple as this one! With birthdays on the brain (keep reading to find out more), and also thinking about tiny stamps in the Uniko range, I remembered the tiny balloon in Balloon Bash clear stamp set.

I then thought about all the sentiment sets and most of the Uniko sentiments bar a few are quite small. I had this layout idea in my head, so I wanted small over tiny. I opted for this one from Birthday Sentiments clear stamp set.

Don’t those tiny balloons look cute? I added the strings with a fine liner. The colours of ink are my usual go to Altenew inks and the sentiment stamped in VersaFine Onyx Black.

That’s all I have to share with you for the “Less is More” challenge, but be sure to pop back again soon & over HERE as February is Uniko’s 8th Birthday month and we have a month full of celebrations, challenges, competitions and a NEW Release!

I look forward to seeing you in the “Less is More” gallery and hope you will join in on the fun at Uniko too 😉

Crafty Hugs

Introducing… Background Blocks Pinstripe & You Are, Yes You

Hey!

Welcome to the LAST day of our 7th Birthday & February 2019 Release product introductions. The last four days have been so fun and colourful. If you have missed any of them you can catch up HEREHEREHERE and HERE.

I’m back again today with my guest designer and the design team to show you LOTS of inspiration! This time we are introducing a new Background Blocks Pinstripe & Yes, You  clear stamps. Hopefully you have hopped on over from the start HERE where I have introduced these 2 new products a little.

How about a closer look at the cards I have made using them…

IntroPinstripe


This first card shows the pinstripe background perfectly! I’ve stamped it in Altenew Pink Diamond ink a couple of times using my stamping tool. The flower from You Are, Yes You is then stamped directly over the top in VersaFine Onyx Black ink and coloured with one colour of Prismacolor pencil. I added one of the leaves from the same set and a sentiment from Simply Said. Again finishing the design with Nuvo Drops 😉

IntroDay5a


The colours for the card were again inspired by this weeks CAS Colours & Sketches challenge seen HERE and below. I rather like this colour combo, as I am quite a sucker for Grey!

CC&S color307-001

For my next card I decided to use the flowers & leaves from You Are, Yes You to embellish the corners of a die cut sentiment window frame.

BirthdayWishes&YesYou


The sentiment is from Birthday Wishes, which was introduced on Day 2 and it fits perfectly inside the Papertrey Ink Mat Stack 4. The flowers and leaves are coloured with Stampin’ Up! stamping blends, fussy cut out and adhered to the card with double sided tape.

IntroDay5d

Lastly, I wanted to try my hand at stamping a wreath using a self made wreath builder template and one of the leaves from You Are, Yes You…
WreathYesYou
Oh my! This was so much fun to do! I stamped and masked the leaf as I went round to create a lovely leaf wreath. The sentiment is from You Are, Yes You and I stamped, fussy cut and coloured the flower from the set to add to where the wreath began and ended to make it look neat.
IntroDay5c

That’s all I have to share today using these products, but I know Ruth our Guest Designer this month along with the Design Team have SO much more to share with you.

Hop on by to see what Ruth has created HERE and this is the order of the hop following Ruth…

Also, don’t forget the enter the HUGE giveaway over HERE to WIN Stamps For A Year! If you need help entering the giveaway as you don’t have a blog or social media to link, send me an email and I will assist you 🙂

WINstampsforayear

Thanks so much for stopping by & joining in on the 7th Birthday February Release fun 🙂

Hugs

Introducing… Passiflora & Designer Dies

Hey!

Welcome to Day 4 of our 7th Birthday & February 2019 Release product introductions. The last three days have been so fun and inspiring. If you have missed any of them you can catch up HEREHERE and HERE.

I’m back again today with my guest designer and the design team to show you LOTS of inspiration! This time we are introducing a new Passiflora Clear Stamp Set & Designer Dies. Hopefully you have hopped on over from the start HERE where I have introduced these 2 new products a little.

How about a closer look at the cards I have made using them…

IntroDay4a

My first card pairs the solid Passion Flower and leaf contained in the set with one of tomorrows introductions, another addition to the Background Block series. I’ve used my MISTI tool to stamp and layer the flower details, apart from the upper stamen of the flower, which is die cut and adhered with foam adhesive.

IntroDay4d

The darker shading on both the flower and the leaves was done by after stamping the image in a lighter shade. I used an ink dauber to apply the darker ink to selected areas of my stamp before stamping. I’ve found that using an ink dauber to apply the ink to the stamp results in a more even blended look. I’ve embossed the pinstripe background in gold, added a sentiment from Simply Said Blocks II and some Nuvo Drops too!

Continuing with the purple colour theme for the Passion Flower I opted for another clean and simple design…

IntroDay4c

Again I used the solid flower from the set (there is an outline flower too), but this time I white heat embossed the circular line detail of the flower and added the swirly foliage detail.

IntroDay4e

I’m loving the trend of embossed scoring lines, so tried my hand at it. It is quite subtle in the photo and more noticeable in real life. The sentiment is from Just Because clear stamp set and again I added my favourite Nuvo Drops!

Lastly it had to be a shaker card (apologies on my iffy photo, I’m still trying to get the hang of my new set up)…

IntroDay4b

There is something about new dies and my *need* to make a shaker card with them 😉 This time I went for some lovely bright pinks for the flowers and you can see that I have used the outline flower inside the shaker part of the card. I’ve also added a small circular detail stamp to the middle of that flower.

IntroDay4f


With the upper most solid flower I have used both of the stamen images, stamping, die cutting and layering them. If you look at some Passiflora flowers and the one I designed my stamp set from, they have a five stem stamen and then a 3 stem stamen. The sentiment is also from the set and again, more Nuvo Drops! I just love these too much! The shaker mix is from Little Things From Lucy’s Cards, Blush mix.

That’s all I have to share today using these products, but I know Ruth our Guest Designer this month along with the Design Team have SO much more to share with you.

Hop on by to see what Ruth has created HERE and this is the order of the hop following Ruth…

Also, don’t forget the enter the HUGE giveaway over HERE to WIN Stamps For A Year! If you need help entering the giveaway as you don’t have a blog or social media to link, send me an email and I will assist you 🙂

WINstampsforayear

Thanks so much for stopping by & joining in on the 7th Birthday February Release fun 🙂

Hugs

Introducing… BIG & BOLD Happy Clear Stamps & Designer Dies

Welcome to Day 1 of our 7th Birthday & February 2019 Release product introductions.

This is the fun part where myself, my guest designer and the design team get to show you LOTS of inspiration! You get to see all the sneak peeks I shared yesterday in action on cards & projects over the next few days leading up to 11th February, Release Day!

Hopefully you have hopped on over from HERE, where I have introduced todays products a little and all the links to the blog hop.

Okay, now to some inspiration…

IntroB&Bhappy1b

I thought I would start off with this rainbow happy card. Just seeing the rainbow of colours sparks joy and happiness to me!

IntroB&Bhappy1a

This card uses just the BIG & BOLD Happy Designer Dies, I wanted to show how they can be used on their own. Though I have used some favourite colours and products too to make the dies shine!

I started out by masking a rectangle off on my base card. I then used Distress Inks & blended them together to create a nice rainbow that would flow from ‘H’ to ‘Y’. I then trimmed a top layer of white card to fit inside the base card with a slight border around the edge and die cut the ‘happy shadow’ to create a window to see the rainbow of colours.

IntroB&Bhappy1c

This die cut window panel is adhered to the card base using foam adhesive. I then die cut the ‘happy’ word & adhered it direct to my card base inside the window. Hopefully you can see the dimensions of the window & word in the photo above.

The card is finished with lots of yummy Nuvo drops to match the rainbow. I decided to keep the front of the card sentiment free and will add a follow on sentiment inside the card for the occasion it is sent out for.

For my next card I used mainly the clear stamp set…

IntroB&Bhappy2

This is almost a one layer card, it is just the raised ‘Oh’ and ‘Day’ which makes it a two layer card. It is also a little less CAS for me & I nearly didn’t show it here today because of that!

Anyway, I did (sorry if you don’t like it) and here is how I made it. I started out by creating a window mask out of printer paper to lay over my base card & ink blend through. This time I used Distress Oxide inks in Festive Berries, Worn Lipstick, Spiced Marmalade & Fossilised Amber.

IntroB&Bhappy2a

Once my ink blending had dried, I used my MISTI stamping tool to stamp the large happy inside the ink blended shadow & heat embossed with Stardust EP. I stamped the confetti spray around the happy, which I inked up in a trio of the colours I used to ink blend with. I then added a trio of circle accents from the clear stamp set in black and the smaller sentiments. These are stamped & embossed with detail white EP onto black card and adhered using foam adhesive.

I have one last card to share with you today using these products, this time I went back to my usual CAS style…

IntroB&Bhappy3

This one again mainly uses the dies as I was having so much fun with them! I tried my hand at the inlaid die cutting technique and added in colourful stripes for a little more interest. I actually made 2 cards with this technique, but I will share the other one with you on release day!

I started by adhering 1 cm strips of left over coloured card to a thin white piece of card using double sided tape & glue adhesive. I then die cut the word happy. I’ve then created a base card and panel like my first card at the top of the post.

IntroB&Bhappy3a

Before adhering my white card panel to the card base using double sided tape I die cut the happy from this too, setting aside the die cut & the inner pieces aside. The striped die cut is adhered inside the die cut window and then I added the white inner die cuts to fill in the gaps. Added the birthday sentiment and a trio Nuvo Drops to finish.

That’s all I have to share today using these products, but I know Ruth our Guest Designer this month along with the Design Team have SO much more to share with you.

Hop on by to see what Ruth has created HERE.

Also, don’t forget the enter the HUGE giveaway over HERE to WIN Stamps For A Year! If you need help entering the giveaway as you don’t have a blog or social media to link, send me an email and I will assist you 🙂

WINstampsforayear

Thanks so much for stopping by & joining in on the 7th Birthday February Release fun 🙂

Hugs