Posts tagged “Technique”

Introducing… Stencil Pure Florals Rose

Hello & Happy Thursday!

I am delighted you have stopped by today. Hopefully you have hopped on over from HERE, the start of the fun!

I am so excited to be bringing a Mini Uniko Stencil Release this month and today myself and the Uniko Brand Ambassadors get to show you the new stencils in action.

I’m over the moon to be adding these NEW Uniko Stencils to the growing collection. If you missed the peeks and news about the release/s I shared yesterday, be sure to catch up HERE.

Let me introduce you to the next in the Pure Florals collection, Stencil Pure Florals Rose…

This is a 6 x 6 inch stencil, so the bloom is beautifully large like the Chrysanthemum and the Gerbera. And like the others this stencil coordinates with the previously released and popular Pure Florals Rose clear stamp set.

I’ve had SO much fun ‘playing’ with stencils, trying out some mixed media techniques and still keeping a CAS feel with some of them. Like this first card…
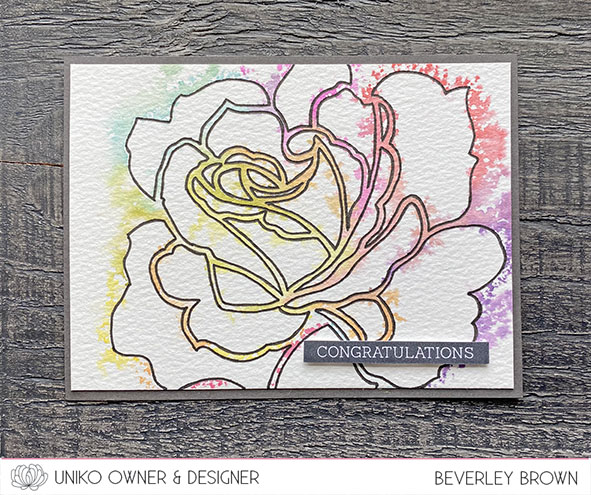
For this I used a piece of water colour card. I found some postcard sized pieces, perfect for cards. The make is Langton and the weight is 140g, so nice and sturdy.

For this I started out with my stencil on my work space with the design on the opposite side to the direction I wanted the rose to face on my card.

I then used water based markers (I used Stampin’ Up! as I have a good mix of colours) to colour the lines of the stencil and around the outside. No need to be super perfect at this as once you’ve coloured it, you spritz lightly with water.

Before you place your water colour card over the top, you want to give that a light brushing of water to wet the card. This helps transfer the ink a little more.
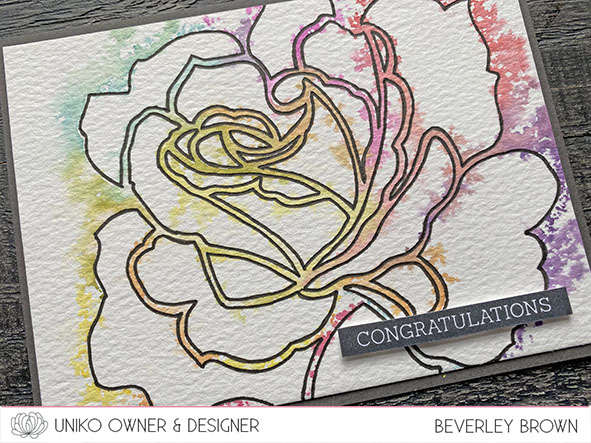
The result is a beautiful watercolour outline rose, which was lovely, but I felt it needed a little more definition. I placed the clean and dry stencil over the top and used a fine liner to carefully draw inside the stencil. To finish I mounted the piece onto a dark smokey grey card base and added the congratulations sentiment from Simply Said Blocks II.

Lastly for today I had a play with another fun technique and this time I remembered to take some photos of the process πŸ˜‰

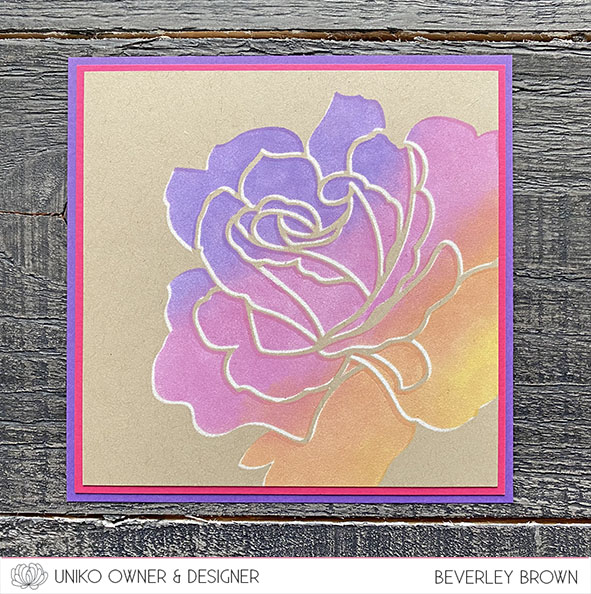
Hello Distress Oxide inks, it’s been a while πŸ˜‚ This is a shadow stencilling technique and depending on the stencil you use, it can be quite subtle like it has turned out with this design.
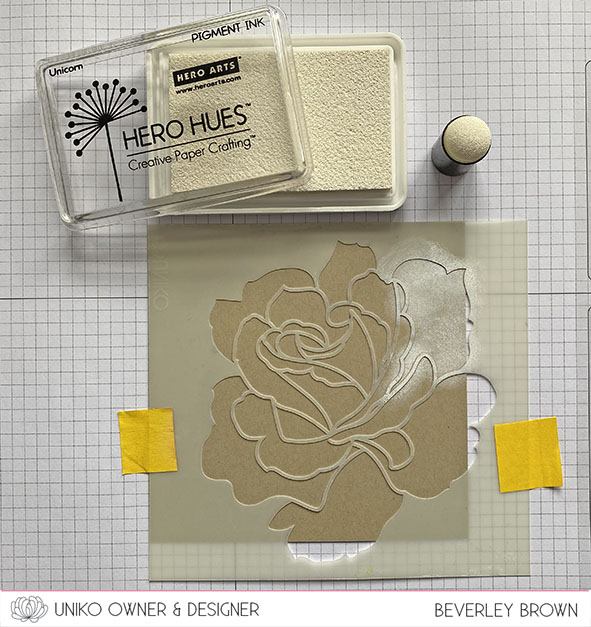
Step 1 – Kraft card base. I used a 13 x 13 cm square. Temporarily adhere your card to your work space and place the stencil where you want the design to be. Ink the design with white pigment ink until you are happy with the coverage.
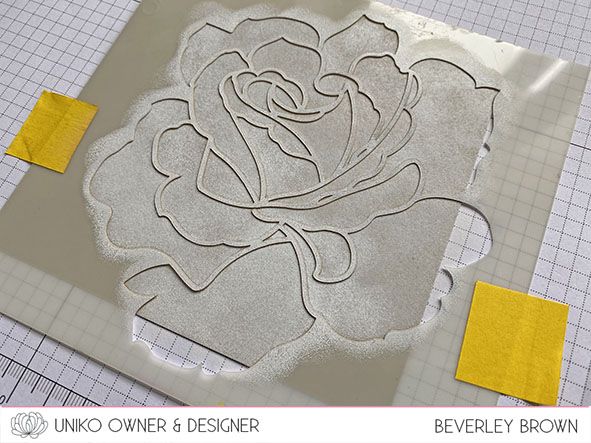
Step 2 – Remove & clean the stencil. Once clean & dry reposition the stencil leaving a small border. I moved mine up by about 1mm and across to the right by 1mm.
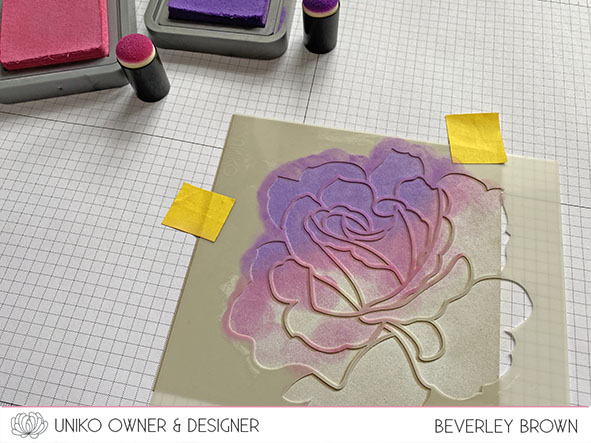
Step 3 – Start applying your chosen colours.

I am using Distress Oxide inks in Wilted Violet, Picked Raspberry, Spiced Marmalade & Mustard Seed. I chose DOI because I find them smoother to blend. Though for this stencil I use sponge daubers instead of a brush as the stencil has large areas with delicate stencil details that can move quite easily.
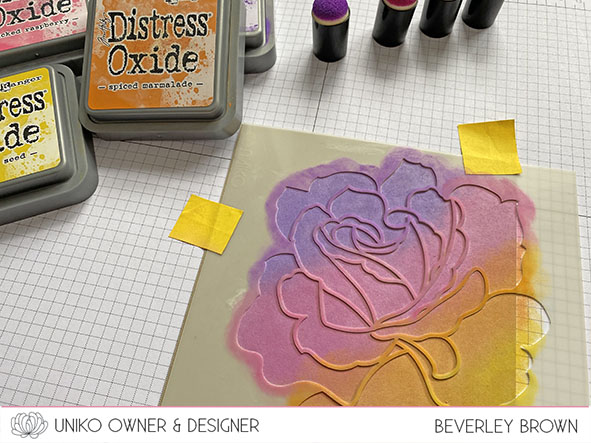
Apply the colours of ink until you are happy, and then remove the stencil.
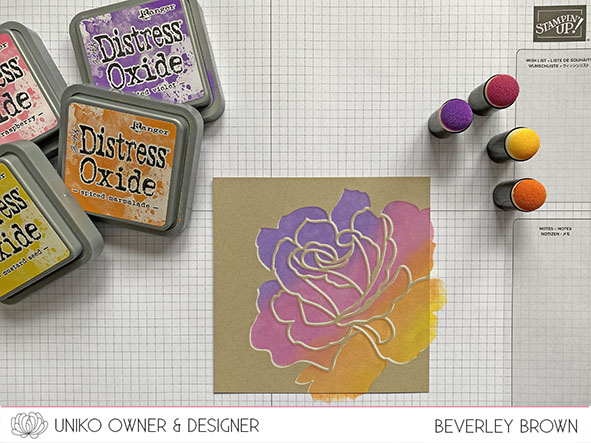
Hopefully you can see the subtle white shadow border it leaves on the design.
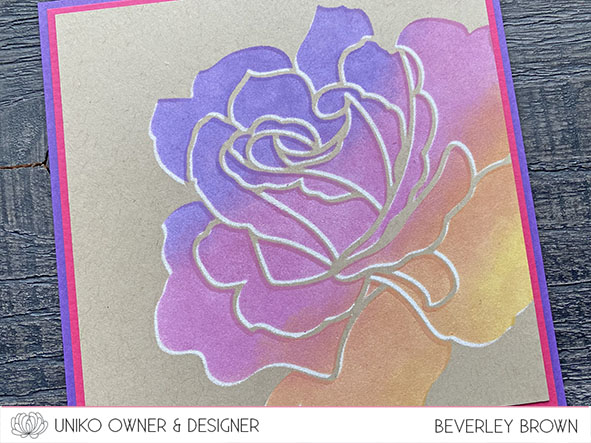
I kept this card sentiment free and simply mounted the stencilled piece onto a pink and purple card base.

That’s all from me today! Be sure to hop along with the Brand Ambassadors for more inspiration and I do hope you will pop by tomorrow for the next introduction.

Hannelie

Izzy 

Jane 

Julie

Rahmat

Steph


Crafty Hugs 

Uniko Stamping Retreat!

Hey & Happy Monday!

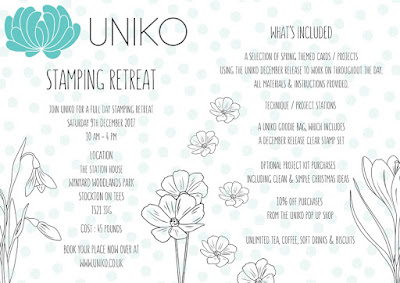
If you follow Uniko on social media or subscribe to the newsletter, you might have seen my advert for the Uniko Stamping Retreat?!

I thought I’d pop by and share a little about the day here too πŸ˜‰

{Click Photo For A Closer Look}

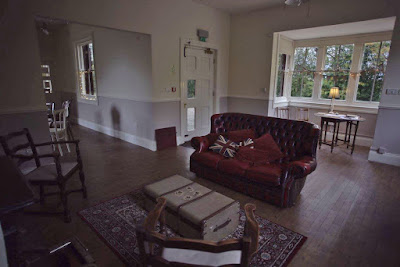
It has taken me a while, but I have finally found the perfection location to hold Uniko events like this Stamping Retreat!

I wanted somewhere which was close to where I live in the North East of the UK, not too big and not too small. I wanted somewhere with character and the ability to adapt to the requirements of my ideals for Uniko events. Then one day my close friend who I have got to know though having the beans and hosting play dates told me about one of her new adventures with her husband and a couple of friends and a venue their are hiring out, literally 20 minutes away from where I live. I knew of it straight away and had no doubt that it was perfect!

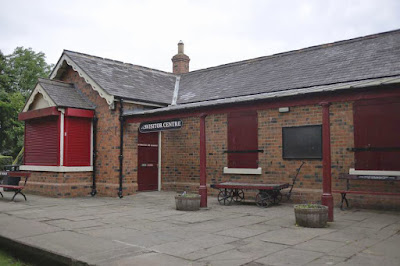
The Station House at Wynyard Woodlands Park…

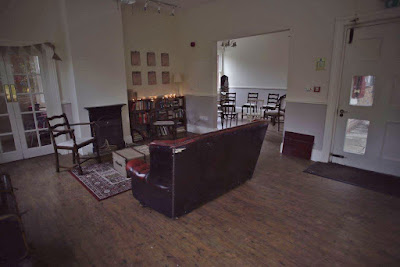
Set in a beautiful woodland park is this old station house, which most recently was a visitor centre. As you walk in you are greeted with a space filled with character and warmth. With a spaces perfect for a hive of creativity.

I am so excited to be holding the first Uniko Stamping Retreat on Saturday 9th December 2017 10am – 4pm at this venue!

Why is it called a Stamping Retreat? I hear you ask!Β 

Simply because the focus of the day is on stamping with Uniko clear stamps and retreating to this wonderful location!

I didn’t want to call it a class, as that sounds to formal. The day is about being relaxed and enjoying the creative process. Whether you are an expert stamper/crafter, beginner or somewhere in between, this is the day for you.

What is involved/included?

If you ever attended one of my previous ‘classes’ at The Paperlane in Northallerton, the overall structure is similar, but I have added in some NEW things too πŸ˜‰

I will be designing a collection of cards using the NEW Uniko December Release, which is based around Spring & Florals. You will receive a ‘kit’ that will contain all the instructions and materials to make 5 – 6 cards throughout the day at your own pace. I will be there to help and guide individuals as needed and I will demonstrate any techniques to the whole group at the beginning of the day.

Along with the kit there will be two individual project / technique stations for each of you to take turns, have a go and make during the day. For December these will be…

* A stencilling technique station. You will get to have a ‘play’ with some new Uniko Stencil Designs and make a card using them!

* A small MDF stamped hanging decoration.

Along with all this you will receive a Uniko Goodie Tote Bag! This will contain a FREE clear stamp set from the December Release and a few other goodies. The total worth of this goodie bag will be Β£10 πŸ˜‰

There will be optional kit purchases available, clean and simple Christmas cards using the recent Uniko October Release and a kit based on the Uniko September Release. These will be priced at Β£5 each.

There will also be a Uniko pop up shop of all the items available on the Uniko website! You will receive 10% off any purchases made during the day!

Does this sound FUN or what?! I can hardly wait πŸ˜‰ I do hope that some of you will be able to come and enjoy this day with myself and Uniko!

For more details and to book your place pop on over HERE to the website.

Hugs

Fond Farewell…

Hey!

It feels like forever since I last blogged over here! Today was my last class at The Paperlane, I have been doing demos and classes there since I launched my Uniko stamp range 4 1/2 years ago. I have made so many lovely friends through my love of stamps and this hobby and it was sad to call it a day, but time to progress and move forward into other exciting ventures. I am sure I will be seeing some of you soon πŸ˜‰

Anyway, I thought I would share a couple of the cards we made in the class…

FinalClass1{click the photo for a closer view}

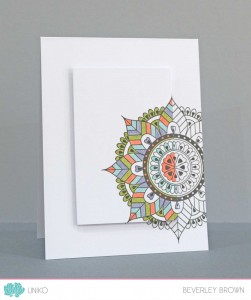
I’ve been seeing this ‘spotlight’ stamping technique a lot recently, so I thought I would give it a whirl with the newly released Marvellous Mehndi clear stamp set and the large mandala stamp from the set. As I don’t have a MISTI yet πŸ™ even though I have nicely asked Santa (aka hubby) for an early Christmas present as I ‘really’ do deserve one, I have been EVER so good so far this year!

I digress, so I had to line up the stamp the old fashioned way. I was pleased with the results and once the class had the hang of my instructions is was quite fun πŸ˜‰

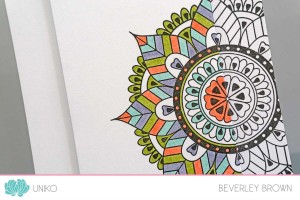
FinalClass1a

{click the photo for a closer view}

The mandala is stamped in VersaFine Onyx Black ink and the top focal layer coloured with a selection of Stampin’ Up! markers, my favourite In Colour collection.

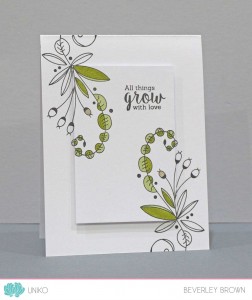
To get a little more practice with the technique we also made this card…

FinalClass3

{click the photo for a closer view}

It would have been rude not to give the ‘spotlighting’ treatment to the new Originally Organic clear stamp set too! So I chose the swirly foliage stamp. Again it is stamped in VersaFine Onyx Black ink and coloured with Stampin’ Up! markers.

FinalClass3a

{click the photo for a closer view}

That’s all I have to share for today, but I will be back again tomorrow with more to share AND Stamp Of The Week returns on Monday – Yay!

Thank you to all who came to the class today and to all of you who have taken the time to stop by the blog. Enjoy the rest of the weekend!

Hugs

F4933FEA1542074D511250ADE7A9D0F4

Supplies:

Uniko Clear Stamps: Marvellous Mehndi and Originally Organic

Ink: VersaFine Onyx Black

Card: Hobby Craft White 300gsm

Accessories: Stampin’ Up! Markers and Foam Adhesive