Posts tagged “Party Confetti”

Introducing… Party Confetti & Stylised Floral Stencils

Hey!

Are you still with us?! I didn’t think this was a big release until I started scheduling it on the blog 😉 Welcome back to day four of the product introductions!

Today the Design Team and myself are here to introduce two new Uniko Stencil Designs, Party Confetti and Stylised Floral. Hopefully you have hopped along with the Design Team, I’ve struggled to keep up with work over the long holiday weekend here in the UK. The lovely sunny weather has distracted me to spend time with the Beans and hubby!

Anyway, I am finally here to share a couple of cards using 2 more Uniko Stencils being released on Saturday 12th May.

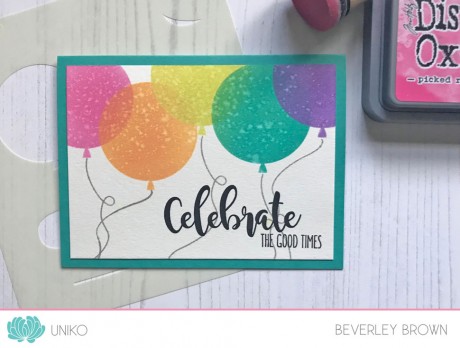
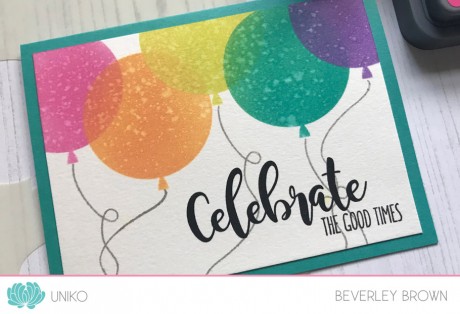
First up is a card using the new Stylised Floral Stencil…

IntroUnikoStencils1

It just called for me to ink it up with my very small collection of Distress Oxide inks! I think I will be treating myself at Happy Stampers Festival for some more colours 😉

IntroUnikoStencils1a

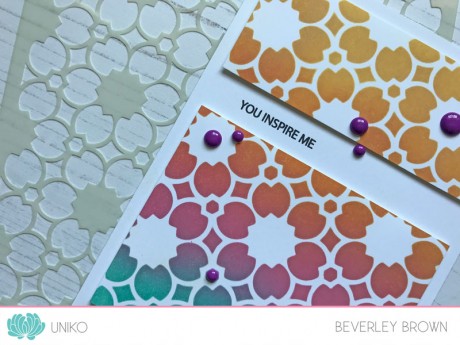
As you can see I kept my card really simple as I wanted the Stylised Floral design to take centre stage. This is another design way back from my Uni days and I can’t even remember how it came about! I just stubbled across it in my disorganised archive of designs!

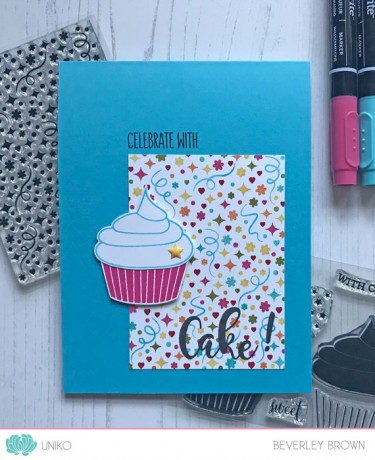
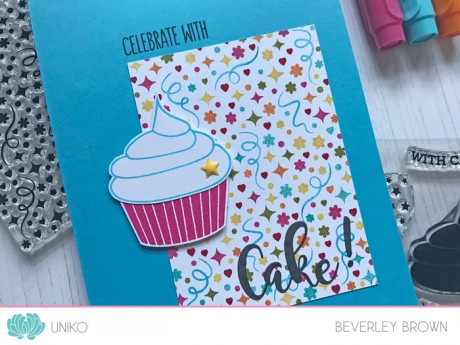
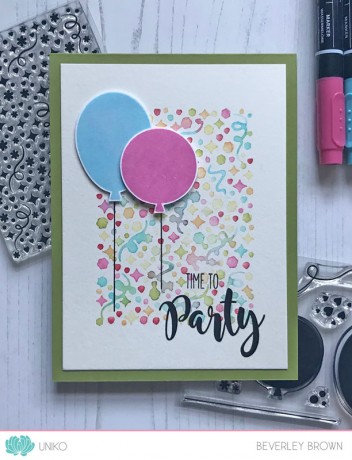
Next is another simple card using the Party Confetti Stencil…

IntroUnikoStencils2

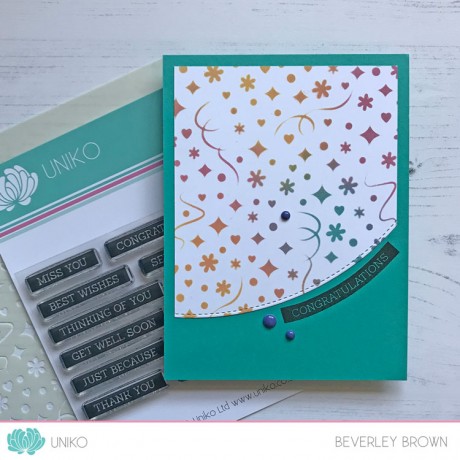
If you like the Background Blocks Party Confetti clear stamp, then you might just like this stencil too 😉 This stencil is a larger version of the design with just a few little tweaks to make it work for a stencil! Again I used my Distress Oxide inks to colour through the stencil before trimming and die cutting a curved edge.

IntroUnikoStencils2a

One fun thing about clear sentiment stamps is their ability to bend and shape them to fit in with a design. I’ve not tried this with the Simply Said Blocks stamps before (that I can remember), so I thought I would give it a go with the Congratulations sentiment. With it being the longest of the stamps in the clear stamp set I thought it the best stamp to use. I am rather pleased with how it turned out 🙂 I added a trio of my favourite enamel dots to finish the design off too.

That’s all I have to share with you today. Fingers crossed I am more organised and not so late tomorrow! Be sure to hop along with the Design Team (links below) for more FAB inspiration…

Hugs

Release Schedule…

Sneak Peeks 1st – 4th May 2018, these little teasers give you hints at what is in store!

Introducing… 5th – 11th May 2018, here you will see a closer look at the products being released with a daily blog hop with the Uniko DT.

Release Day! Saturday 12th May 2018 9am BST you will get to see the products in their entirety and purchase them HERE on the website! As usual there will be a Design Team Blog Hop & GIVEAWAY!


Extra PRIZE Info! Alternative prizes will be offered to those that may already own the prize offered. Winners will be announced on Saturday 11th on the Winners Page HERE


Introducing… Birthday Sentiments, Background Blocks Party Confetti & Balloon Bash Stencil

Hey!

Welcome to the first day of the product introductions. This is the exciting bit, where you get to see the sneak peeks in action!

Today myself and the Design Teams are introducing 3 of the February / 6th Birthday Release products, Birthday Sentiments, Background Blocks Party Confetti & Balloon Bash Stencil. As you can see by the titles, they all have a birthday / celebratory theme to them.
To start the hop and find all the Design Team links (in case you get lost along the way, as the DT has grown) click HERE.
Now how about a look at these stamps in action…
First up I thought I would share a card using the Balloon Bash Stencil and just one of the mix and match sentiments from Birthday Sentiments. If you like the previously released Festive Sentiments, then I think you might just LOVE this sentiment set too 😉
IntroBalloonStencil1
I started out with some smooth watercolour card, I use The Langton Hot Pressed (Smooth) Grain Satiné. I selected 5 colours of Distress Oxide in to form a rainbow effect. I then simply applied the colour through one of the balloon images in the stencil starting from Picked Raspberry, Spiced Marmalade, Twisted Citron, Peacock Feathers & Wilted Violet. I then spritzed the card with some water and dabbed the excess to achieve the mottled oxide effect on the balloons.
IntroBalloonStencil1a
The balloon strings are stamped from the previously released Balloon Bash clear stamp set and then I used my MISTI tool to stamp the sentiment in VersaFine Onyx Black ink a couple of times to get a nice smooth, solid impression.
Next I decided to ink up Background Blocks Party Confetti as I wanted to give my new go to technique a whirl on it! I simply love the direct to stamp colouring with water based markers. And this stamp simply calls for a rainbow of colours, don’t you think?!
IntroBBPartyConfetti1
For this card I placed the Background Block inside my small MISTI stamping tool and chose to colour the block with my Stampin’ Up! Brights marker collection. I simply started with a colour and just randomly coloured the elements in the design and simply repeated this for each colour until the block was all coloured.
IntroBBPartyConfetti1a
I then ‘huff’ over the stamp to moisten the ink. As The process is quite time consuming, the ink can dry onto the stamp, so you need to do this before you stamp or you will get a dull stamped image. But I think the results are worth the effort! After I had stamped the image I trimmed it down and adhered it to a Tempting Turquoise card base. I added sentiments from Birthday Sentiments and embellished with a yummy cupcake from Celebrate With Cake.
Before I removed the Background Blocks Party Confetti from the MISTI tool, I decided to spritz the image with some water and stamped the design onto some watercolour card, this formed the base for my next card design…
IntroBBPartyConfetti2
Again, such a cool effect and the colours are a little more muted this time, with being watered down. This time I embellished the card with a duo of stamped balloons from the Balloon Bash clear stamp set and another mix and match sentiment from Birthday Sentiments.
That’s all I have created to share with you today! Be sure to hop on over to sweet Carol to see the creativity there. If you get lost along the way here is the list of Design Team Blog Links…