Posts tagged “Distress Oxide Inks”

Surprise Stencil Release!

Hello!

Today at Uniko we have a surprise stencil release!

Earlier this month Uniko was at Stamp Magic in Doncaster and I had 3 NEW stencil designs available to purchase at the show and I am super pleased they are NOW available HERE on the website.

Let’s have a look at the 3 new designs…

Uniko Stencil Bright Butterflies £4.50, Copyright Uniko Ltd 2018, www.uniko.co.uk

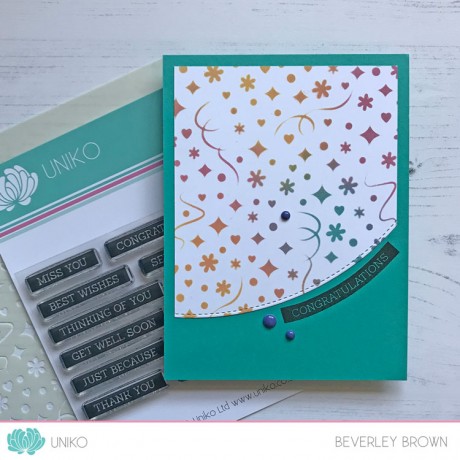
Uniko Stencil Scattered Polka Hexagons £4.50, Copyright Uniko Ltd 2018, www.uniko.co.uk

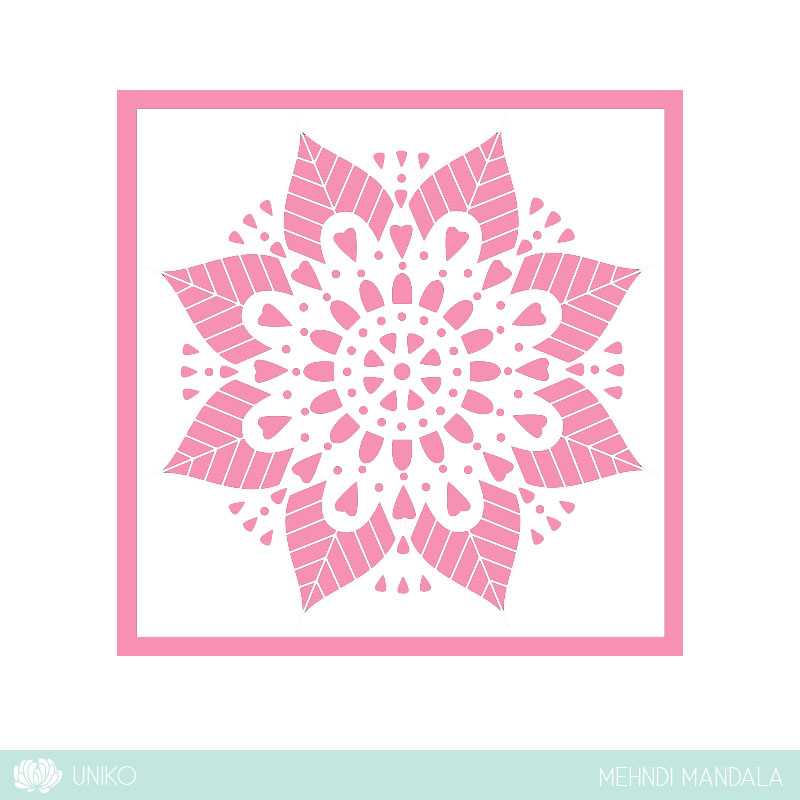
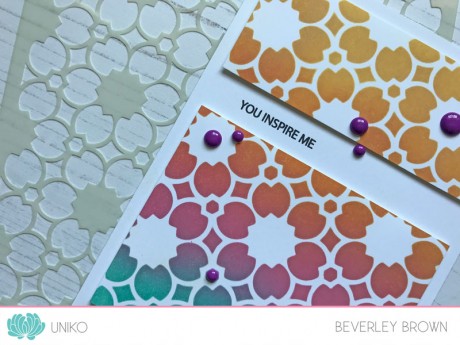
Uniko Stencil Mehndi Mandala £4.50, Copyright Uniko Ltd 2018, www.uniko.co.uk

Like with any new release here at Uniko we have a blog hop to celebrate and show you beautiful inspiration using the new products. I am super duper pleased to have a wonderful, talented and all round lovely crafter joining me and the Uniko Stencil DT us as our Guest Designer…. Ruth from Crafting While The Baby Naps. Hopefully you have hopped along from Ruth’s blog, but if not be sure to check out Ruth’s amazing inspiration HERE.

And as with all the Uniko Blog Hops we have a GIVEAWAY too! Simply comment along the hop for your chance to win one of the three stencil designs being released and as there are 3 new designs, I will randomly pick 3 lucky winners!!

Ok, how about some inspiration from myself using the new designs…

IntroMandalaStencil2

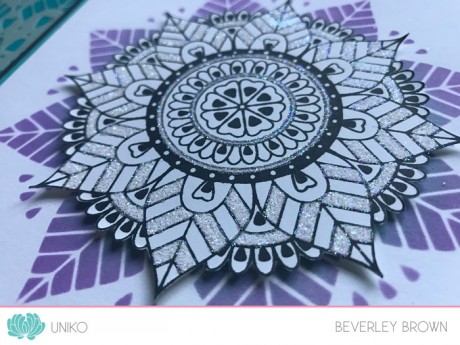
First up is the card in my sneak photo over on the Uniko Blogspot blog! I wanted to show how the Mehndi Mandala stencil can be paired with the large mandala clear stamp from Marvellous Mehndi.

IntroMandalaStencil2a

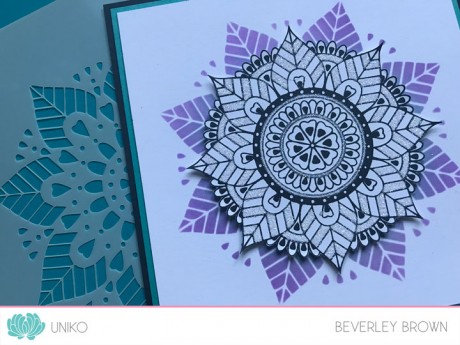
I started by inking my Mehndi Mandala with Distress Oxide Inks, in Wilted Violet and Peacock Feathers. I then stamped the mandala from Marvellous Mehndi, fussy cutting it out and adding some Stampin’ Up! Dazzling Diamonds glitter to various sections. I’ve adhered it to my stencilled layer using 1mm thick foam adhesive.

IntroMandalaStencil2c

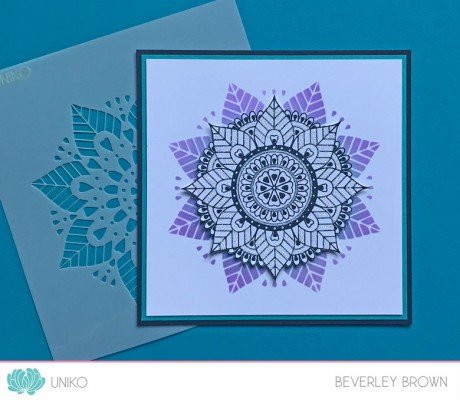
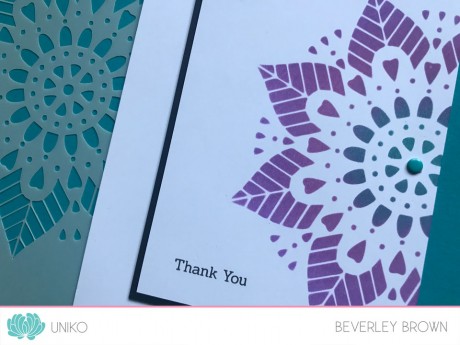
I’ve used the Mehndi Mandala stencil for my next card too, this time showing you more of the design…

IntroMandalaStencil1

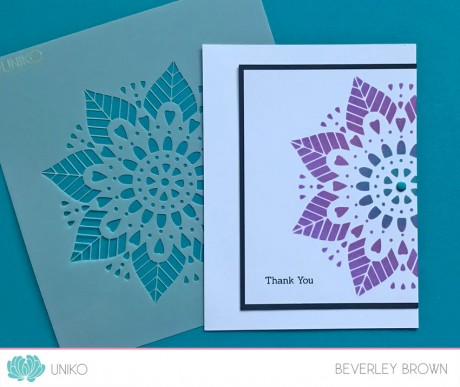
Again I used Distress Oxide Inks, this time Wilted Violet, Picked Raspberry and Peacock Feathers. I offset mounted my stencilled layer with some black card and onto a white card base. The sentiment is from Simply Said and I added an old Stampin’ Up! embellishment.

IntroMandalaStencil1a

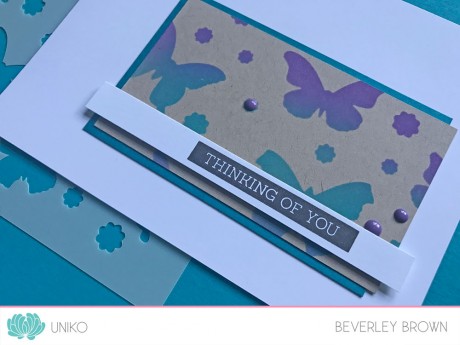
As I was on a roll with the colour combo of Wilted Violet and Peacock Feathers I decided to use if for my Bright Butterflies card…

IntroBButterflyStencil1

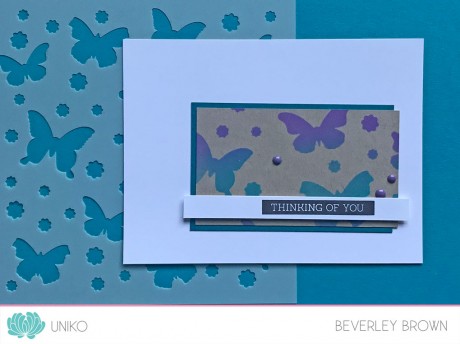
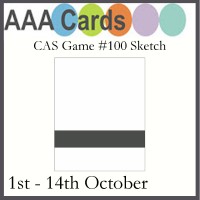
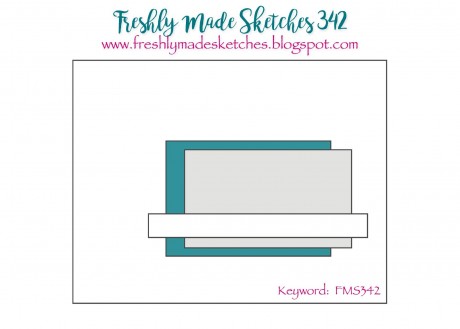
I’d had the SU! Crumb Cake card stencilled with the design since Stamp Magic, but I didn’t know how I wanted to use it, until I saw this weeks Freshly Made Sketches sketch seen HERE and below!

FMS Final 342-001

I layered my stencilled section with some scrap turquoise card from my stash and paired it with a sentiment from Simply Said Blocks II.

IntroBButterfliesStencil1a

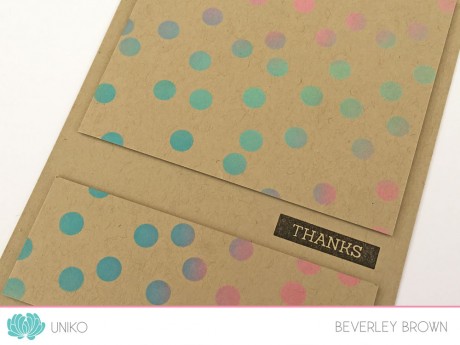
Lastly, but by no means least I inked up the Scatted Polka Hexagons stencil…

IntroSPHstencil1

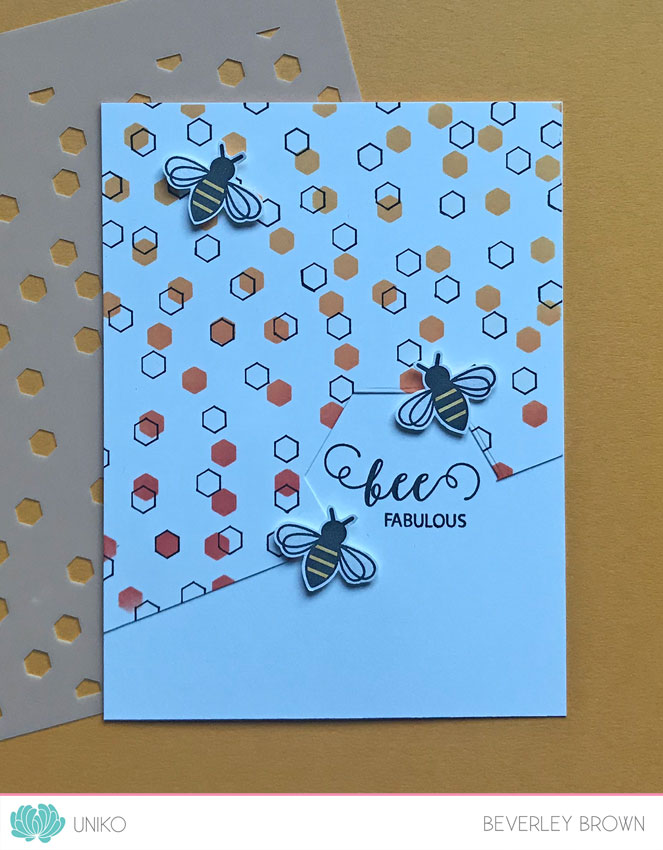
This is a fun geometric stencil and it pairs beautifully with the recently released Bee Happy clear stamp set. This time I used my new Catherine Pooler inks to blend through the stencil.

IntroSPHstencil1a

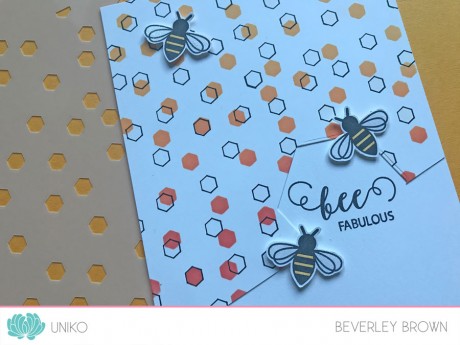
I used Tiara, Tiki Torch and Tutti Frutti from top to bottom. I then moved the position of the stencil slightly and used a fine liner to draw inside the polka hexagons to create a fun pattern.

IntroSPHstencil1b

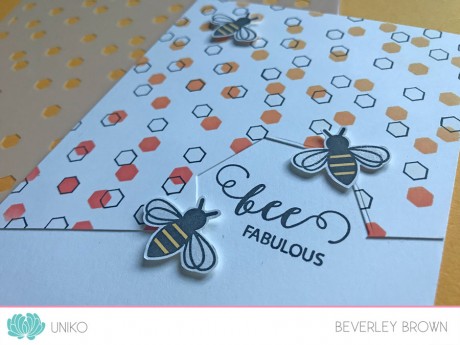
To finish the design I trimmed my stencilled panel on the diagonal, die cut a large hexagon, big enough for my chosen sentiment from Bee Happy, which is stamped onto my base card. I’ve then embellished the card with a trio of fussy cut bees.

That’s all the inspiration I have to share with you today, but be sure to hop around the Stencil Design Team blogs below for even more. Don’t forget to comment too, to be in the chance of being a lucky winner!

Thanks for stopping by today.

Hugs

Introducing… Party Confetti & Stylised Floral Stencils

Hey!

Are you still with us?! I didn’t think this was a big release until I started scheduling it on the blog 😉 Welcome back to day four of the product introductions!

Today the Design Team and myself are here to introduce two new Uniko Stencil Designs, Party Confetti and Stylised Floral. Hopefully you have hopped along with the Design Team, I’ve struggled to keep up with work over the long holiday weekend here in the UK. The lovely sunny weather has distracted me to spend time with the Beans and hubby!

Anyway, I am finally here to share a couple of cards using 2 more Uniko Stencils being released on Saturday 12th May.

First up is a card using the new Stylised Floral Stencil…

IntroUnikoStencils1

It just called for me to ink it up with my very small collection of Distress Oxide inks! I think I will be treating myself at Happy Stampers Festival for some more colours 😉

IntroUnikoStencils1a

As you can see I kept my card really simple as I wanted the Stylised Floral design to take centre stage. This is another design way back from my Uni days and I can’t even remember how it came about! I just stubbled across it in my disorganised archive of designs!

Next is another simple card using the Party Confetti Stencil…

IntroUnikoStencils2

If you like the Background Blocks Party Confetti clear stamp, then you might just like this stencil too 😉 This stencil is a larger version of the design with just a few little tweaks to make it work for a stencil! Again I used my Distress Oxide inks to colour through the stencil before trimming and die cutting a curved edge.

IntroUnikoStencils2a

One fun thing about clear sentiment stamps is their ability to bend and shape them to fit in with a design. I’ve not tried this with the Simply Said Blocks stamps before (that I can remember), so I thought I would give it a go with the Congratulations sentiment. With it being the longest of the stamps in the clear stamp set I thought it the best stamp to use. I am rather pleased with how it turned out 🙂 I added a trio of my favourite enamel dots to finish the design off too.

That’s all I have to share with you today. Fingers crossed I am more organised and not so late tomorrow! Be sure to hop along with the Design Team (links below) for more FAB inspiration…

Hugs

Release Schedule…

Sneak Peeks 1st – 4th May 2018, these little teasers give you hints at what is in store!

Introducing… 5th – 11th May 2018, here you will see a closer look at the products being released with a daily blog hop with the Uniko DT.

Release Day! Saturday 12th May 2018 9am BST you will get to see the products in their entirety and purchase them HERE on the website! As usual there will be a Design Team Blog Hop & GIVEAWAY!


Extra PRIZE Info! Alternative prizes will be offered to those that may already own the prize offered. Winners will be announced on Saturday 11th on the Winners Page HERE


Introducing… Block Party Christmas

YAY!

I’m SO happy that you have stopped by today, as here at Uniko preparations for the October 2017 product release are well underway. We have had all the sneak peeks at the 5 clear stamp sets being released and NOW it is time for the Design Team and I to introduce them to you.

Today, myself and my AWESOME Design Team are introducing the next in the Block Party series, Block Party Christmas.
IntroBPxmas2

{Click Photo for a Closer Look}

Just like Block Party Birthday, the stamp is one BIG block, measuring 9.5 x 13 cm and it is a style of Subway Art. You might recognise some images from previously released and now retired clear stamp sets.

IntroBPxmas2a

{Click Photo for a Closer Look}

I kept my first card here really simple and hopefully letting the stamp take centre stage?! I simply stamped (a whole bunch) the image in VersaFine Onyx Black ink and set it aside to dry. I then decided to give my new trio of Distress Oxide inks and outing and created a simple ink blended background. To finish the card off I went and added glitter to most of the open images/words using my Quickie glue pen and Stampin’ Up glitter. I also added some small dots to the snowflakes for good measure 😉

For my last card today (which I nearly didn’t share as it isn’t my best make), I decided to do some heat embossing…

IntroBPxmas3

{Click Photo for a Closer Look}

Again I used my MISTI tool to stamp the image in VersaMark ink and then heat embossed the image in Gold EP. I then trimmed the image to use just a small section of the block.

In hindsight I wish that I had kept it at that, but I decided to mess on and die cut a small Designer Die Snowflake (more details on these on Monday, unless you’ve been following me on Instagram/Facebook) and added some gold heat embossing to that too!

IntroBPxmas3a

{Click Photo for a Closer Look}

That’s all from me today using this stamp, but be sure to hop along all the Design Team blogs and leave a comment along the way, as you never know you might just win a random prize (in September random prizes were added to various release day orders). I know for sure that you won’t be disappointed the Design Team have created a bountiful wealth of inspiration 🙂

CLICK HERE to see more from Deborah

CLICK HERE to see more from Izzy

CLICK HERE to see more from Jane

CLICK HERE to see more from Lindsey

CLICK HERE to see more from Rahmat

CLICK HERE to see more from Sarah P

I do hope you have enjoyed the hop and seeing the possibilities this clear stamp set has? This set along with the four others we are introducing this week will be available HERE for you to purchase on Monday 16th October at 9am GMT.

Release Schedule…
Sneak Peeks 7th – 10th October, these little teasers give you hints at what is in store!

Introducing 11th – 15th October, here you will see a closer look at the products being released with a daily blog hop with the Uniko DT.

Release Day! Monday 16th October 9am BST you will get to see the products in their entirety and purchase them HERE on the website! As usual there will be a Design Team Blog Hop & GIVEAWAY!

Thank you for stopping by today and I’d LOVE to hear your initial thoughts on this new clear stamp 🙂

Hugs

NBUS Challenge #12 and a BIG peek at something NEW!

Hey!

I can’t believe it’s day 9 of Darnell’s NBUS #12 Challenge and I am only ‘just’ finding some time to play along 🙁 Good new is I have an extra day to play along as it’s now on for 11 days!

button aqua use this the

Anyway, here’s what I’ve made using some NBUS…

NBUS#12a{Click Photo for a Closer Look}


So, I’ve had a trio of the Distress Oxide inks (Worn Lipstick, Broken China & Cracked Pistachio) for quite a while now and I’ve not really had chance to ‘play’ with them and experiment with blending them. That was until last week when I received a newly design Uniko product to test, Uniko Stencils!! This got me all inspired to test drive the inks with this new stencil 🙂

Yep, you are getting the first real look at ‘one’ of the new stencil designs being released this month! With the popularity of the recently released Background Blocks: Scattered Polka Dots clear stamp, I decided to do a larger version as a 6×6″ stencil.

NBUS#12b

{Click Photo for a Closer Look}

And, just look at those inks on kraft card stock? They are so vibrant and I don’t know if it is just me, but they blend SO much easier than the regular distress inks?!

The layout of my card is from the current AAA Cards challenge HERE, which this fortnight is a sketch, seen below. My stencilled panel was perfect to split into 2 and I simply added a sentiment from Simply Said Blocks.

#100

Ok, that’s all from me today. I have a list as long as my arm of housework and jobs to be done before I head across to Happy Stampers Festival this Saturday! I am sure there is still time to grab a ticket HERE as they’re not available to purchase on the door and must be bought prior to the show.

I am looking forward to the show & if you’re attending please drop by the stand and say ‘Hello’!

Hugs

F4933FEA1542074D511250ADE7A9D0F4