Introducing… Stencil Pure Florals Rose
Hello & Happy Thursday!
I am delighted you have stopped by today. Hopefully you have hopped on over from HERE, the start of the fun!
I am so excited to be bringing a Mini Uniko Stencil Release this month and today myself and the Uniko Brand Ambassadors get to show you the new stencils in action.
I’m over the moon to be adding these NEW Uniko Stencils to the growing collection. If you missed the peeks and news about the release/s I shared yesterday, be sure to catch up HERE.
Let me introduce you to the next in the Pure Florals collection, Stencil Pure Florals Rose…
This is a 6 x 6 inch stencil, so the bloom is beautifully large like the Chrysanthemum and the Gerbera. And like the others this stencil coordinates with the previously released and popular Pure Florals Rose clear stamp set.
I’ve had SO much fun ‘playing’ with stencils, trying out some mixed media techniques and still keeping a CAS feel with some of them. Like this first card…
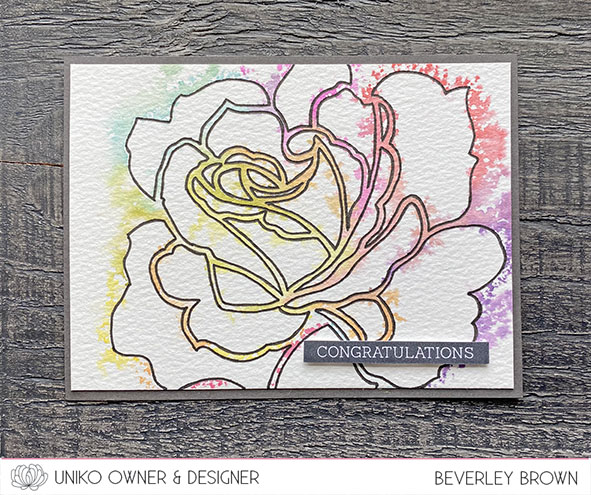
For this I used a piece of water colour card. I found some postcard sized pieces, perfect for cards. The make is Langton and the weight is 140g, so nice and sturdy.
For this I started out with my stencil on my work space with the design on the opposite side to the direction I wanted the rose to face on my card.
I then used water based markers (I used Stampin’ Up! as I have a good mix of colours) to colour the lines of the stencil and around the outside. No need to be super perfect at this as once you’ve coloured it, you spritz lightly with water.
Before you place your water colour card over the top, you want to give that a light brushing of water to wet the card. This helps transfer the ink a little more.
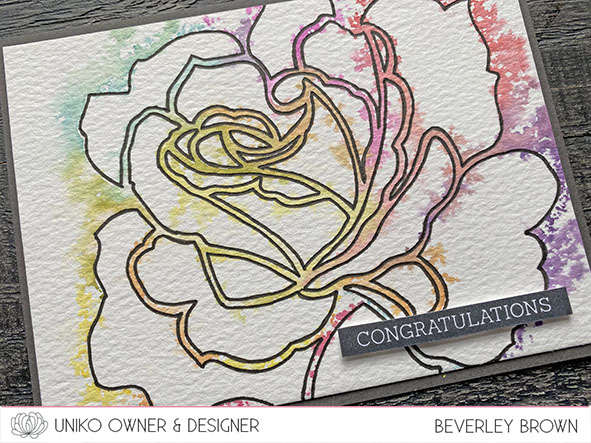
The result is a beautiful watercolour outline rose, which was lovely, but I felt it needed a little more definition. I placed the clean and dry stencil over the top and used a fine liner to carefully draw inside the stencil. To finish I mounted the piece onto a dark smokey grey card base and added the congratulations sentiment from Simply Said Blocks II.
Lastly for today I had a play with another fun technique and this time I remembered to take some photos of the process 😉
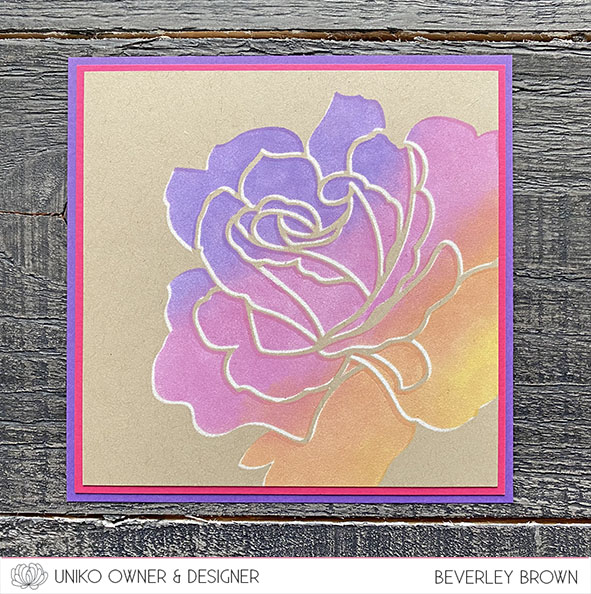
Hello Distress Oxide inks, it’s been a while 😂 This is a shadow stencilling technique and depending on the stencil you use, it can be quite subtle like it has turned out with this design.
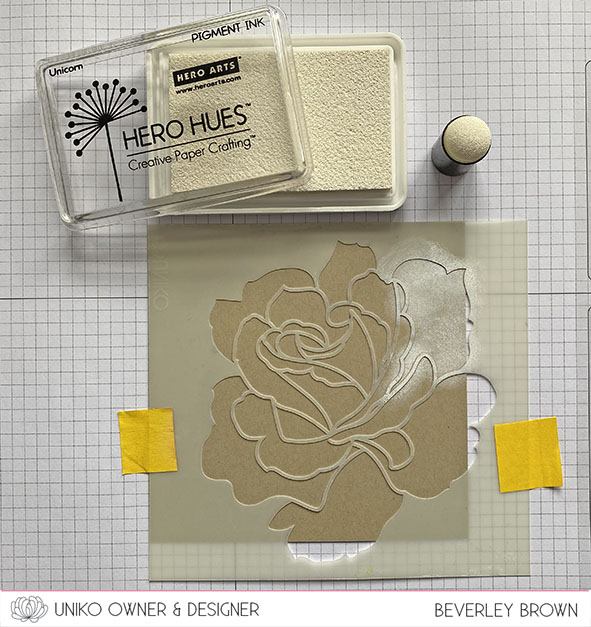
Step 1 – Kraft card base. I used a 13 x 13 cm square. Temporarily adhere your card to your work space and place the stencil where you want the design to be. Ink the design with white pigment ink until you are happy with the coverage.
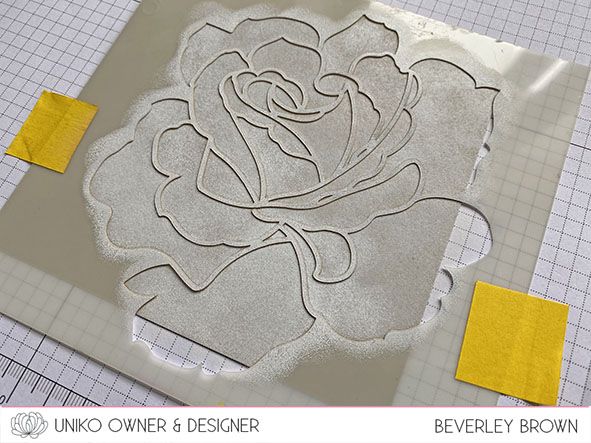
Step 2 – Remove & clean the stencil. Once clean & dry reposition the stencil leaving a small border. I moved mine up by about 1mm and across to the right by 1mm.
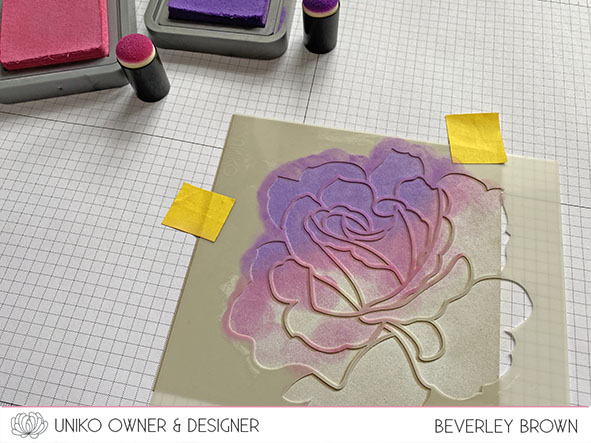
Step 3 – Start applying your chosen colours.
I am using Distress Oxide inks in Wilted Violet, Picked Raspberry, Spiced Marmalade & Mustard Seed. I chose DOI because I find them smoother to blend. Though for this stencil I use sponge daubers instead of a brush as the stencil has large areas with delicate stencil details that can move quite easily.
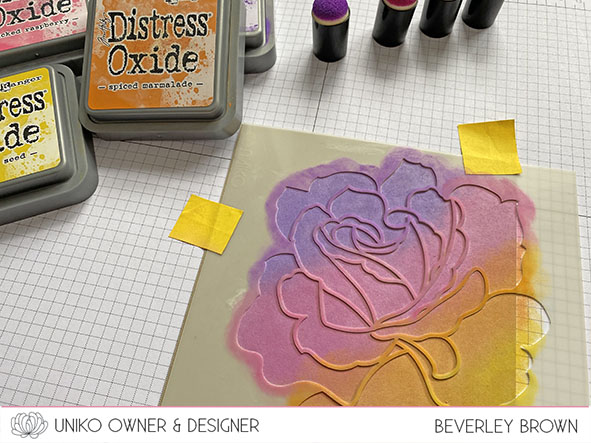
Apply the colours of ink until you are happy, and then remove the stencil.
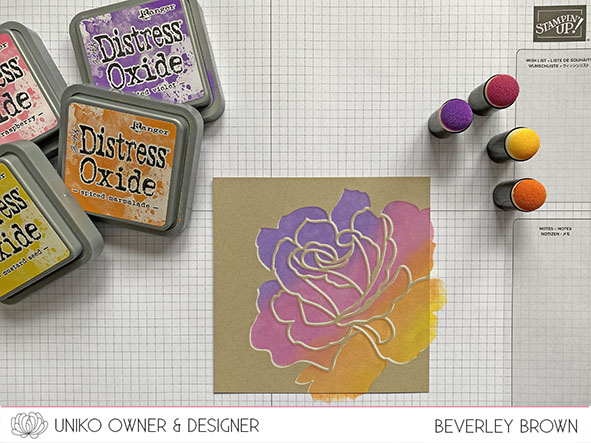
Hopefully you can see the subtle white shadow border it leaves on the design.
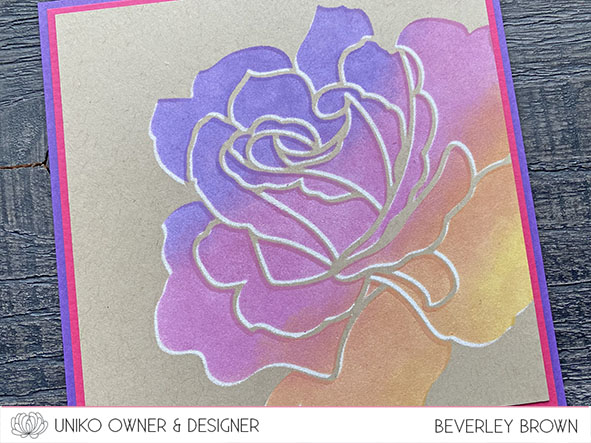
I kept this card sentiment free and simply mounted the stencilled piece onto a pink and purple card base.
That’s all from me today! Be sure to hop along with the Brand Ambassadors for more inspiration and I do hope you will pop by tomorrow for the next introduction.
Crafty Hugs





Comments (2)
Both so beautiful Bev. I really like how you added the fine liner to the first one, its almost pop art in style. I’ve been meaning to try the shadow effect myself, I really must remember to do so as your second card is fabulous too. x
Two wonderful techniques for two beautiful cards, Bev ! And thanks so much for sharing the step by step pictures. Fabulous first introduction !