Introducing (Page 6)

Introducing… Stencil Pure Florals Rose

Hello & Happy Thursday!

I am delighted you have stopped by today. Hopefully you have hopped on over from HERE, the start of the fun!

I am so excited to be bringing a Mini Uniko Stencil Release this month and today myself and the Uniko Brand Ambassadors get to show you the new stencils in action.

I’m over the moon to be adding these NEW Uniko Stencils to the growing collection. If you missed the peeks and news about the release/s I shared yesterday, be sure to catch up HERE.

Let me introduce you to the next in the Pure Florals collection, Stencil Pure Florals Rose…

This is a 6 x 6 inch stencil, so the bloom is beautifully large like the Chrysanthemum and the Gerbera. And like the others this stencil coordinates with the previously released and popular Pure Florals Rose clear stamp set.

I’ve had SO much fun ‘playing’ with stencils, trying out some mixed media techniques and still keeping a CAS feel with some of them. Like this first card…
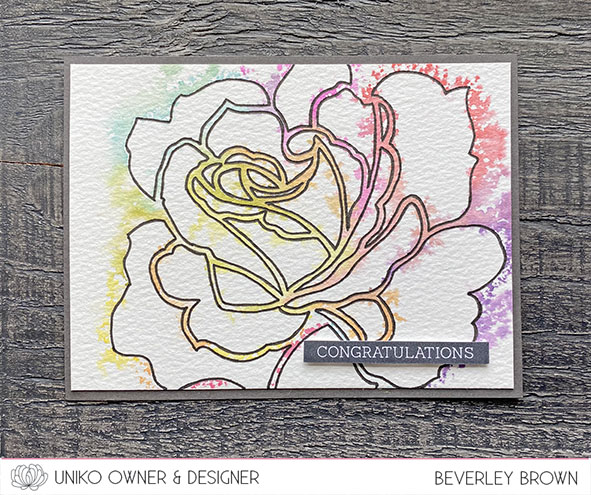
For this I used a piece of water colour card. I found some postcard sized pieces, perfect for cards. The make is Langton and the weight is 140g, so nice and sturdy.

For this I started out with my stencil on my work space with the design on the opposite side to the direction I wanted the rose to face on my card.

I then used water based markers (I used Stampin’ Up! as I have a good mix of colours) to colour the lines of the stencil and around the outside. No need to be super perfect at this as once you’ve coloured it, you spritz lightly with water.

Before you place your water colour card over the top, you want to give that a light brushing of water to wet the card. This helps transfer the ink a little more.
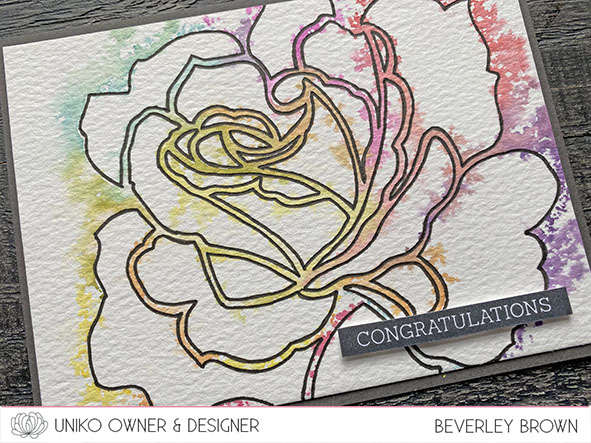
The result is a beautiful watercolour outline rose, which was lovely, but I felt it needed a little more definition. I placed the clean and dry stencil over the top and used a fine liner to carefully draw inside the stencil. To finish I mounted the piece onto a dark smokey grey card base and added the congratulations sentiment from Simply Said Blocks II.

Lastly for today I had a play with another fun technique and this time I remembered to take some photos of the process 😉
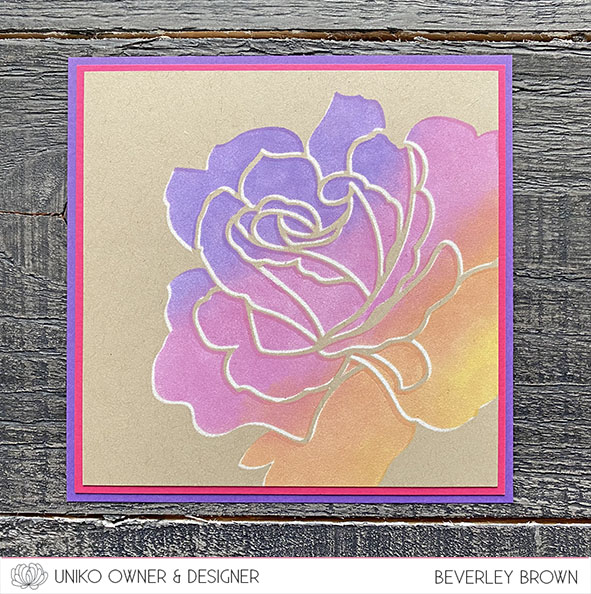
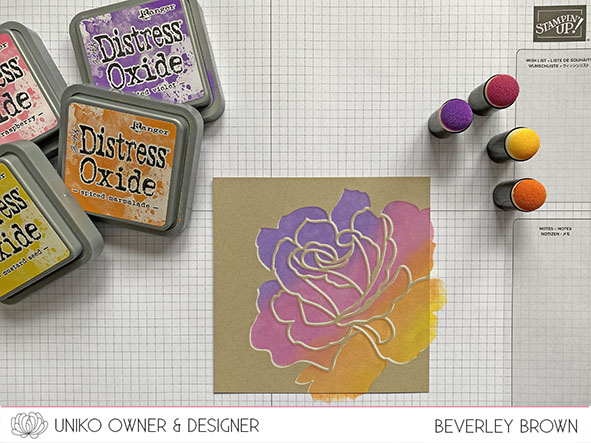
Hello Distress Oxide inks, it’s been a while 😂 This is a shadow stencilling technique and depending on the stencil you use, it can be quite subtle like it has turned out with this design.
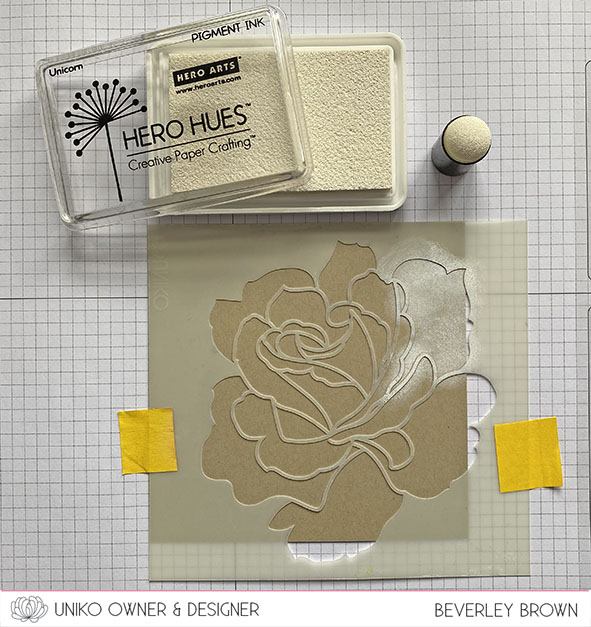
Step 1 – Kraft card base. I used a 13 x 13 cm square. Temporarily adhere your card to your work space and place the stencil where you want the design to be. Ink the design with white pigment ink until you are happy with the coverage.
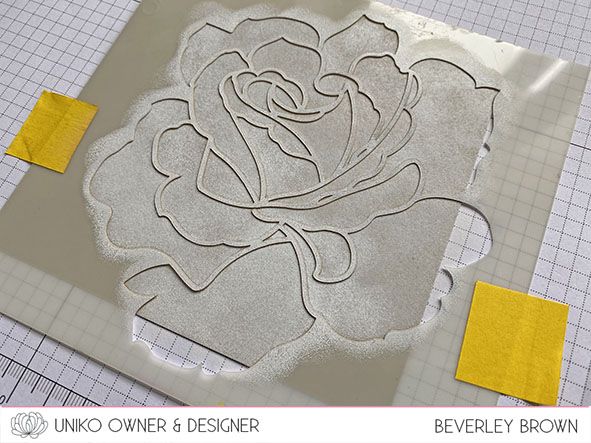
Step 2 – Remove & clean the stencil. Once clean & dry reposition the stencil leaving a small border. I moved mine up by about 1mm and across to the right by 1mm.
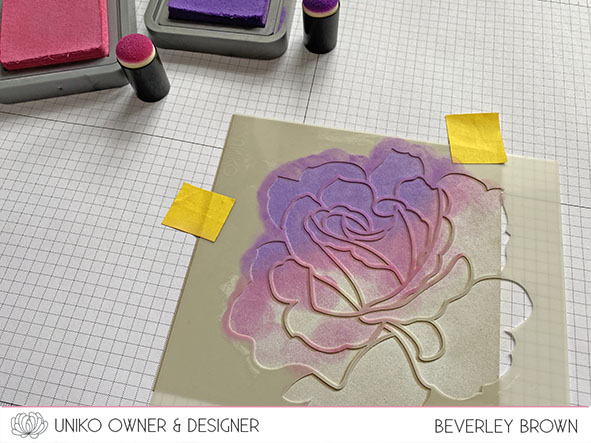
Step 3 – Start applying your chosen colours.

I am using Distress Oxide inks in Wilted Violet, Picked Raspberry, Spiced Marmalade & Mustard Seed. I chose DOI because I find them smoother to blend. Though for this stencil I use sponge daubers instead of a brush as the stencil has large areas with delicate stencil details that can move quite easily.
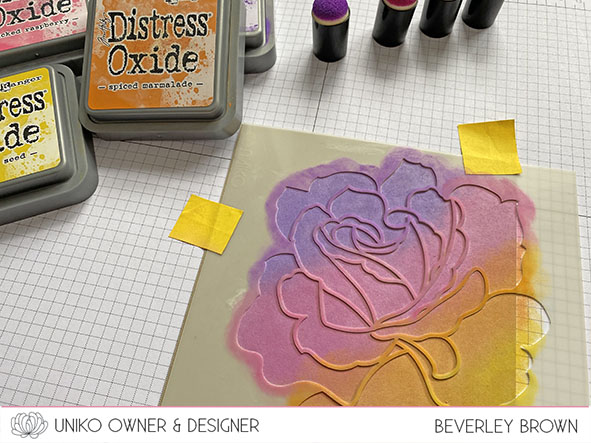
Apply the colours of ink until you are happy, and then remove the stencil.
Hopefully you can see the subtle white shadow border it leaves on the design.
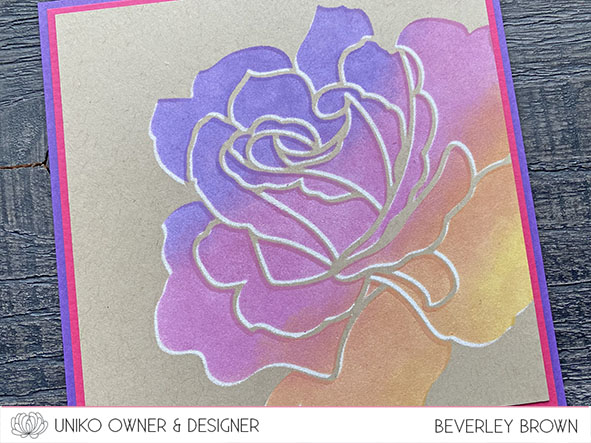
I kept this card sentiment free and simply mounted the stencilled piece onto a pink and purple card base.

That’s all from me today! Be sure to hop along with the Brand Ambassadors for more inspiration and I do hope you will pop by tomorrow for the next introduction.

Hannelie

Izzy 

Jane 

Julie

Rahmat

Steph


Crafty Hugs 

Introducing… Happy Days and Background Blocks Pinstripe II

Hey!
Welcome to Day 5 and the last of the product introductions for the February 2020 & 8th Birthday Releas. If you missed day 1, be sure to catch up HERE , for Day 2, HERE,  Day 3 HERE and Day 4 HERE.

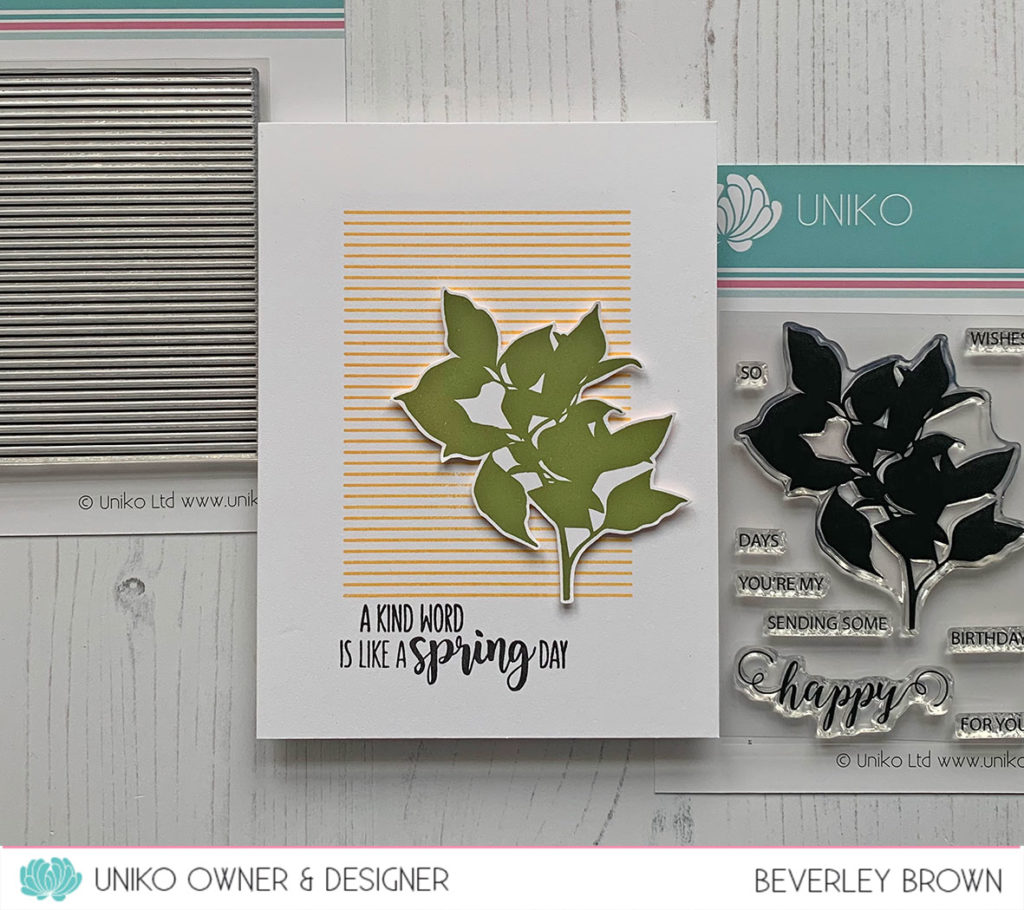
Today we have two more clear stamp sets to introduce to you, Happy Days and Background Blocks Pinstripe II. I’ve combined them both on my first card.

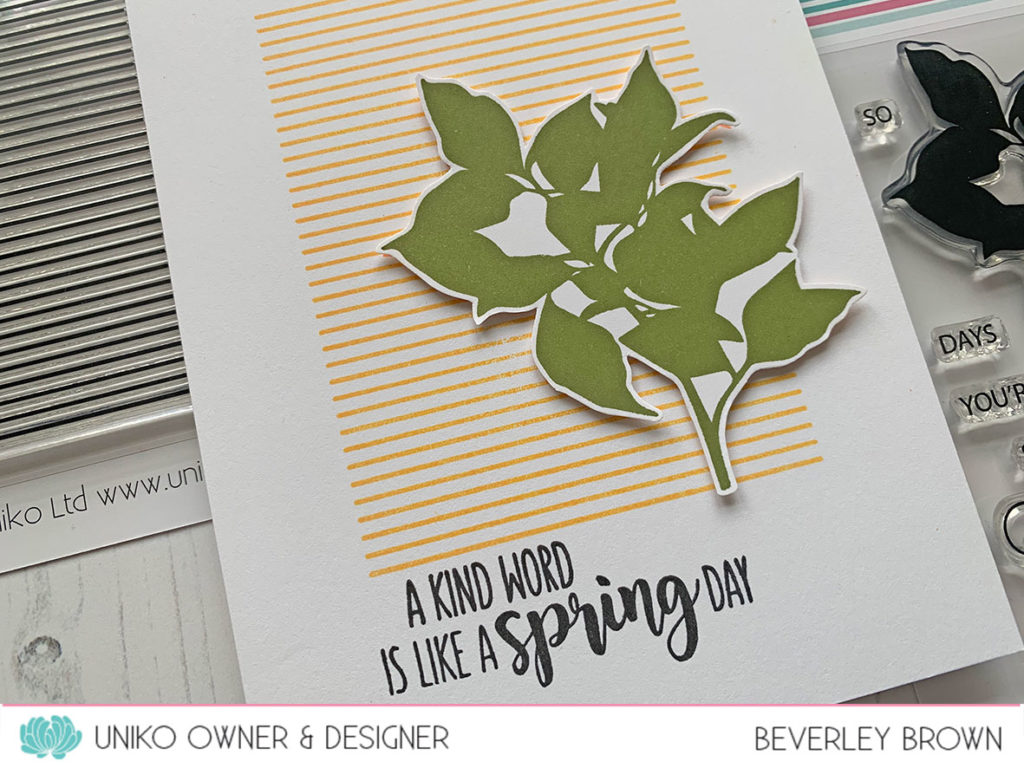
I love stripes and silhouettes and combining them both on this card was so easy. I used my MISTI to position and stamp the background, and I used a lovely Sunshine yellow.

I decided to stamp & fussy cut the silhouette foliage & adhere it to the card using foam adhesive. The sentiment is from Spring Botanicals Tulip, which we introduced yesterday.

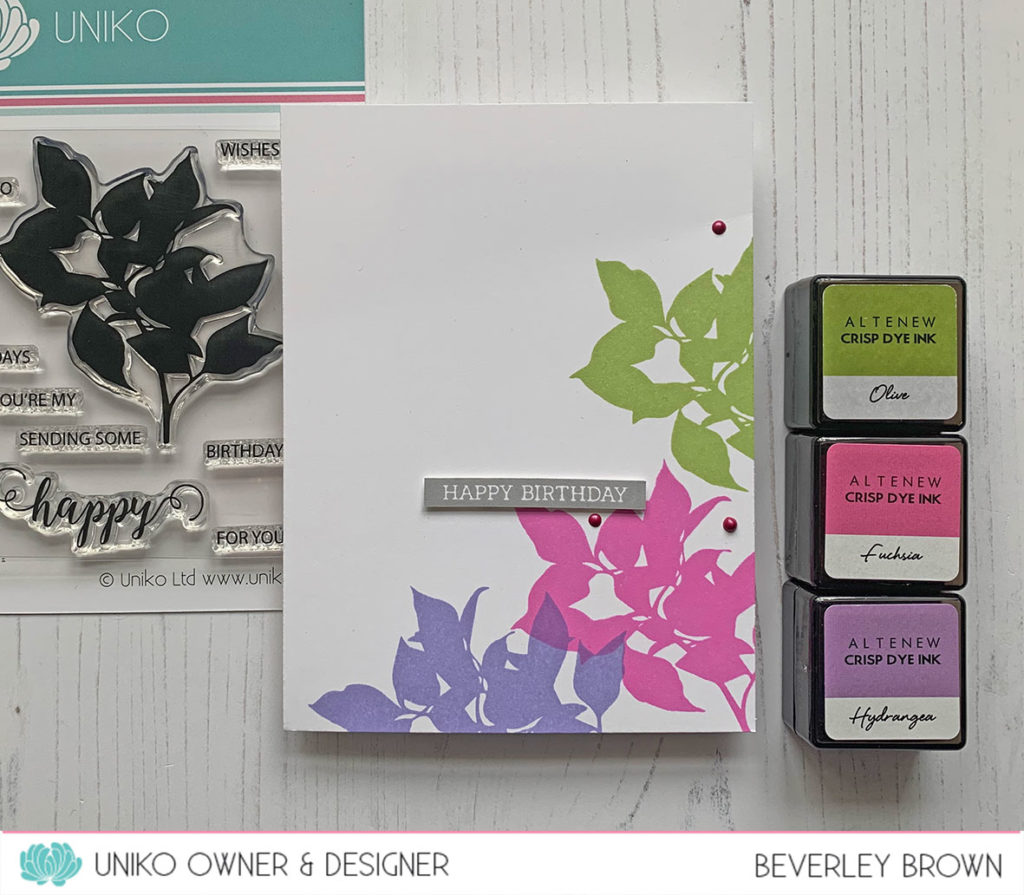
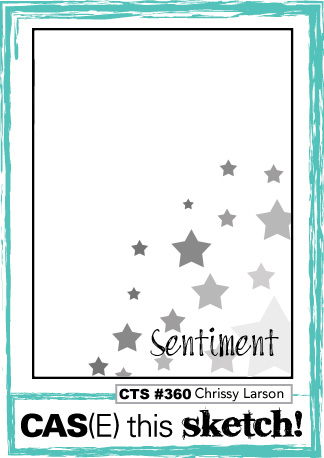
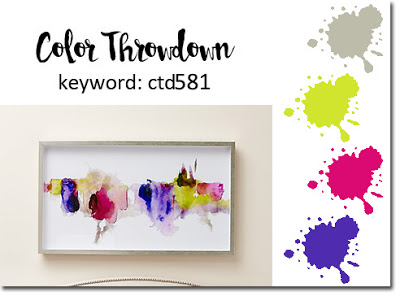
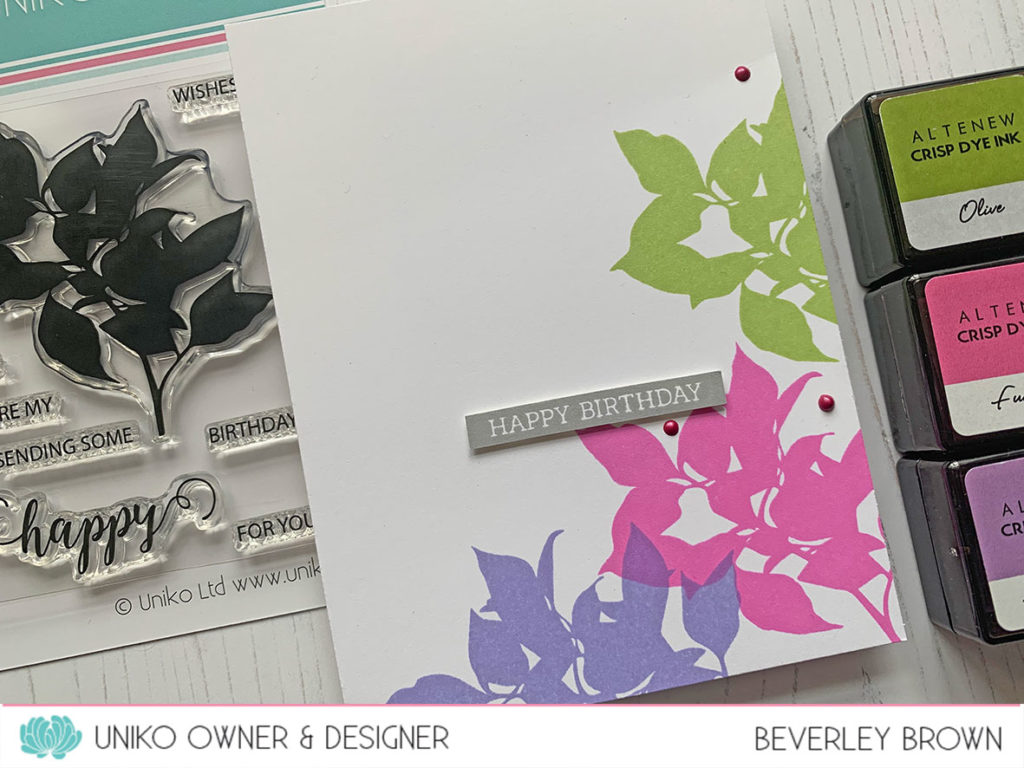
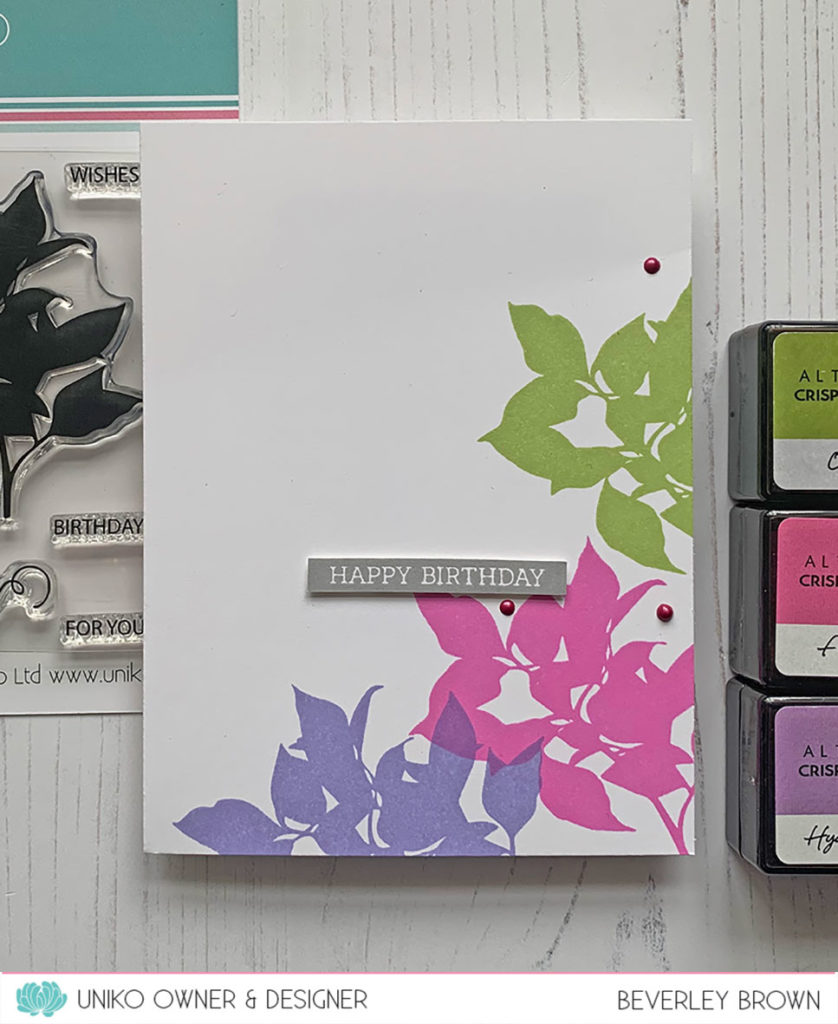
For my second card I was inspired by two challenges. Firstly CAS(E) this Sketch! HERE for the layout and for the colours Color Throwdown HERE.

Such a simple design, but I really like how the colours work together and the foliage looks so pretty.

I’ve added one of my favourite and ‘go to’ sentiments from Simply Said Blocks and also some of my favourite embellishment, Nuvo Drops to finish the card.

I hope you enjoyed all the inspiration and the hops & left some comment love along the way. I will be randomly selecting some comments left on the Introducing hops to win prizes!

Thank you for stopping by today & I hope you will come back tomorrow for the full reveal, blog hop & GIVEAWAY! All the products you have seen over the past few days will be available to purchase at 9pm GMT.

Crafty Hugs

Introducing… Spring Botanicals Tulip


Hey!
Welcome to Day 4 of the February 2020 & 8th Birthday Release product introductions. If you missed day 1, be sure to catch up HERE , for Day 2, HERE and for Day 3 HERE.

Today I am introducing the newest addition to the Spring Botanicals clear stamp set series and this time I have Tulips. This stamp set doesn’t need much of an introduction. The set follows the same format as Spring Botanicals Snowdrop & Spring Botanicals Daffodil. It features a main floral image of Tulips and some Spring time & happy sentiments in the same fonts.

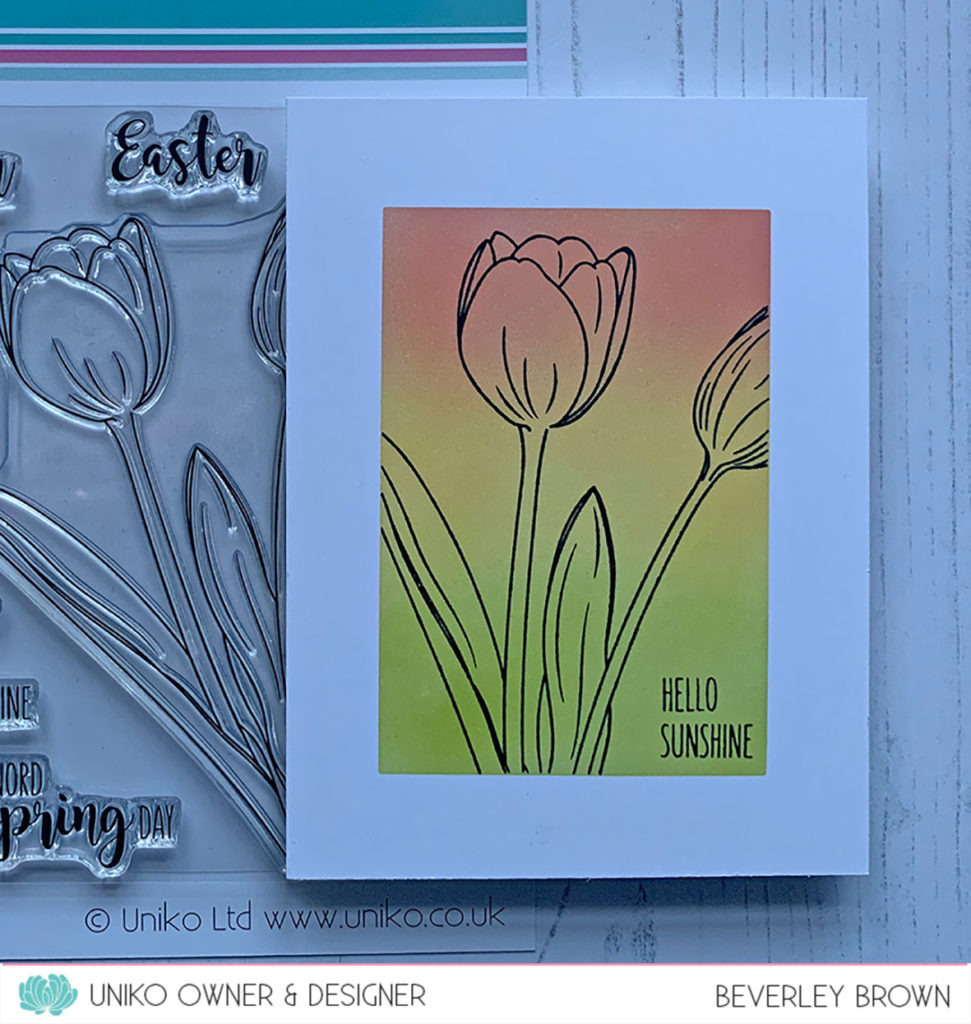
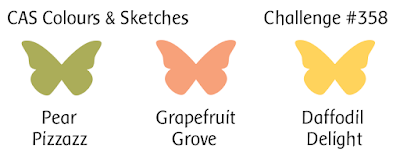
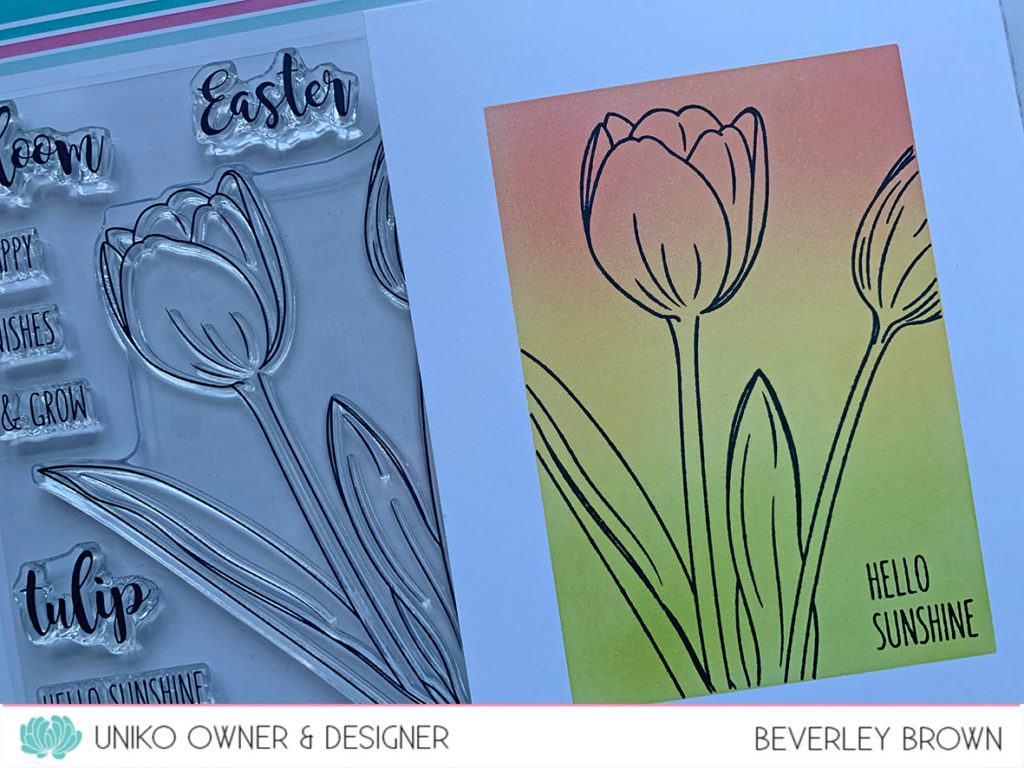
I’ve just the one card today 🙁 My mojo has been on a wander & my lack of time with it being half term and The Beans off school has not helped it! I did however find some inspiration over at CAS Colours & Sketches HERE with their colour challenge this week for my card!

I created a rectangle mask for my one layer card & blended the colours (as close as I could match) using my Taylored Expressions Blender Brushes. Then I decided to stamp the Tulips inside (using my MISTI) before removing the mask. The sentiment is also from the set and I masked & stamped it twice to break the sentiment so it would fit inside the inked section.

That’s all I have to share with you today. Be sure to hop along to Carol’s blog HERE and the rest of the Uniko Brand Ambassadors to see all their wonderful inspiration. Please leave some comment love along the way. I will be randomly selecting some comments left on the Introducing hops to win prizes!

Thank you for stopping by today & I hope you will come back tomorrow for more inspiration and the last of the product introductions.

Crafty Hugs


Introducing… Designer Dies Kindness Blooms

Hey!

Welcome to Day 3 of the February 2020 & 8th Birthday Release product introductions. If you missed day 1, be sure to catch up HERE and for Day 2, HERE.


Today we are back to introduce a collection of Designer Dies which coordinate with the previously released Kindness Blooms clear stamp set. I know I am biased, but this is such a fun stamp set, the loopy flowers are cute and adding the dies just adds to the possibilities.

Today I have a couple of cards to share with you, both are super clean & simple and I also tried to follow the challenge over at AAA Cards HERE, which Uniko is sponsoring!

For both of my cards today I have focused on the dies which coordinate with the loopy flowers. The collection of dies contains a total of 9 dies, four of which cut the flowers out. One cuts the whole flower with no detail cuts and the other cuts out the loopy details.

This first card uses the small loopy flower & it was a left over from a project for an upcoming magazine feature on the 12th March! I’ve stamped the flower and then used the detail die to cut it out.

I’ve used tiny squares of foam adhesive to attach the flower close to the corner of my card, stamped the sentiment from the set and added some of my favourite Nuvo Drops.

Next I wanted to show you how the flower dies can be used without the stamps.

Here I have used the largest flower dies. The black is die cut using the die which doesn’t cut any detail & then I have used the outline die to cut a bright pink flower to layer over the top.

Again I have used small foam adhesive to adhere the die cuts together. This time I added the stamen detail stamp to the middle, which also has its own die. I’m looking forward to playing with this as and individual die & stamp to create an awesome background!

The leaf stamped to the side is from the Kindness Blooms clear stamp set & the sentiment is from another clear stamp set we will be introducing on Saturday.

That’s all I have to share today using these new Designer Dies. I hope that you will hop on by to Carol’s blog (if you haven’t already). Don’t forget to leave some comment love, I will be randomly selecting winners to receive Uniko goodies!

Thank you for stopping by today & I hope you will come back tomorrow for more inspiration.

Crafty Hugs

Introducing… Anniversaire Arts Décoratifs & B. Builders Arts Décoratifs

Hey!
Welcome to Day 2 of the February 2020 & 8th Birthday Release product introductions. If you missed day 1, be sure to catch up HERE.


Today myself and my awesome Brand Ambassadors are back to introduce two more clear stamp sets which continue the Art Deco theme. Anniversaire Arts Décoratifs & Background Builders Arts Décoratifs. If you head on over HERE to the start of the hop I have introduced the stamp sets a little more & you will find links to all the Brand Ambassador inspiration too.

This is what I was inspired to make…

I love this scalloped design & I couldn’t wait to stamp it and create a bright & cheerful rainbow background. AND I didn’t use a stamping tool to stamp it either!

When it comes to background building strips like this, I often find it easier to use my grid block & my grid paper to stamp. I could also see the edge of the stamp when inked to line it up.

There are so many fun ways you can colour this design, I had all sorts running through my mind as I was colouring this! As you can see I finished the card off with a sentiment from Anniversaire Arts Décoratifs.

Lastly for today I wanted to make a card using just Anniversaire Arts Décoratifs. This mini clear stamp set features mainly sentiments, but I have included two accent stamp as well.

Keeping with the gold embossed look like yesterday, but switching it up to stamping on a regal purple instead of blue. The results look just as elegant too.

I love this sentiment, I think it really shouts to the recipient to enjoy & let loose on the occasion you are sending the card for. I have quite a few friends that would appreciate this sentiment & some that might take it literal too 😉

This time I added a little distress style gold embossed edges to just add a little more to the overall CAS design.

Crafty Hugs

That’s all I have to share with you today using these new stamp sets, but I know my Brand Ambassadors have so much more to show you! Next on the hop is Carol, be sure to hop along and comment along the way. I will be randomly selecting comments left this week to win some prizes!

Introducing… Alphabet Outlined & Background Blocks Arts Décoratifs

Hey!
Welcome to Day 1 of the February 2020 & 8th Birthday Release product introductions.

Hopefully you have hopped on over from HERE where I have shared a little bit more about todays clear stamp sets & you will also find the links to all the Uniko Brand Ambassador blogs.

Today we are introducing two new clear stamp sets, Alphabet Outlined AND Background Blocks Arts Décoratifs. So how about some inspiration using these new stamps.

Alphabet Outlined features such a fun modern font and I wanted to create a fun and colourful first card using the alphabet. This is what I came up with.

I’ve seen similar cards on Pinterest using alphabet stamps as flowers and I thought I would create my own version using the stem from Flower Power #6.

I love how colourful the letters spelling ‘Hello’ turned out. I used Catherine Pooler Midnight ink to stamp the letters and used Copic markers to colour them in. I have then fussy cut them out.

I stamped the stem from Flower Power #6 onto my white card base and I altered the height of them so that I could fit 5 across my 10.5 cm wide card. As some of the stems at the bottom needed to be slightly longer, I used the top part of the stem on the stamp to stamp a second time to make it longer.

I trimmed the top of my white card and adhered it to a Lime Green card base and it looks like the flowers are growing out of the grass. The letters are adhered using foam adhesive and the ‘sunshine’ sentiment is from a stamp set we are introducing later this week.

Lastly for today I have a card using Background Blocks Arts Décoratifs. This is such a fun stamp to use for a focal point, but it also works for an all over design.

One of the things I love about the Art Deco style is the gold lines, angles and geometric designs. The image below from the Collins English Dictionary, is an example of the design which inspired my stamp design and also my card using it.

I decided to create a one layer card and instead of using black, which is common in Art Deco, I reached for a Denim Blue.

I used VersaMark ink to stamp the block onto my card base & it was fairly easy to line up and create equal spaces between stamping the blocks to fill the card. I then heat embossed with WOW! Metallic Gold Rich Regular EP.

The ‘Happy Birthday’ sentiment is from a stamp set that we will be introducing tomorrow! It is designed to work with this stamp as much as the ones you will see tomorrow.

Crafty Hugs

That’s all I have to share with you today using these new stamp sets, but I know my Brand Ambassadors have so much more to show you! Next on the hop is Carol, be sure to hop along and comment along the way. I will be randomly selecting comments left this week to win some prizes!

Introducing… Hello Lovely

Happy Friday & welcome to the last of the January 2020 Release product introductions. Today I have saved the new floral addition to the Uniko clear stamp set line up till last.

So I introduce to you, Hello Lovely.

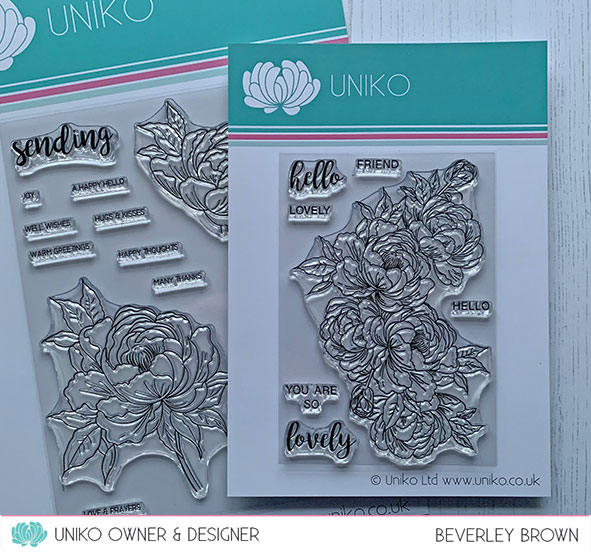
This on trend floral stamp set features a large spray of peony blooms that takes centre stage on your paper craft projects. You probably recognise the peony bloom from the previously released Pure Florals Peony. I have a little comparison to show you of the two stamp sets together side by side…

As you can see from the photo above there is quite a difference in the size of the blooms.

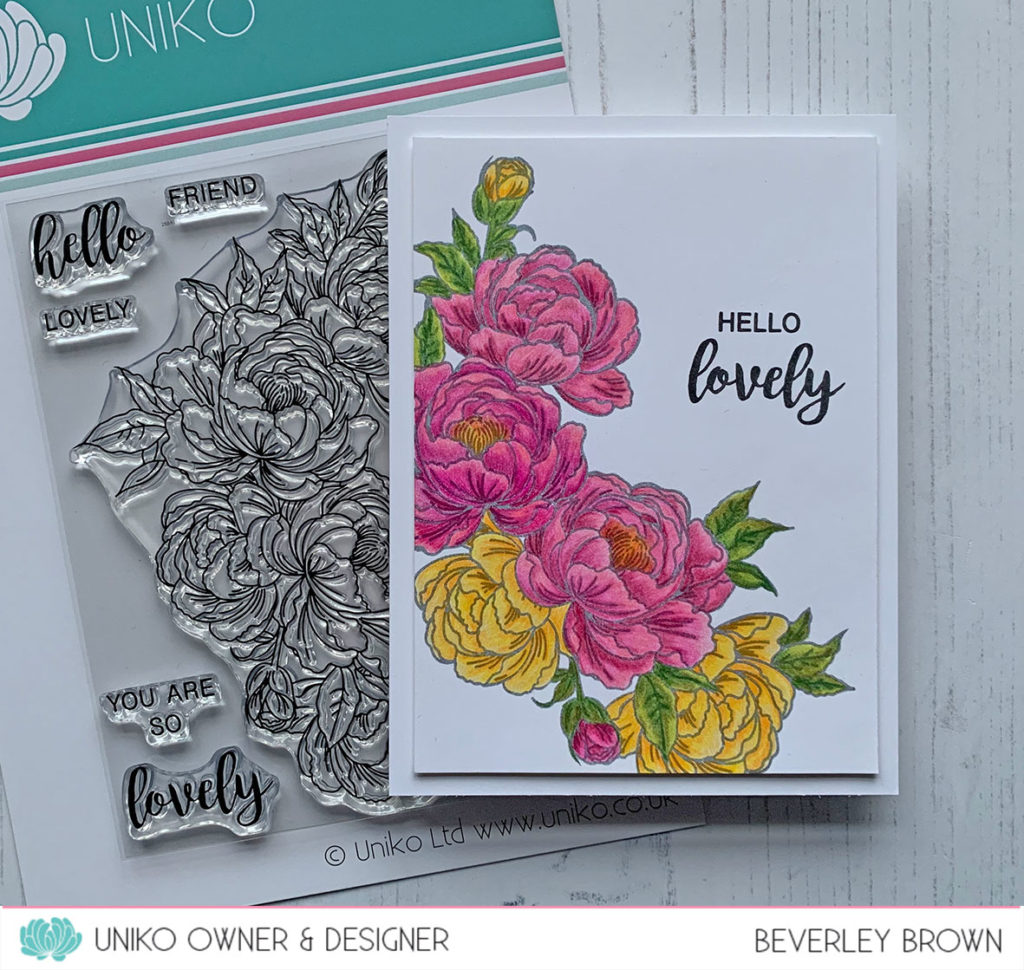
How about a look at Hello Lovely in action…

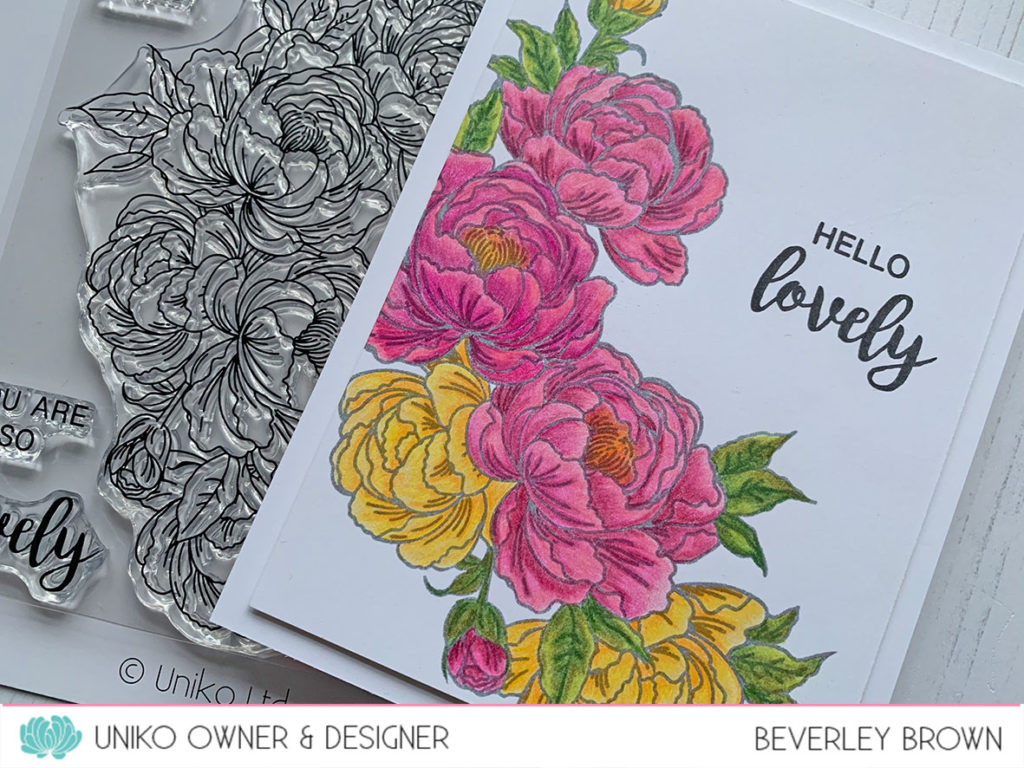
On this first card I have stamped them in Lawn Fawn River Rock ink and coloured the blooms with my Prismacolour pencils.

The sentiment is one of the mix and match options contained in the set and I am just loving these fonts.

Next I wanted to create a card to show how you don’t need to be a fan of colouring to use this stamp set.

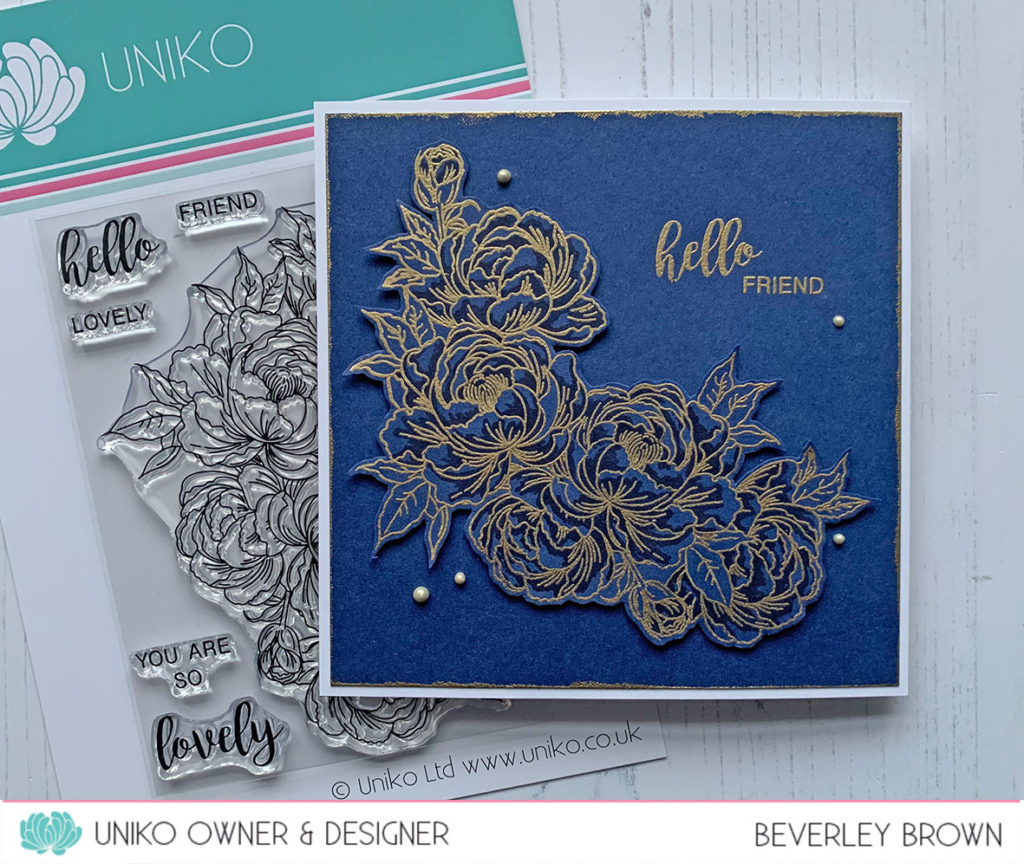
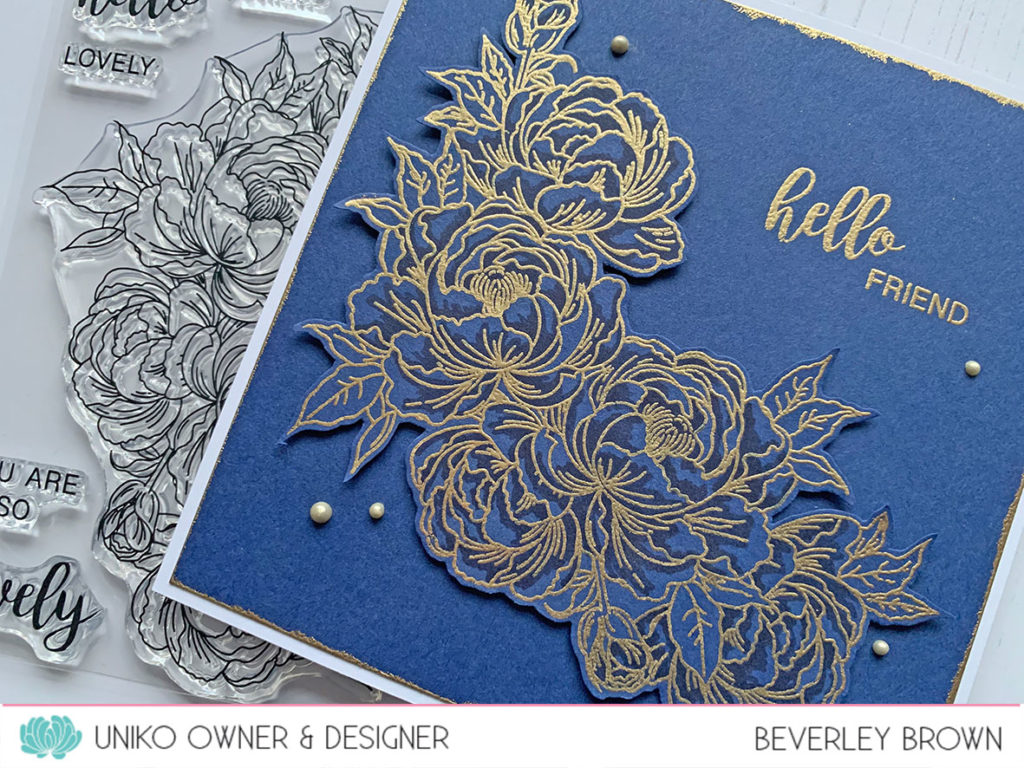
I’ve not used or touched on the Pantone colour of 2020 much yet, so I was inspired to use Stampin’ Up! Night of Navy. I stamped the peony spray with VersaMark ink and embossed with WOW Metallic Gold Rich Regular embossing powder.

Before fussy cutting the stamped image out, I did add a few lowlights to the blooms using my B99 Agate Copic marker and using the colourless blender to remove any colour that went onto the embossed lines.

Before

That is all the cards I have to share with you today, I hope you have enjoyed all the product introductions this week?

I will be back tomorrow with the Uniko Brand Ambassadors at 9am GMT for the January 2020 Reveal, Release, Brand Ambassador Blog Hop & GIVEAWAY! I hope you will join us and comment along the hop for your chance to win the ENTIRE release! All the products will be available to purchase in the store HERE too 😉

Thank you so much for stopping by today.

Crafty Hugs

Introducing… Background Blocks Scattered Hearts & Re-introducing Always & Forever

Hey!

I’m back today with one new product introduction and one re-introduction of a previously retired clear stamp set. It’s always nice when older stamp sets can make a return as trends change & they fit in nicely with new products.

I have a trio of cards to share with you today using these stamp sets and I’ve also combined another popular stamp set which coordinates beautifully with Always & Forever.

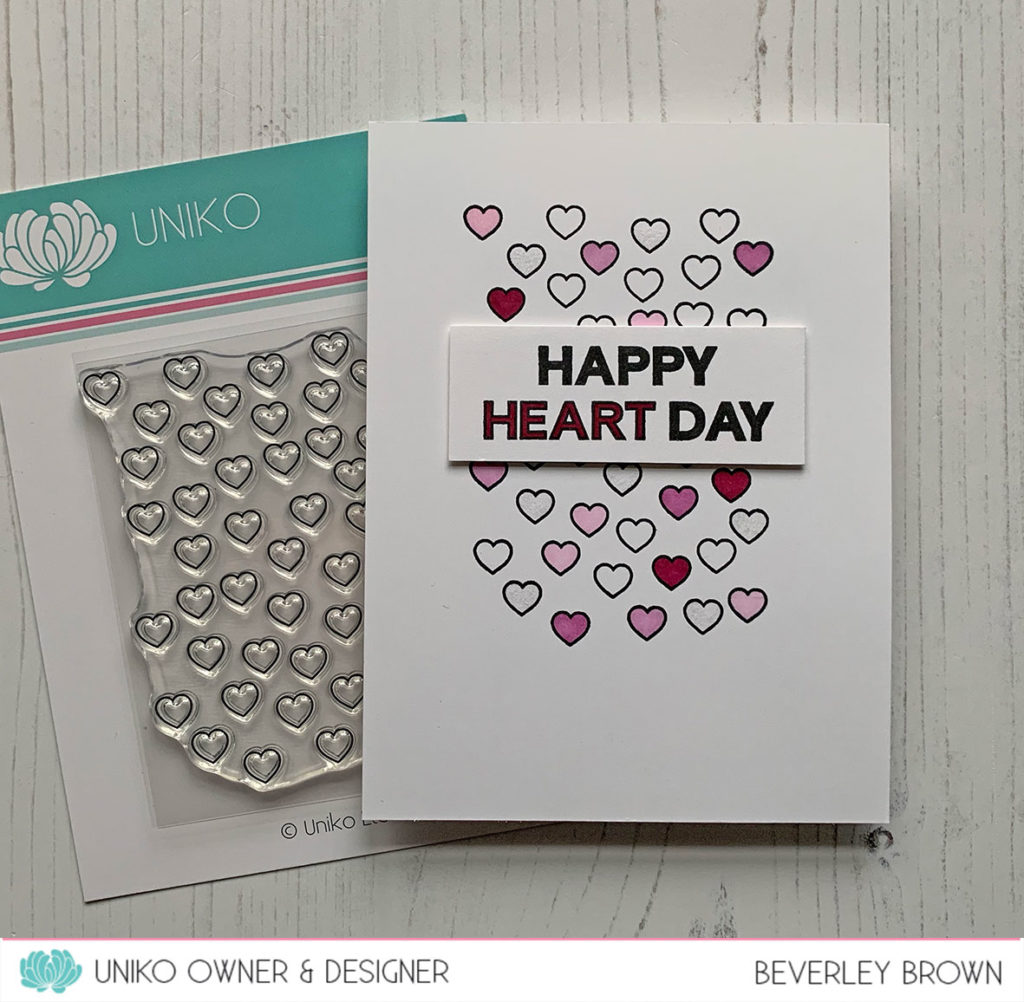
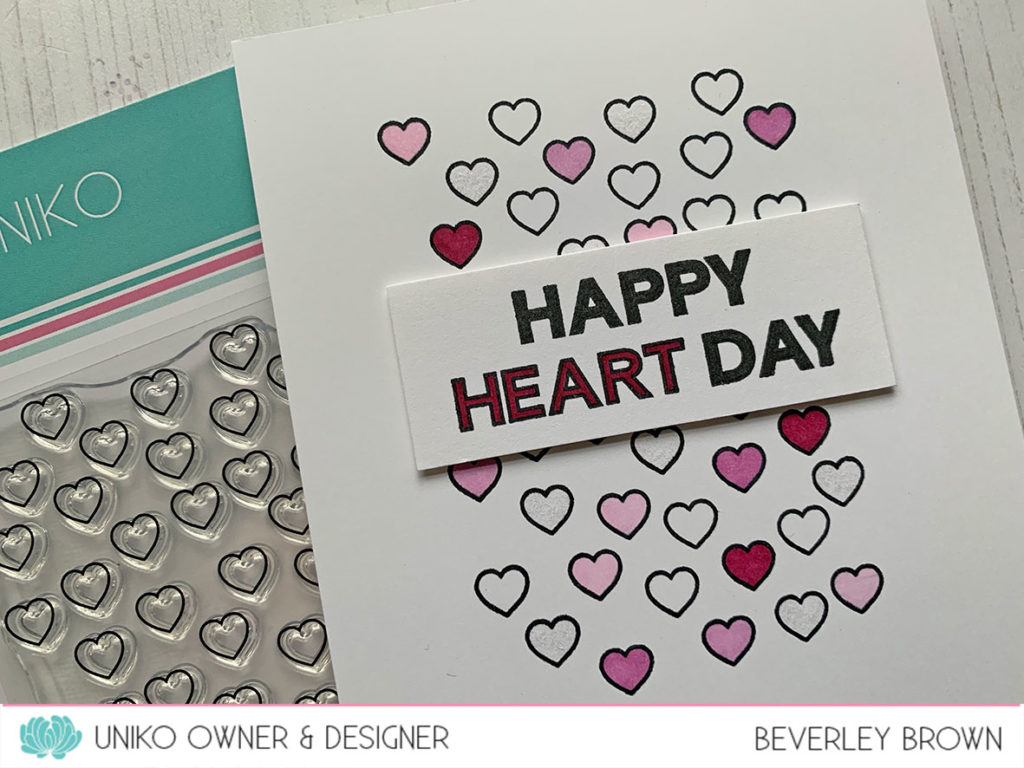
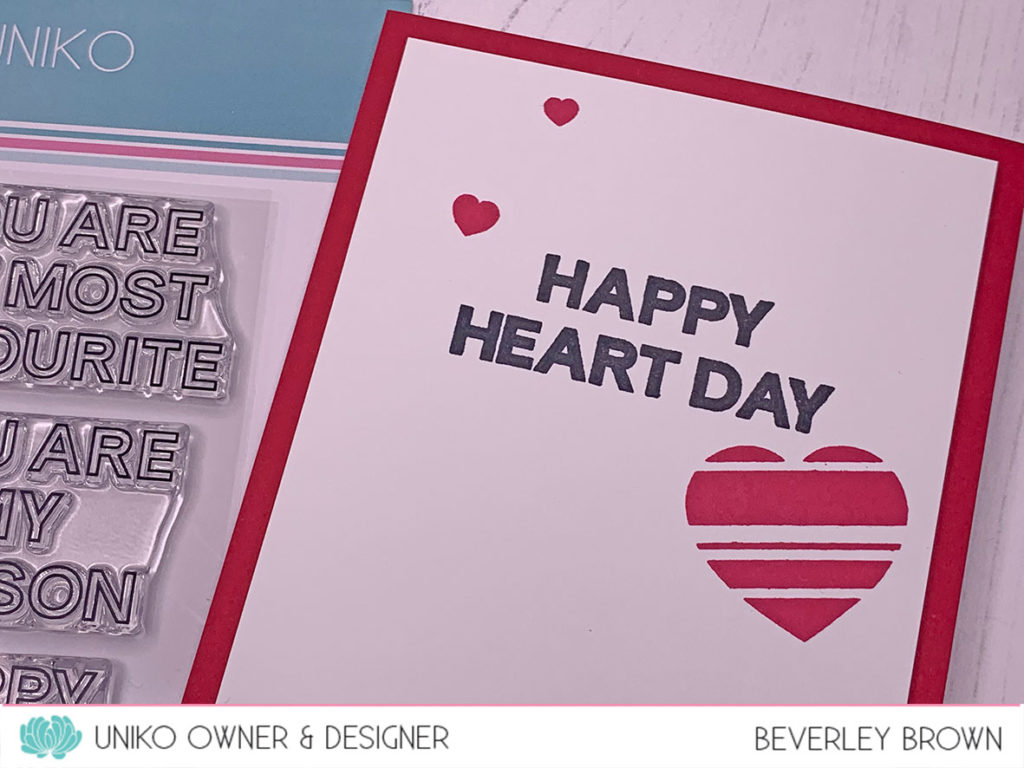
First up I have used Background Blocks Scattered Hearts combined with the ‘Happy Heart Day’ sentiment from You Are… Sentiments Outlined, which I introduced yesterday HERE.

For this card I have stamped the block as a focal image and overlaid the sentiment stamped on a simple panel raised with foam adhesive. I use 1mm thick foam adhesive as it still gives dimension, but is still mail friendly!

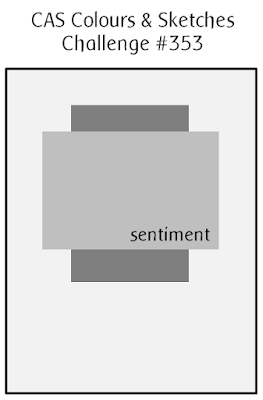
The layout of my card is from this weeks CAS Colours & Sketches challenge seen HERE and below, such a fun sketch to join in on 🙂

I used Catherine Pooler Midnight ink to stamp both the heart background and the sentiment, as this ink is alcohol marker friendly & I knew I wanted to try out some of my new Altenew Artist Markers.

I used all four markers from the Rose Petal collection to randomly colour the hearts and then I used the darkest shade Cosmic Berry to colour the ‘heart’ in the sentiment. The ‘happy’ and ‘day’ are coloured with a black fine liner. I also added some clear Wink of Stella to some of the uncoloured for some subtle sparkle.

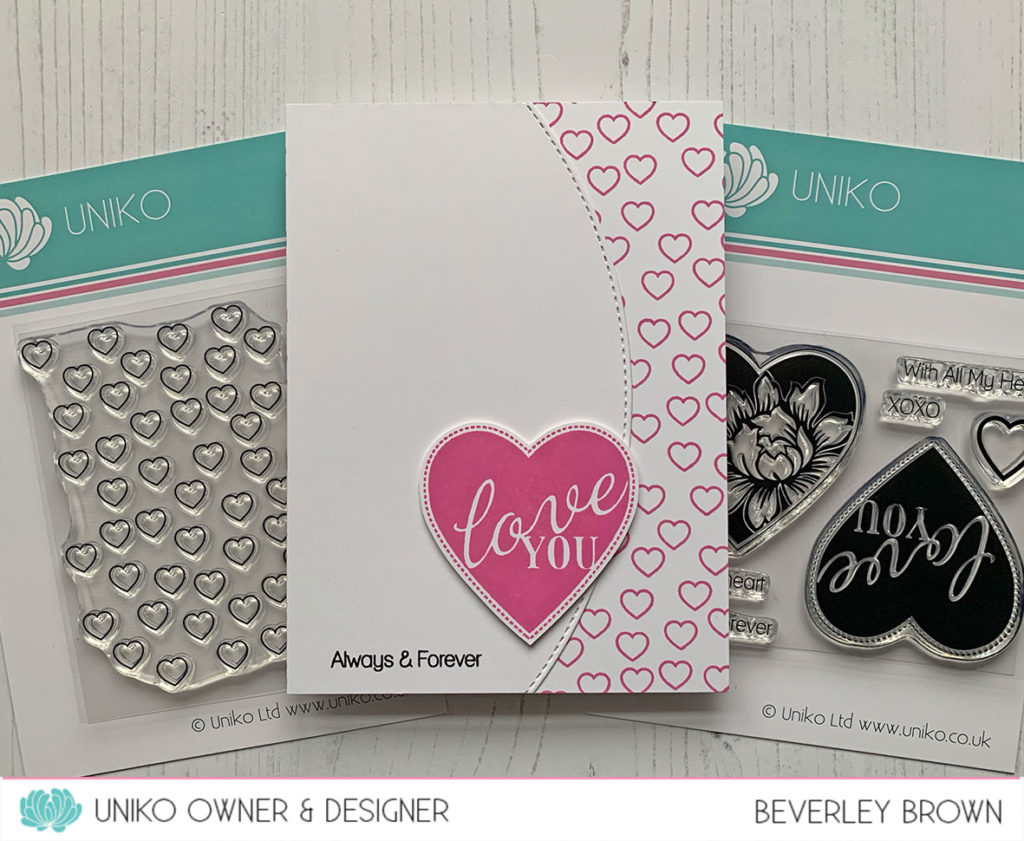
Next I decided to combine both Background Blocks Scattered Hearts with Always & Forever.

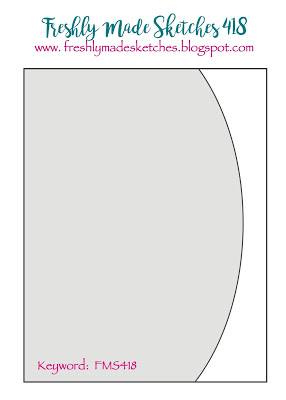
This card layout was inspired by the new sketch over at Freshly Made Sketches this week seen HERE and below.

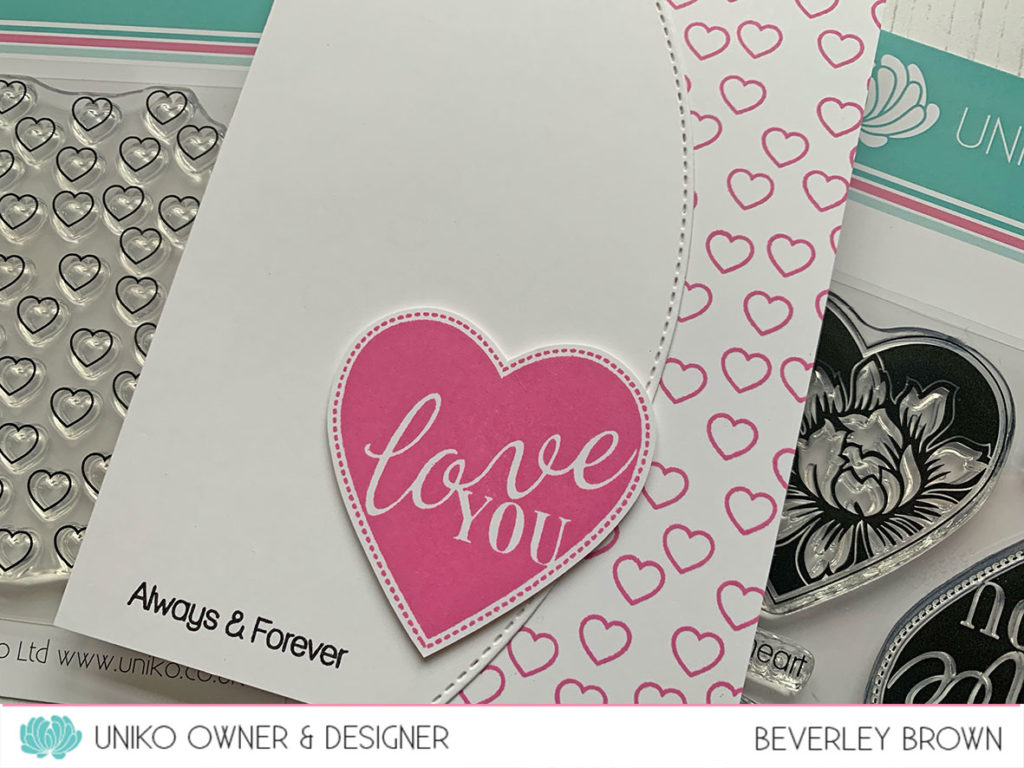
When stamping the Background Blocks Scattered Hearts, it is possible to stamp it so that you can fill a larger area, like I have on this card.

I’ve used a stitched border die (MFT, I think) to die cut the curved panel and I have stamped the ‘Always & Forever’ sentiment in black ink. The ‘Love You’ heart is stamped, fussy cut and adhered using 1mm thick foam adhesive.

Lastly for today I wanted to create a card using Always & Forever and a stamp set it coordinates with, Beautiful Blooms I.

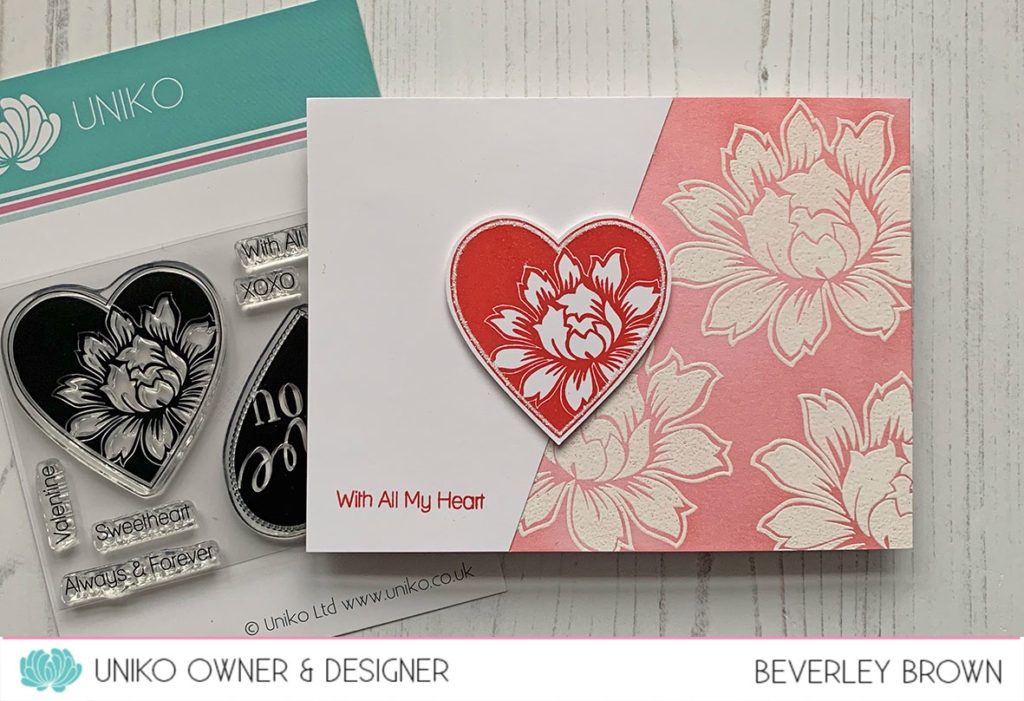
As you can see the floral heart from Always & Forever features the Beautiful Blooms I flower.

From the very beginning of Uniko, I have always tried to design Uniko stamps so that they can be used together for more creative options.

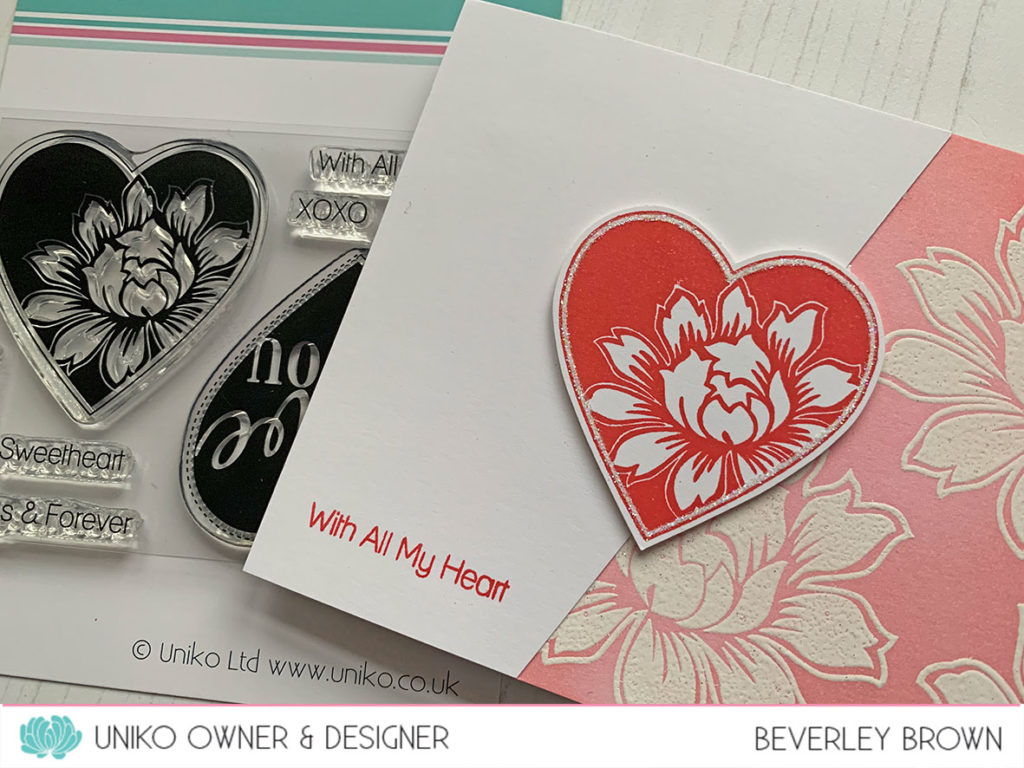
On this card I have stamped the largest Beautiful Bloom onto my base card with VersaMark ink and heat embossed with detail white embossing powder. I’ve then ink blended a pink over the top. The red Beautiful Bloom heart is stamped, fussy cut & adhered with foam adhesive. I’ve added a small line of glitter around the edge of the heart using a quickie glue pen and fine glitter.

That is all the cards I have to share with you today, I will be back tomorrow with one more product introduction. All of the new stamps will be available on Saturday 18th January at 9am GMT.

Thank you so much for stopping by today & I do hope you will come back tomorrow.

Crafty Hugs

Introducing… BIG & BOLD Love & You Are… Sentiments Outlined

Hey & Happy Hump Day!

I’m here to brighten your Wednesday with the first of the January 2020 Release introductions – yay! Today I have two mini clear stamp sets to introduce, BIG & BOLD Love and You Are… Sentiments Outlined. Both these sets are new additions to the popular BIG & BOLD series and the Sentiments Outlined series.

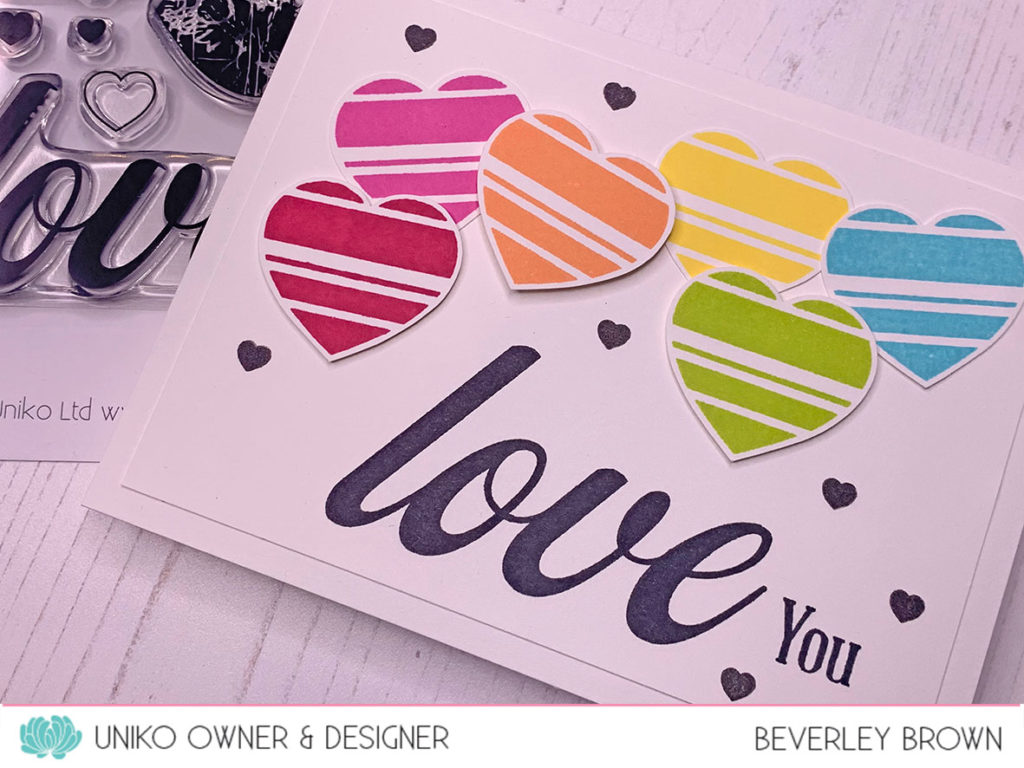
How about some inspiration using these new stamps. First up I got all rainbow inky with BIG & BOLD Love…

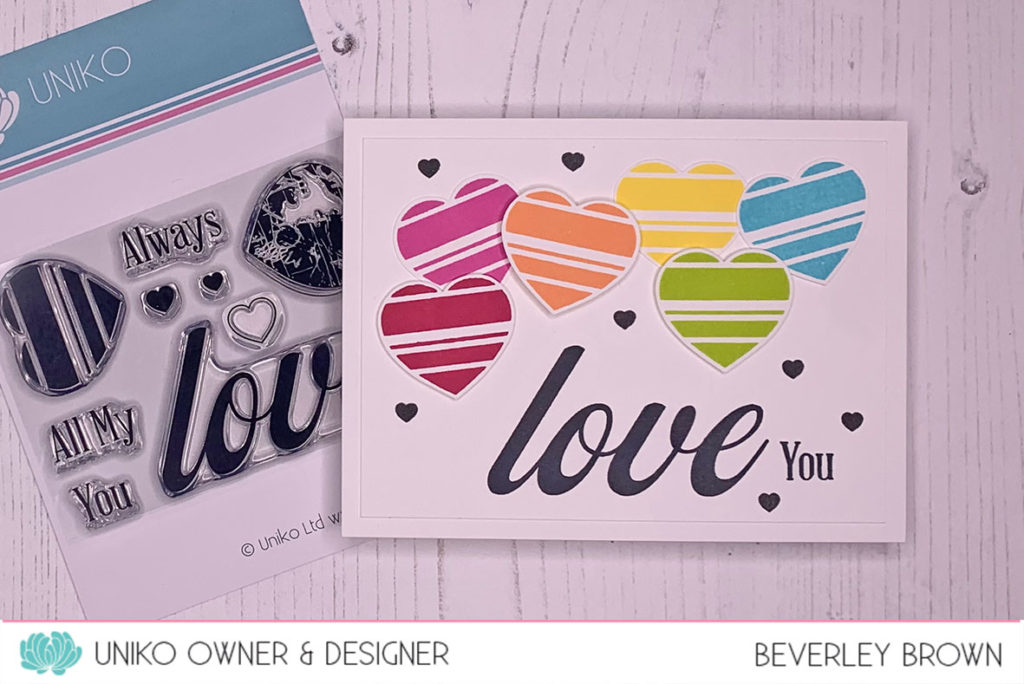
Like all of the BIG & BOLD stamp sets, the set features a beautiful bold word, smaller accompanying sentiments and accent image stamps. For this first card I wanted to go for a rainbow theme to really show off the fun striped heart image.

I’ve used a variety of Altenew inks to stamp the hearts before fussy cutting them out and adhering them to the card. I used two depths of foam adhesive to adhere the orange heart and just one to add the lime green heart.

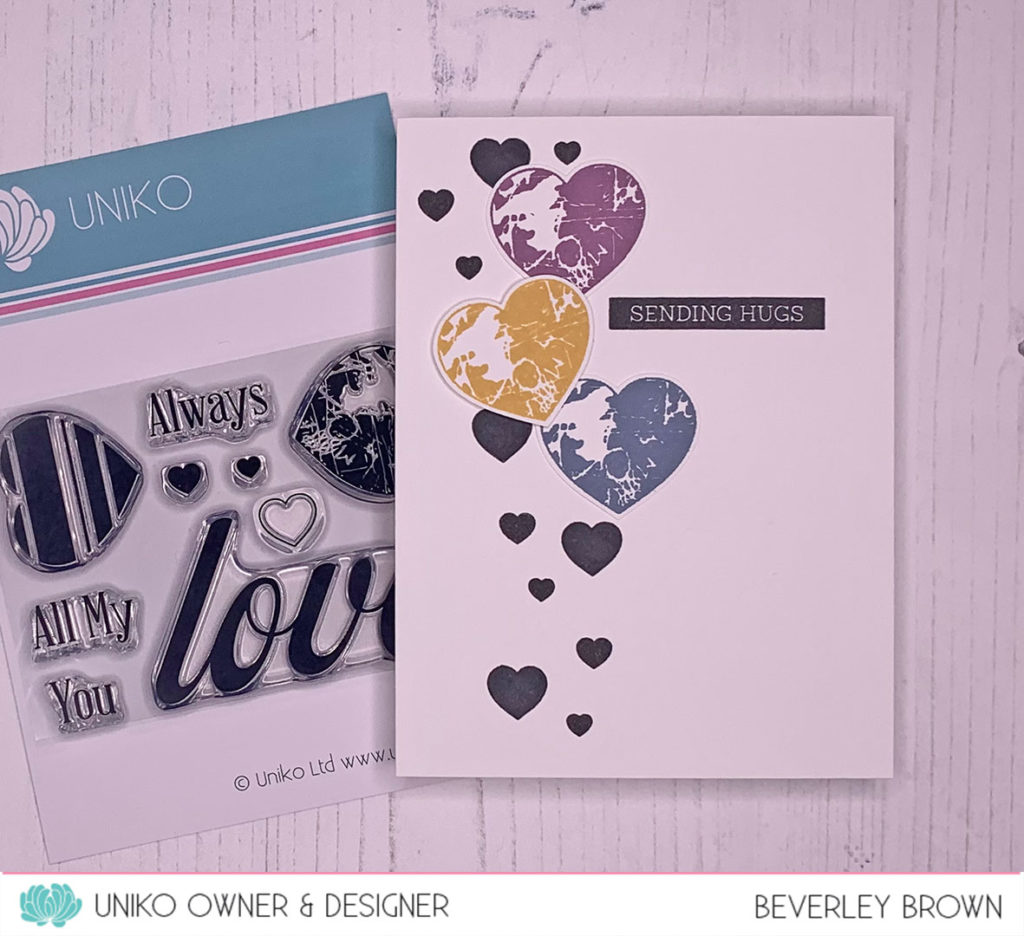
Next I went for a one layer card with a more muted colour palette…

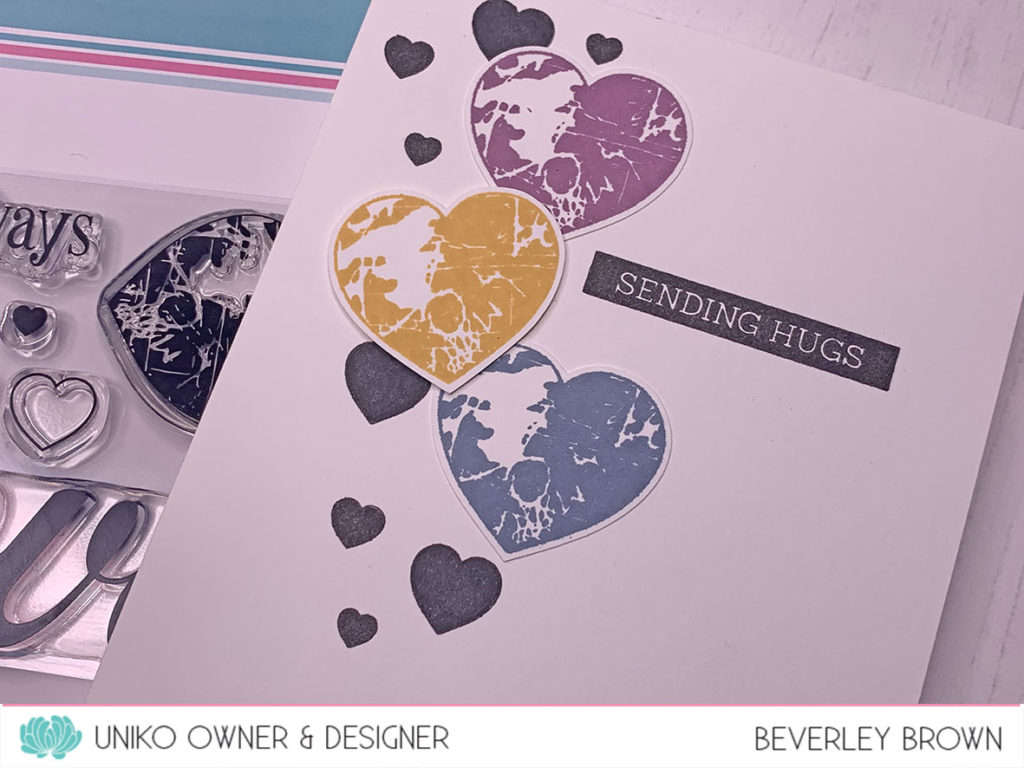
This time I used the graffiti style heart image and used three new Altenew colours Amethyst, Pumpkin Pie and Nimbus. I used all 3 sizes of the smaller hearts, colouring in the largest small heart once stamped with a fine liner. The sentiment is from Simply Said Blocks II.

The second stamp set I am introducing today is You Are… Sentiments Outlined. I love this style of focal sentiment and having had requests for one of the sentiments contained in the set it was a no brainer to release another set 😉

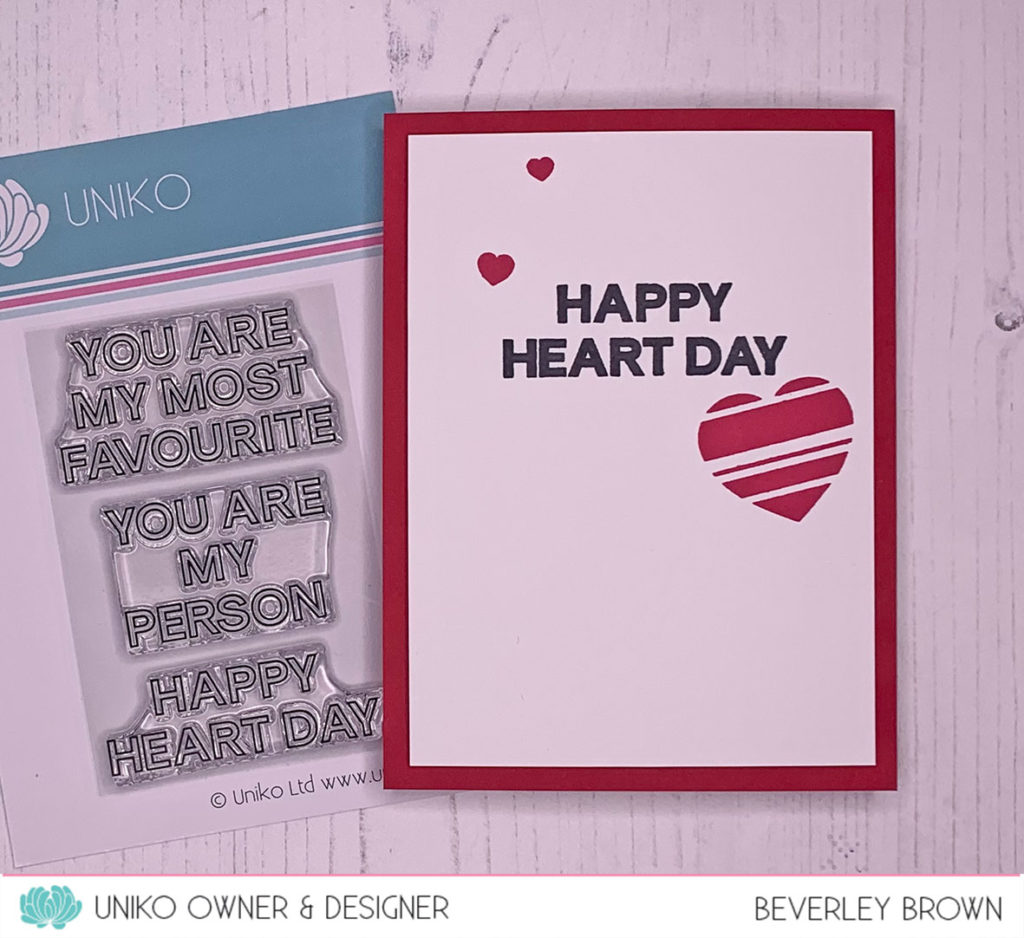
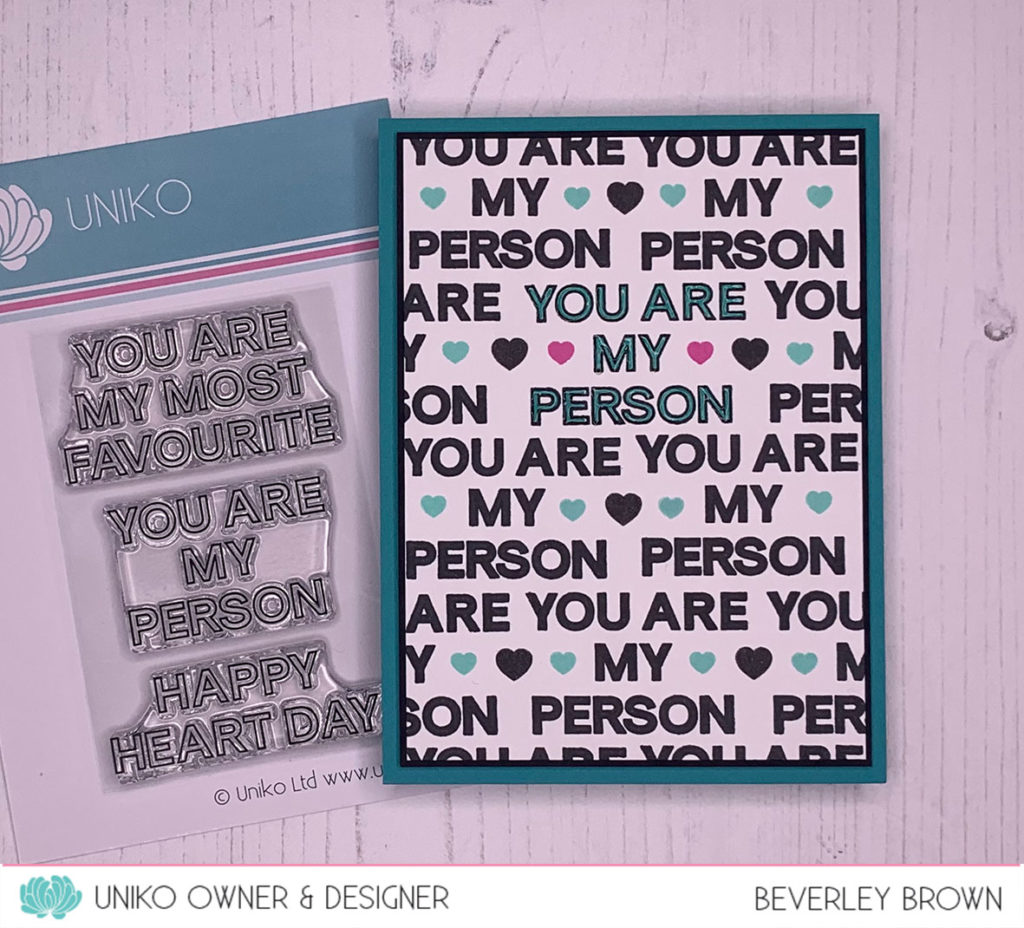
As you can see from the photo, there are three sentiments in the set. For this first card I have used ‘Happy Heart Day’. This is such a good sentiment for Valentine’s Day to make loved themed cards for friends & family without it being a ‘traditional’ Valentine’s card.

On this design I have stamped the sentiment in black ink and then coloured it in with a black fine liner. In hindsight I wished I had coloured the word heart in red ink. I’ve used the striped heart and the two small solid hearts from BIG & BOLD Love to accent the sentiment to create a super CAS design.

Lastly for today I had to make my ‘signature’ card for this style of sentiment. AND yes, I am a Grey’s Anatomy fan and I have been watching them far to much again and from season one – LOL!

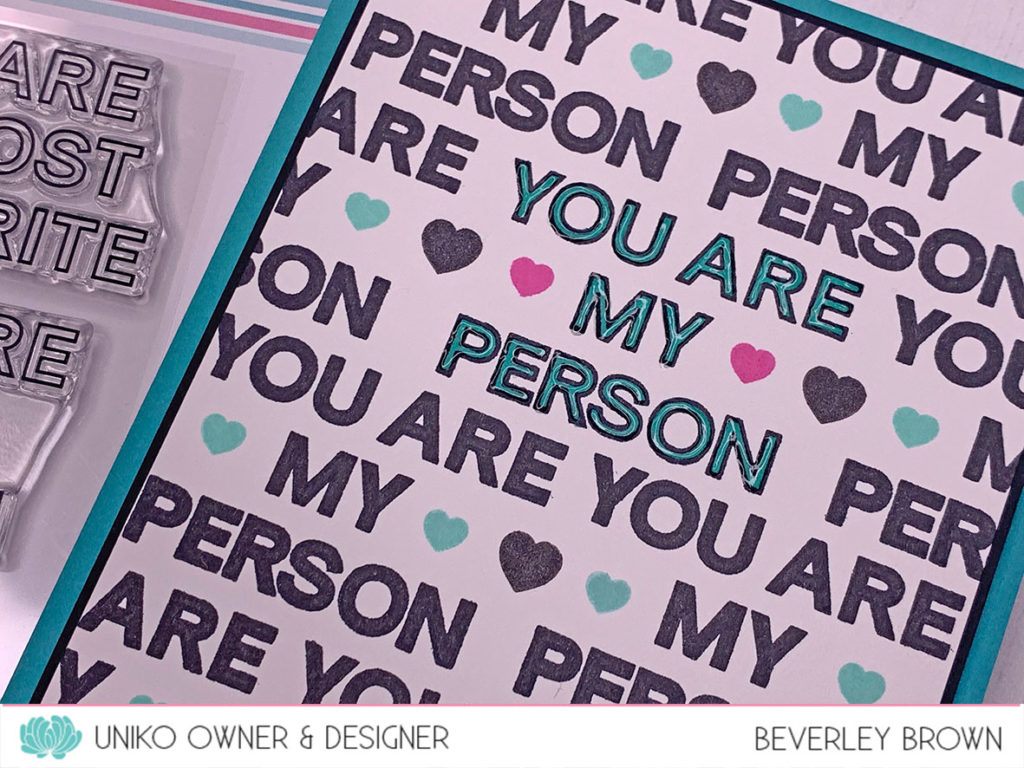
As you can see I have repeat stamped the sentiment to create a fun background. I have coloured all but the top centre sentiment in black fine liner and used an Altenew alcohol marker in Emerald to colour the focal sentiment.

My thinking behind it all is that the coloured sentiment represents the person you are sending the card to, highlighting them from all the ‘people’ around them represented by the black coloured sentiments! That’s just where my creativity comes from sometimes – ha!

With the shape of the sentiment layout, the repeated design left some gaps which I have filled with some stamped accent hearts from BIG & BOLD Love. I also added some clear Nuvo Drops to the coloured sentiment to make it stand out a little more.

That is all the cards I have to share with you today, I will be back tomorrow with more product introductions. All of the new stamps will be available on Saturday 18th January at 9am GMT.

Thank you so much for stopping by today & I do hope you will come back tomorrow.

Crafty Hugs

Introducing… WILD and Animal Print Stencils

Hey!

Welcome to Day 4 and the last of the July 2019 Release product introductions.

Hopefully you have hopped on over from our lovely Guest Designer Keren’s blog HERE. If you missed the start of the hop and introduction to todays products, you can catch up HEREToday we are introducing a clear stamp set called Wild and 3 Animal Print Stencils, Giraffe, Tiger & Zebra.

My apologies for my tardiness, I am blaming the heatwave here in the UK for my lack of organisation and for zapping my mojo!

Anyway, enough of that, how about some more cards using some of todays products…


July19intro16

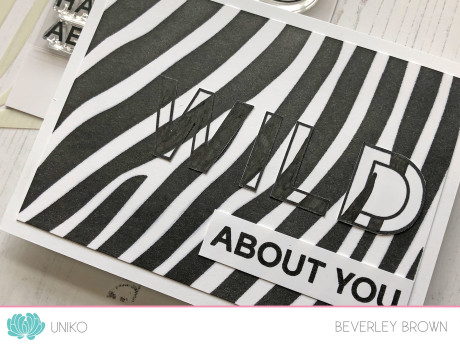
How about a little Zebra camouflage?  This stencil is so easy and fun to use and this card was super quick to make. I used Catherine Pooler Midnight ink to colour through the stencil, but be aware that you will need an ink cleaner to clean the stencil afterwards.

July19intro16a

For the sentiment I stamped the WILD and fussy cut the letters out. Once I had adhered them to the card I placed the stencil over the top and traced where the stencil would have been inked. I then used a fine liner to full the areas in. Such a fun camouflage effect.

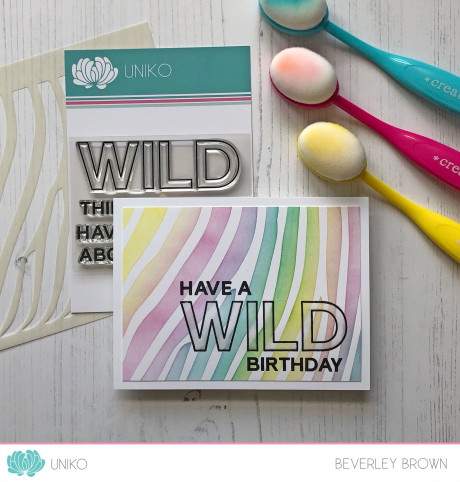
I had so much fun with the Zebra stencil and I couldn’t wait to use it rainbow style!

July19intro14

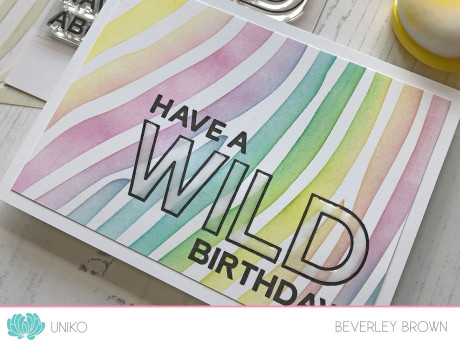
I used Altenew inks for this and my new Tailored Expressions Blender Brushes and I achieved this soft beautiful rainbow Zebra print 🙂

July19intro14a

After I stamped the sentiment I added some clear Nuvo Drops to the WILD sentiment for a bit of shimmer and interest.

Lastly I had to create an idea that came to me when I designed the WILD clear stamp set…

July19intro15

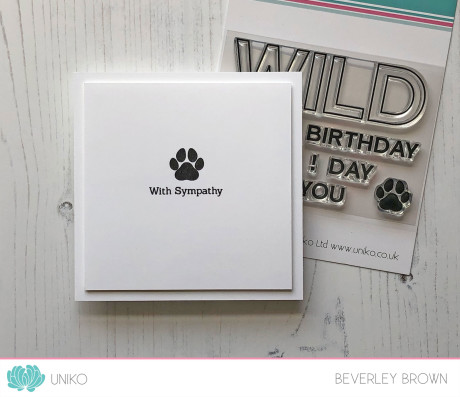
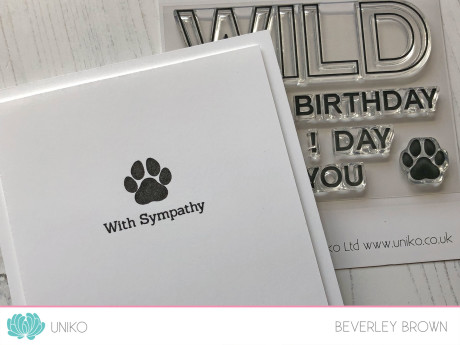
Sometimes you just need a quick clean and simple idea to let someone know that you are thinking about them when they have lost a furry companion. The little paw print in the set paired with the With Sympathy from Simply Said is perfect.

July19intro15a

That’s all I have for today, but as usual my AWESOME Design Team and wonderful Guest Designer this month, Keren Baker have worked their magic with today’s products, so be sure to hop along & see them…

Sarah P

Wiebke 

WOW!

That was a phenomenal inspirational hop, so many creative designs and ways to use this new clear stamp set and stencils.

I hope you enjoyed it and you will join us again tomorrow for the full reveal, Design Team Blog Hop & GIVEAWAY and all the products will be available to purchase at 9pm BST.

Hugs