Cards (Page 2)

Celebrating 12 Years – Introducing… Ink & Flip Geometric Heart Layering Stencil

Happy Wednesday & Happy Valentine’s Day šŸ’–
Welcome to Day 1 of the 12th Birthday/February Release product introductions. This release we are adding to Uniko’s ever popular Mid Century Modern Collection, along with our unique Ink & Flip Stencil series.

With it being Happy Heart Day, I couldn’t resist kicking the introductions off with this fun two layer Ink & Flip Stencil. 

Introducing… Ink & Flip Geometric Heart Layering Stencil. So let’s have a look at the stencil in action…

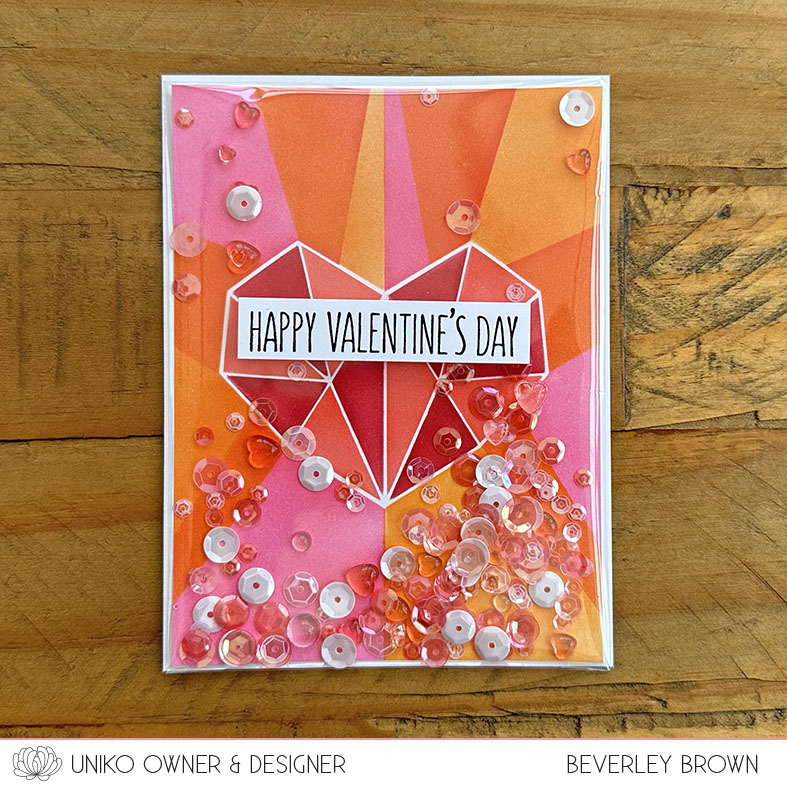
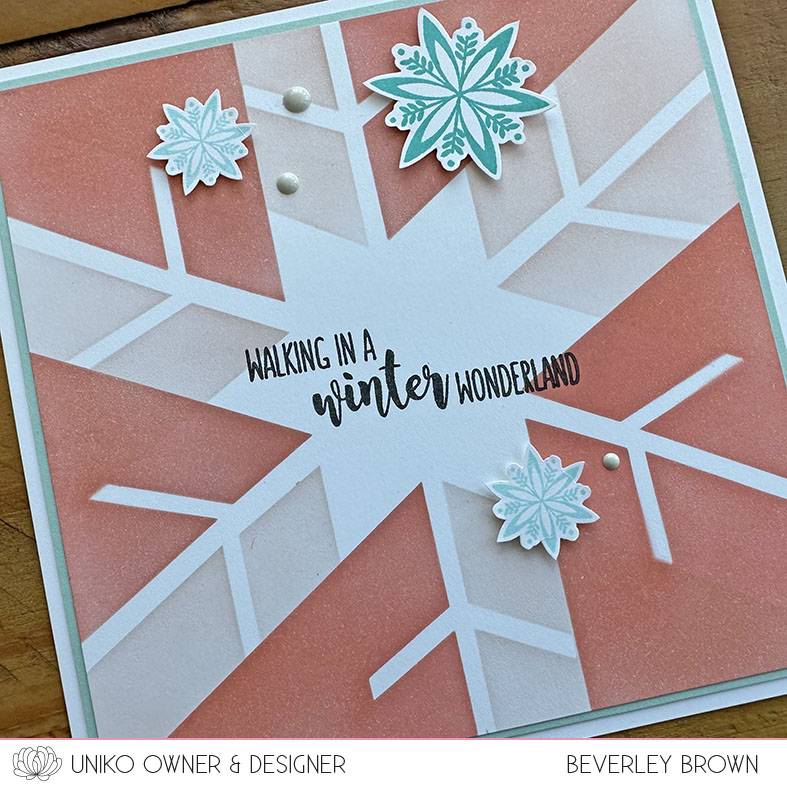
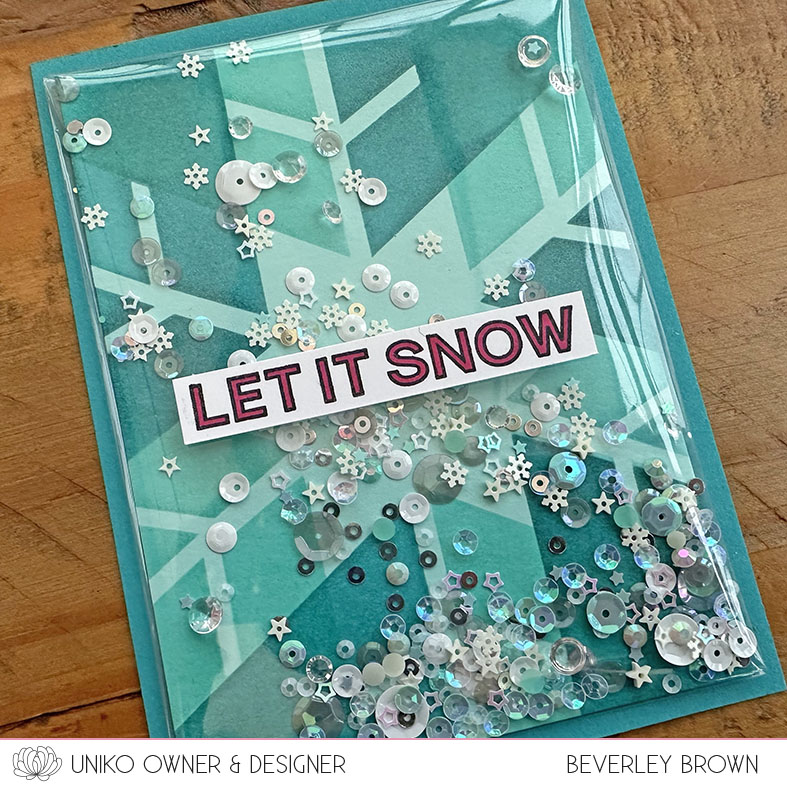
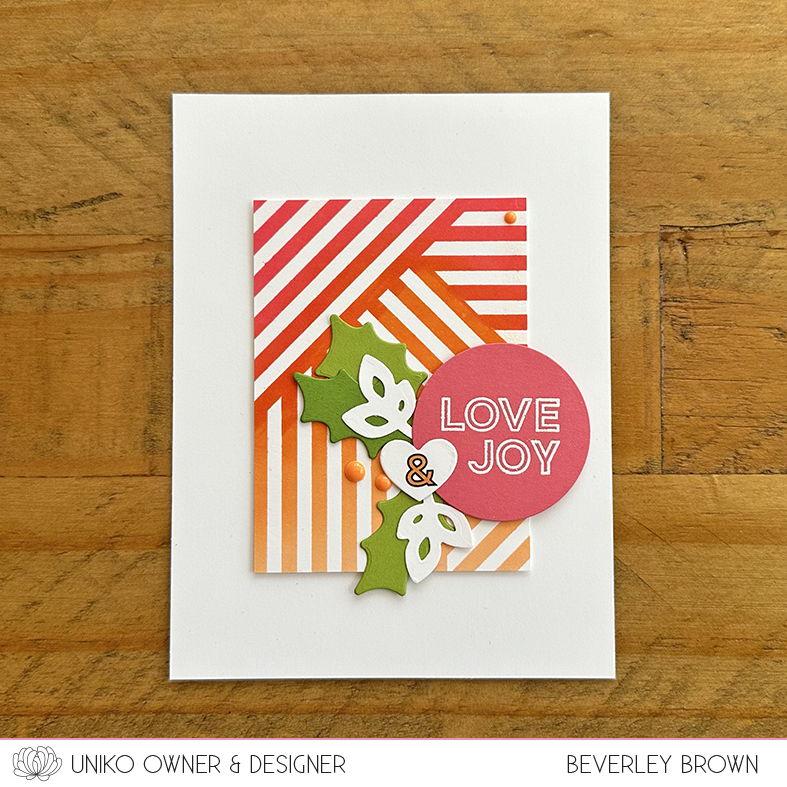
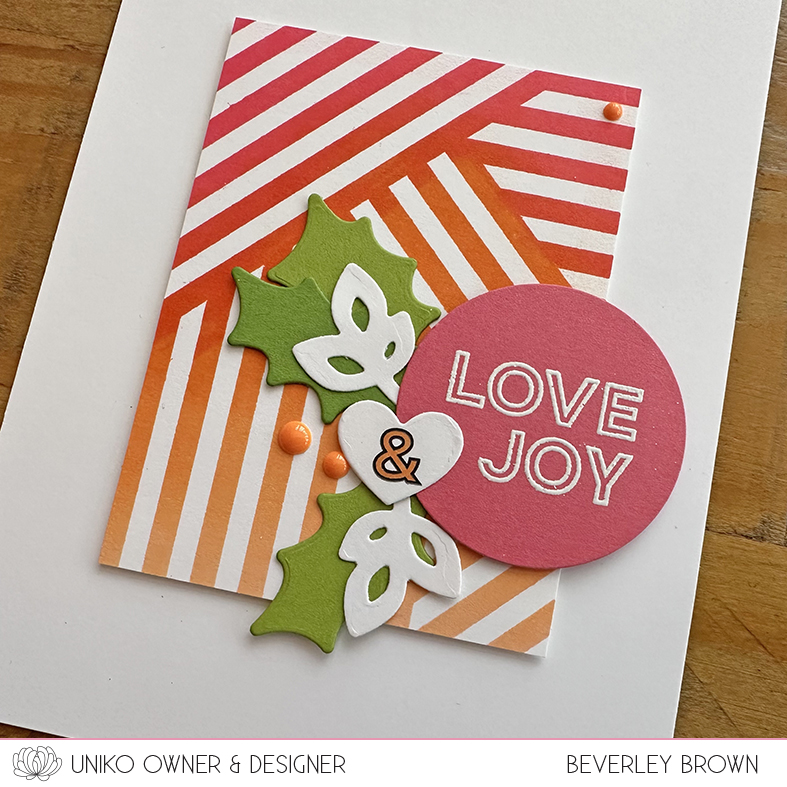
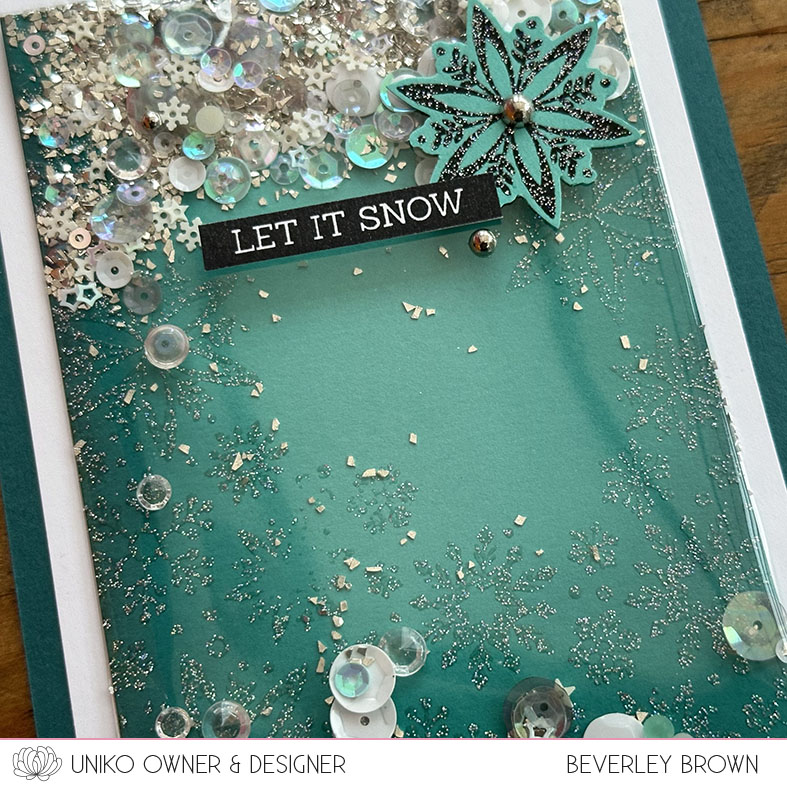
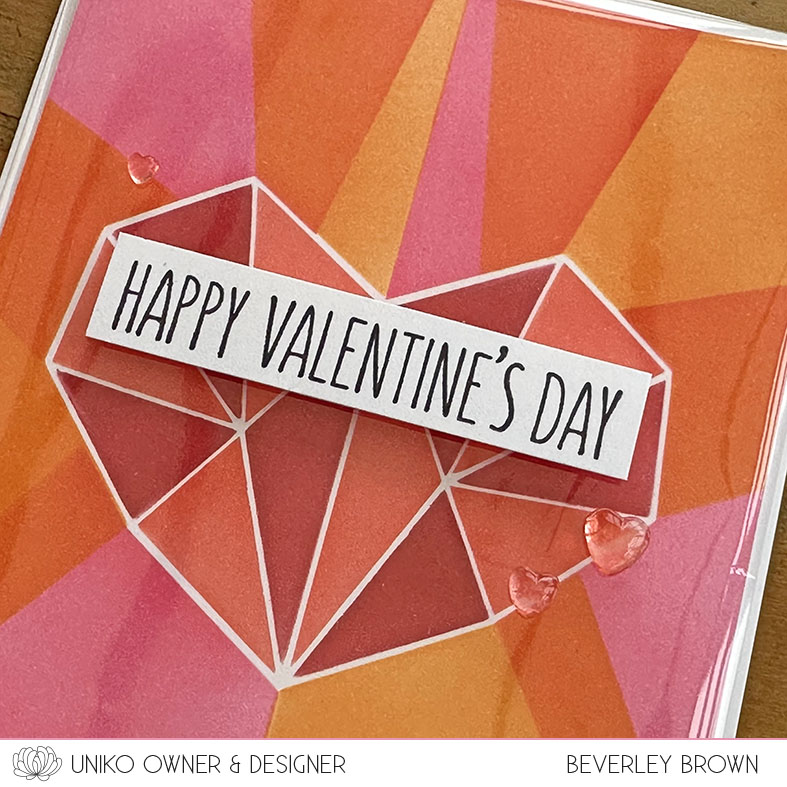
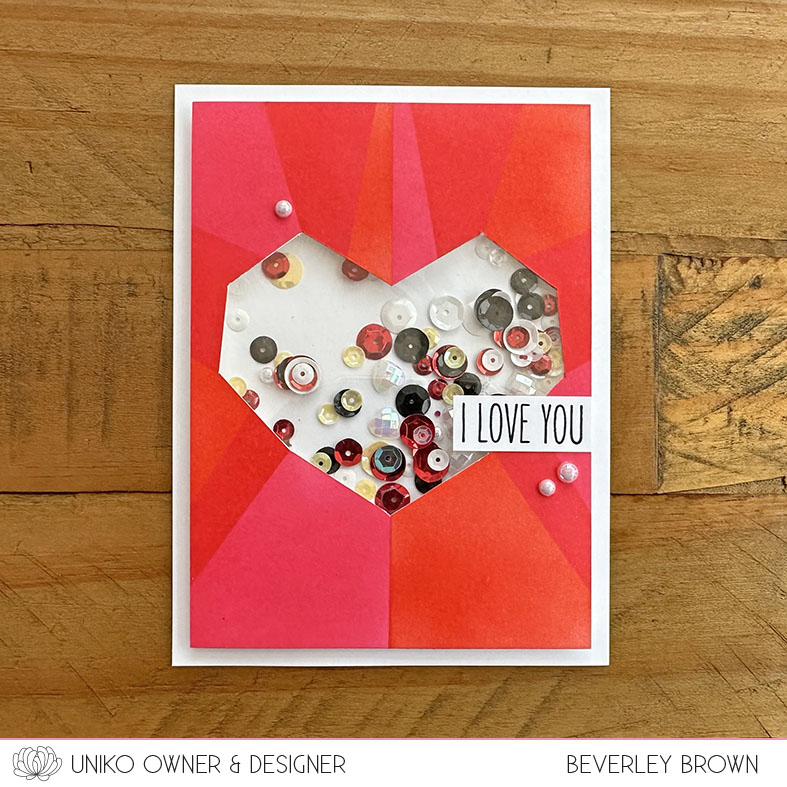
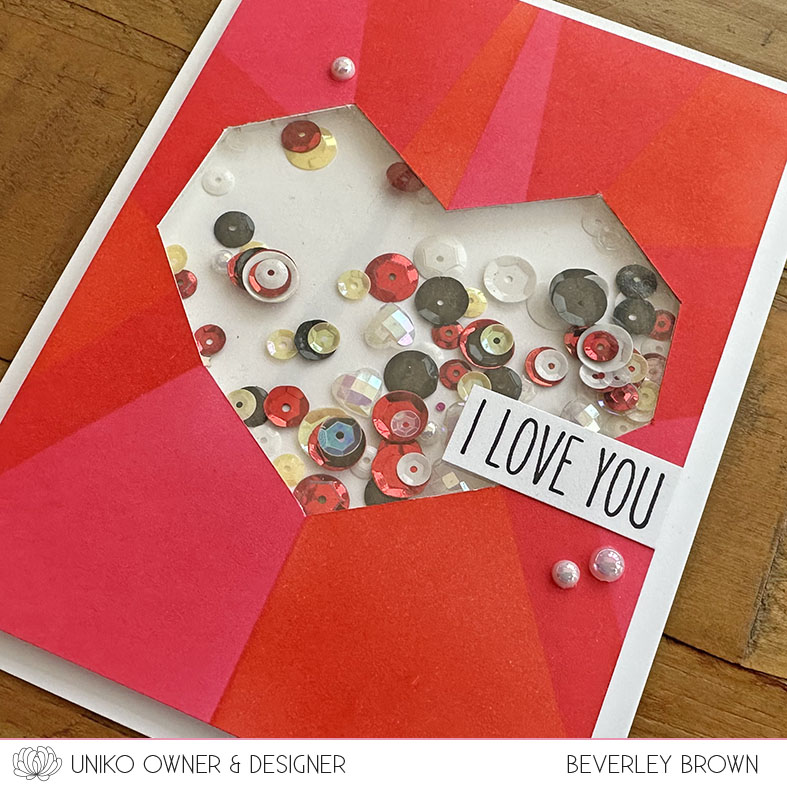
I started off with one of my current favourite things, a full shaker card! They are just so fun, so much easier and quicker that the window style shakers.

Now this new Ink & Flip stencil comes in two layers, to understand this stencil visually I recommend watching my video introduction HERE.

I started with the background layer of the stencils, using Honeysuckle and then Marmalade ink.

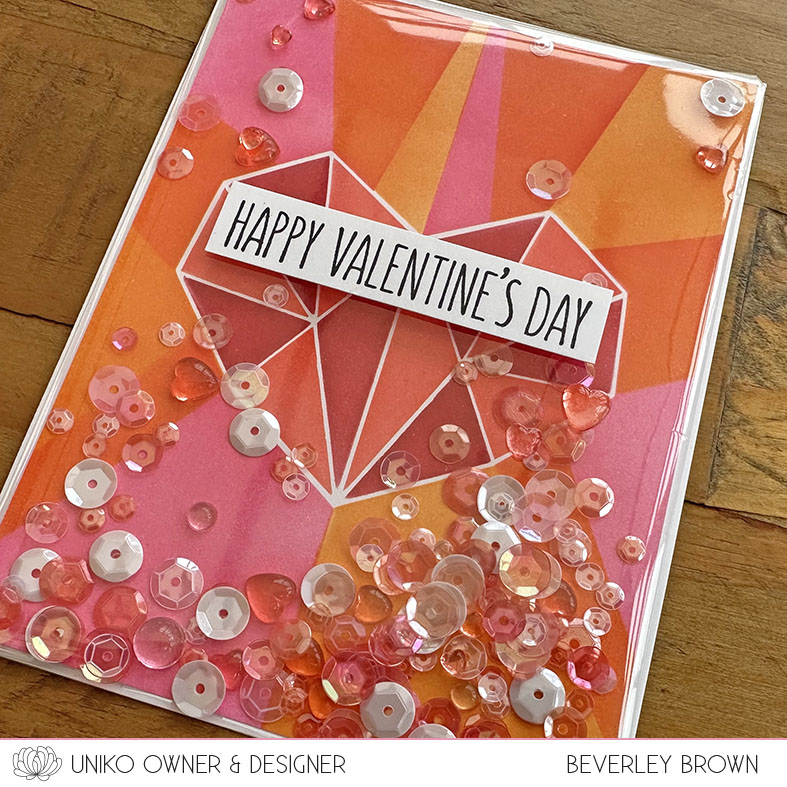
I then added the geometric heart image using the second stencil layer. This time using Poppy and Cranberry inks. Once all the stencilling was done I created my shaker, finishing off with a sentiment from Everyday Love Sentiments and some heart dew drop embellishments.

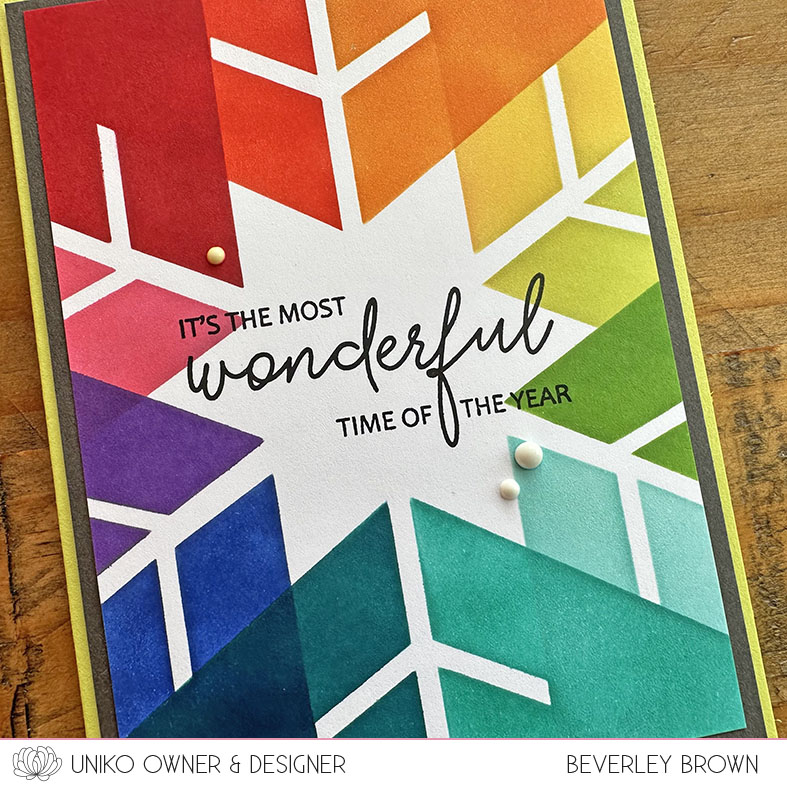
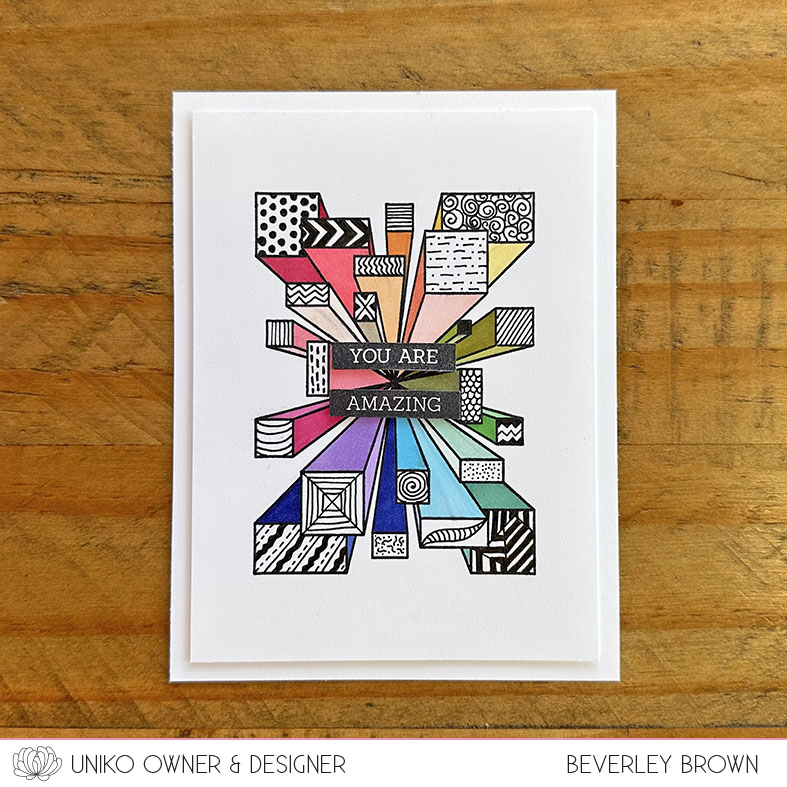
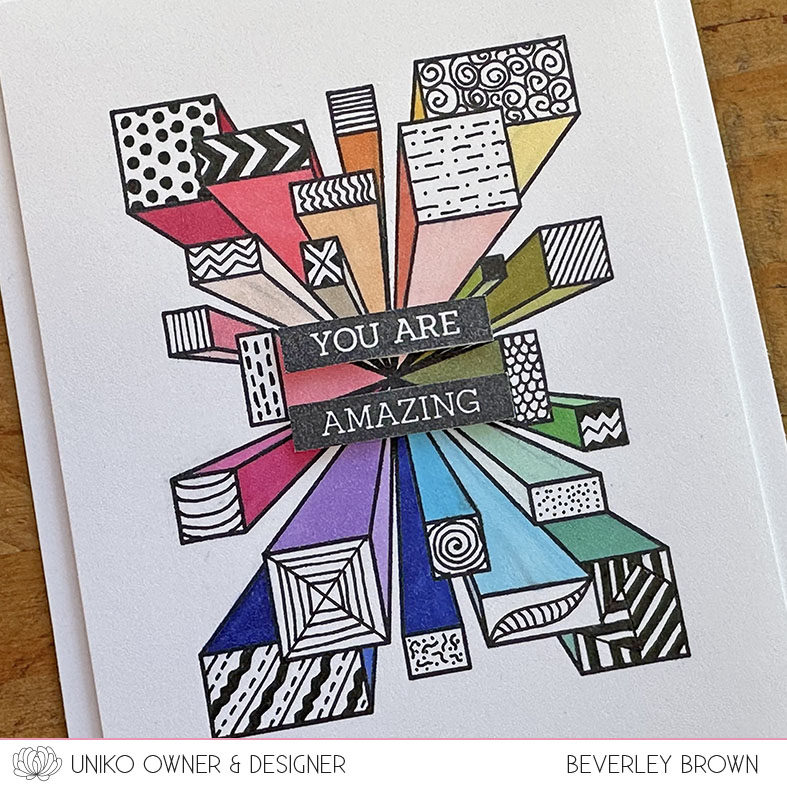
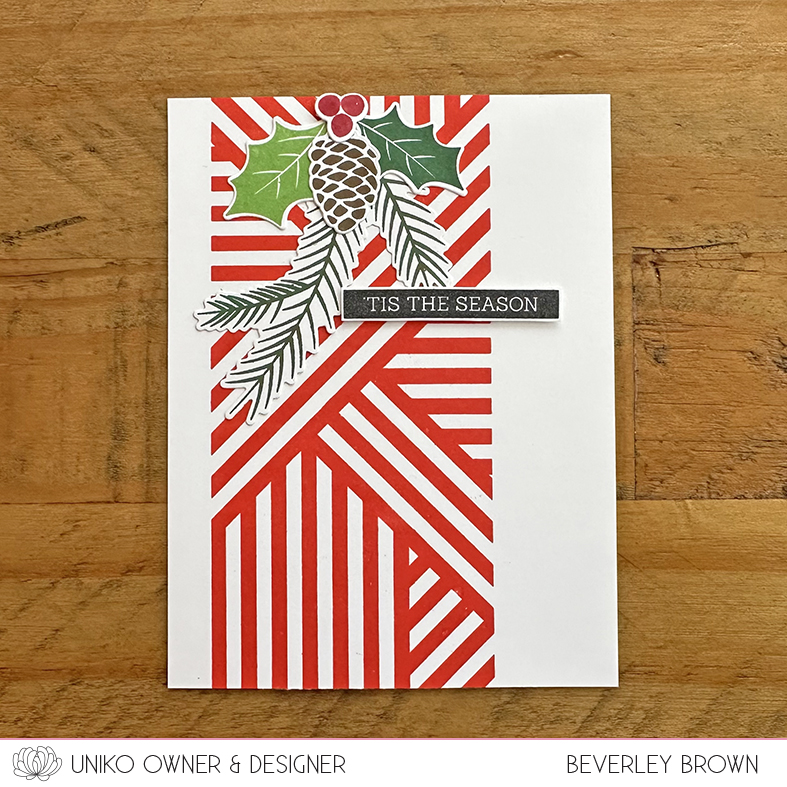
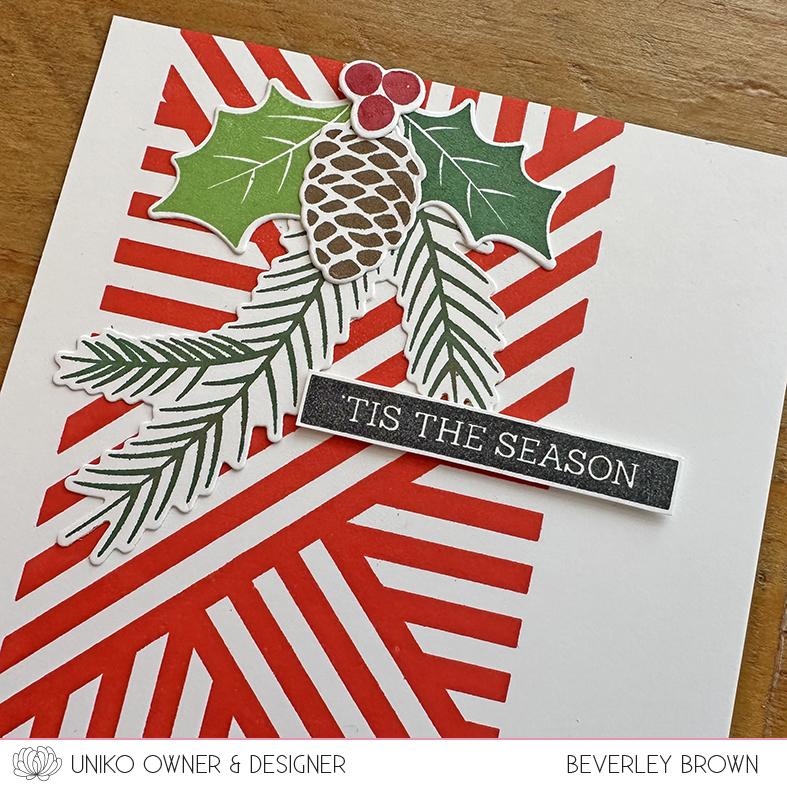
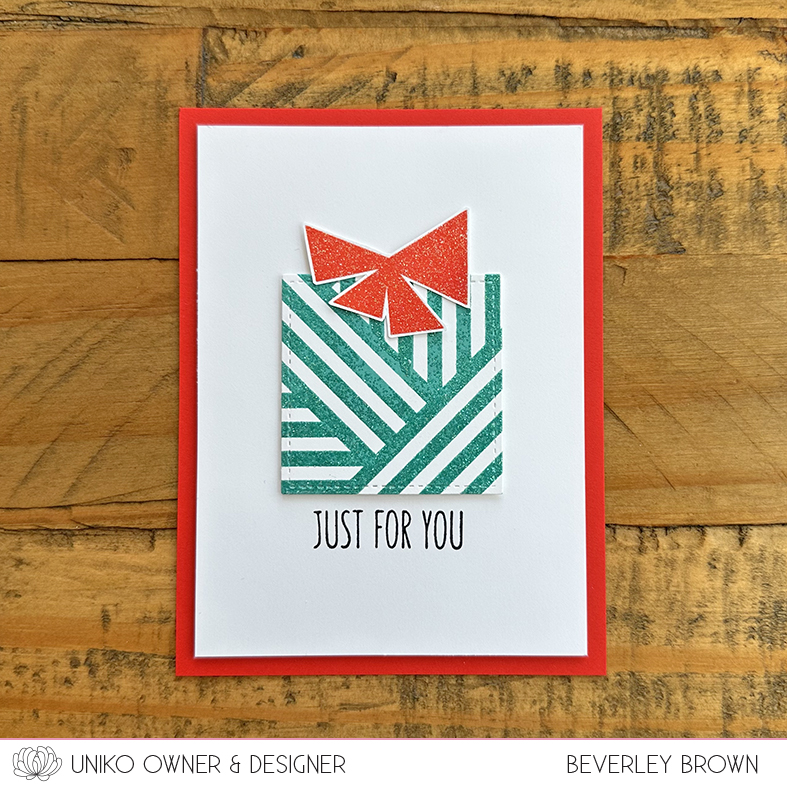
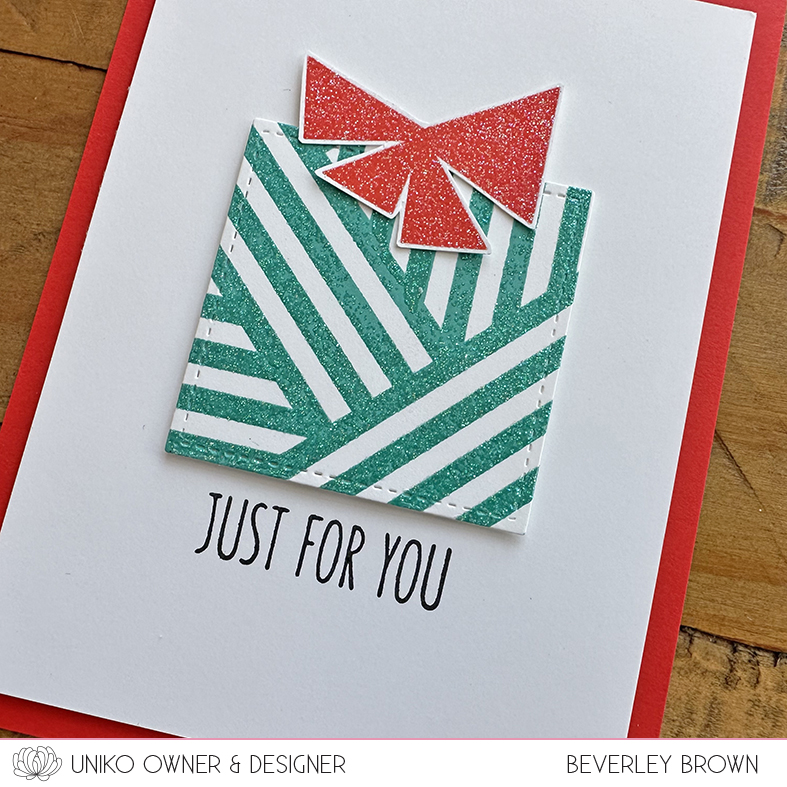
For my second card I chose a clean & simple design using just the heart layer of the stencil.

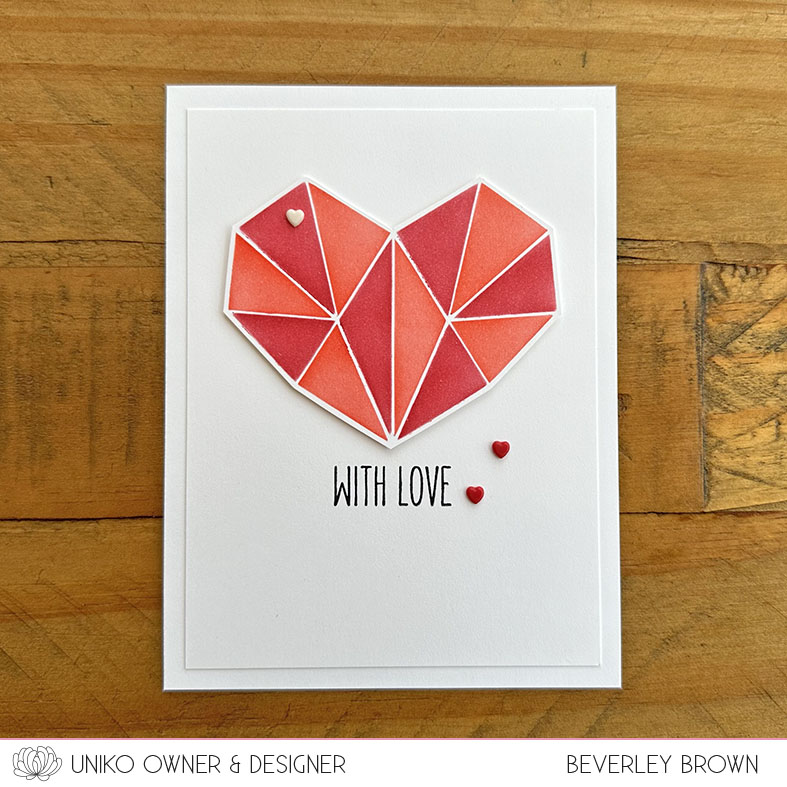
Again I used Poppy and Cranberry inks to create the geometric heart. I then fussy cut this out, which is pretty easy with it being straight lines.

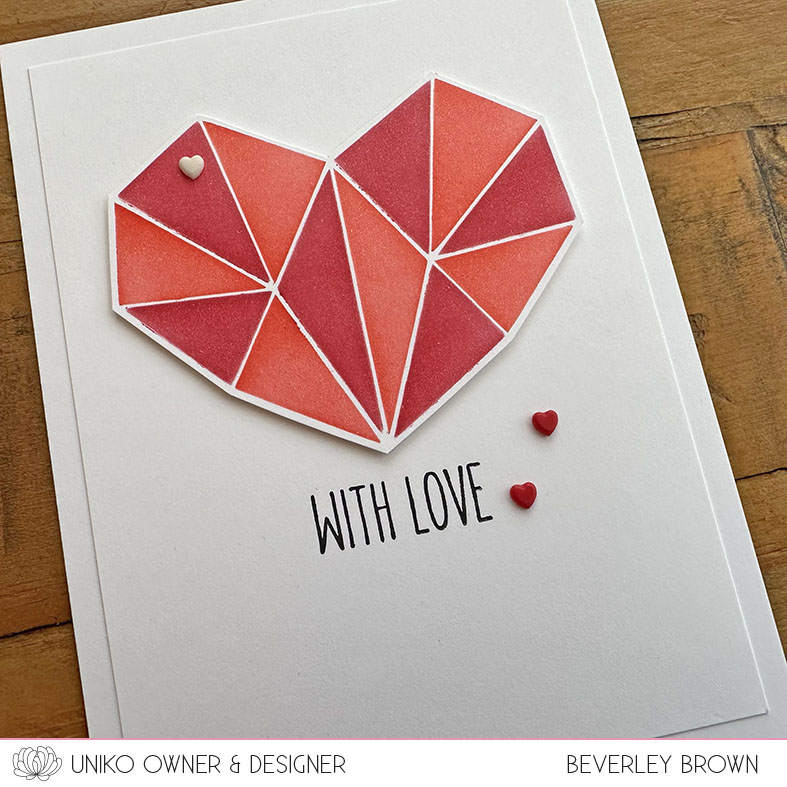
Once I’d cut the heart out I adhered it to my card using foam tape. To finish I added another sentiment from Everyday Love Sentiments and some tiny heart embellishments I’ve had for ages in my stash.

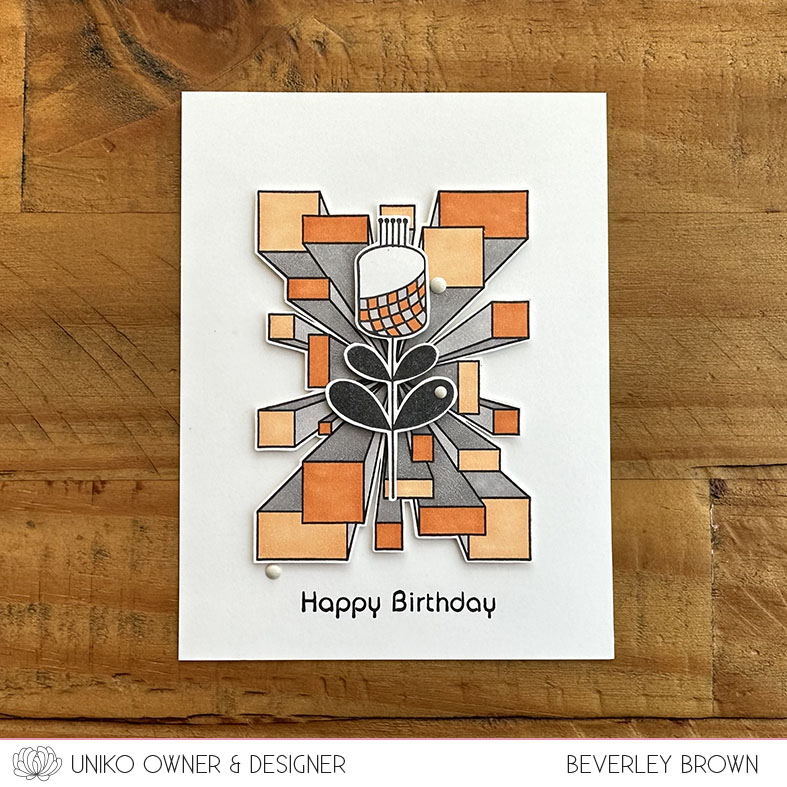
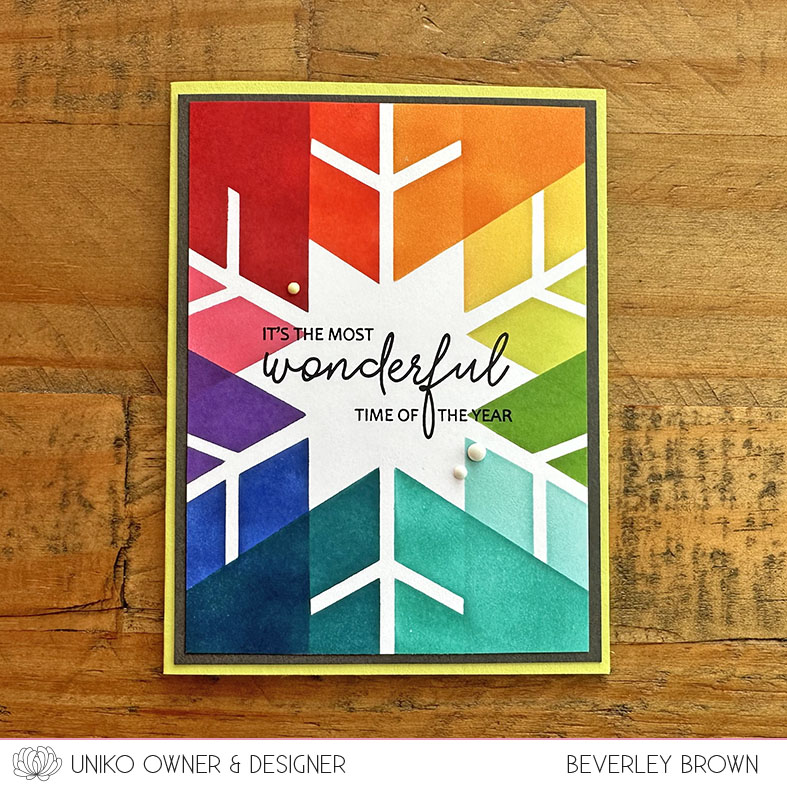
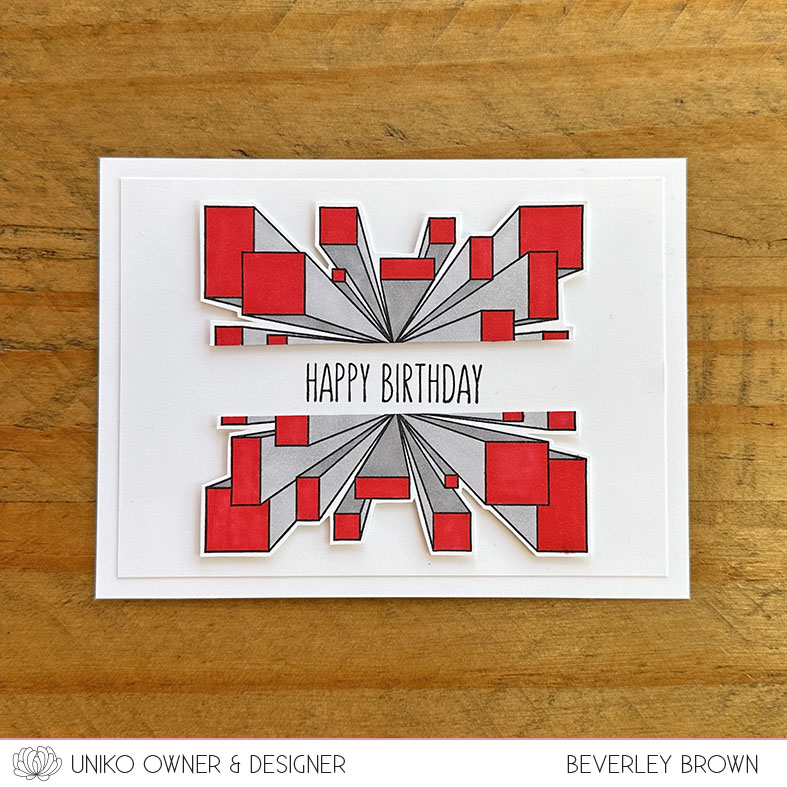
I really have had fun with this stencil and went with a striking dark grey background for my next card, this makes the heart really POP.

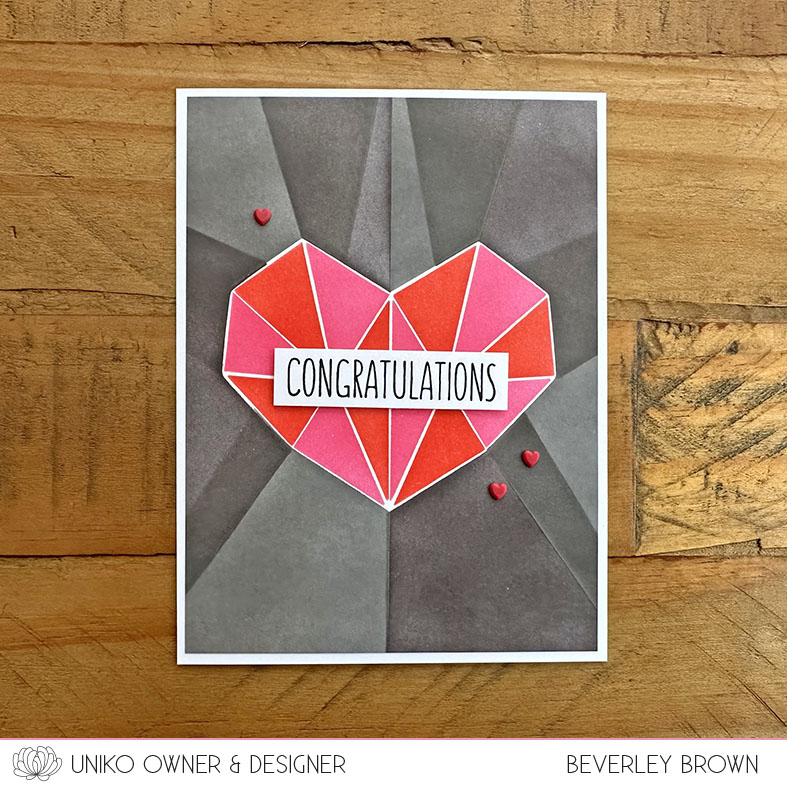
I used Cloudy Sky and Charcoal Soot from Altenew Gentlemen’s Grey ink collection along with Poppy and Honeysuckle, my current favourite colour combo. Red and pink together brings me cheer!

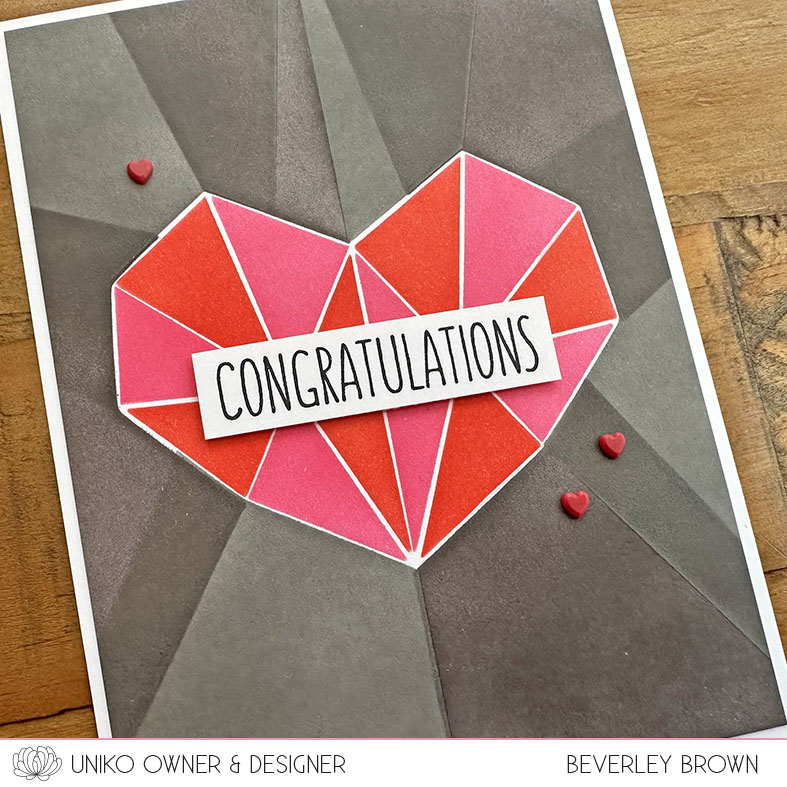
To me hearts are not just for Valentine’s. They can be Wedding, Anniversary, Engagement and more. I used Congratulations for this card from Everyday Sentiments (back in stock 20th February).

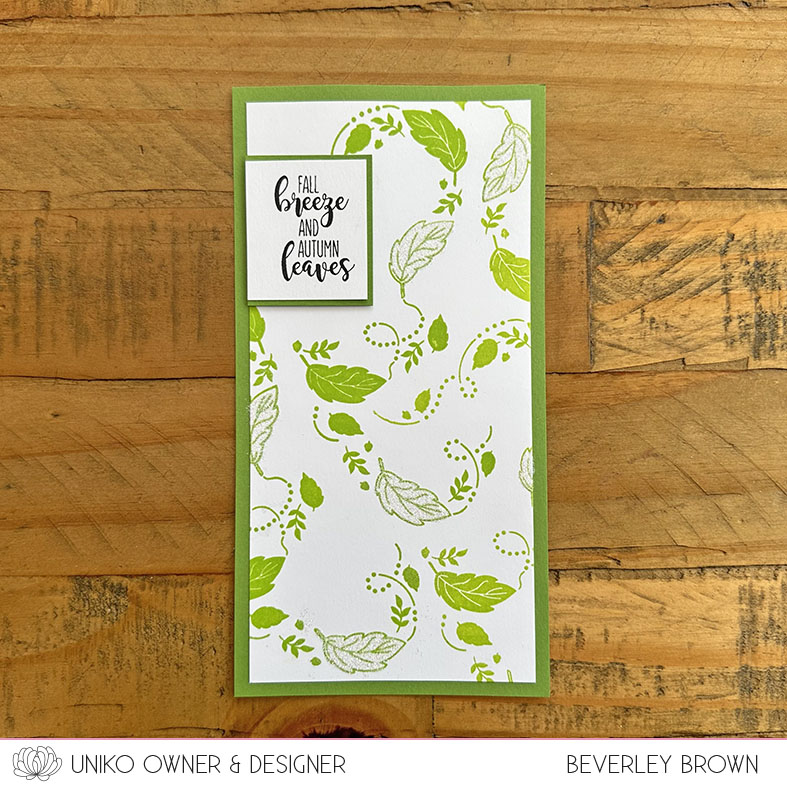
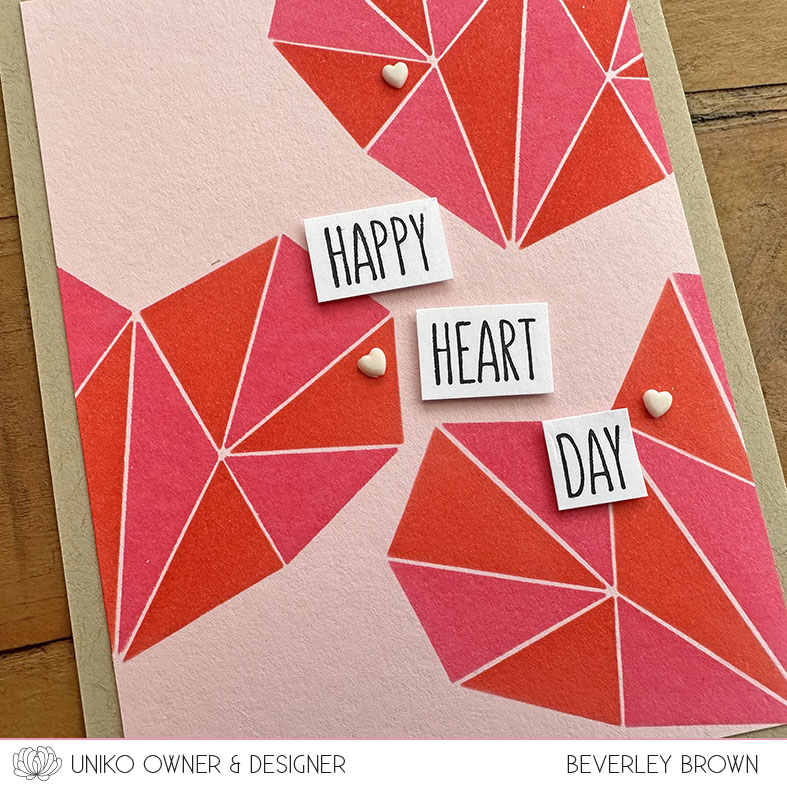
Next up I used the geometric heart layer again for an all over design on coloured card.

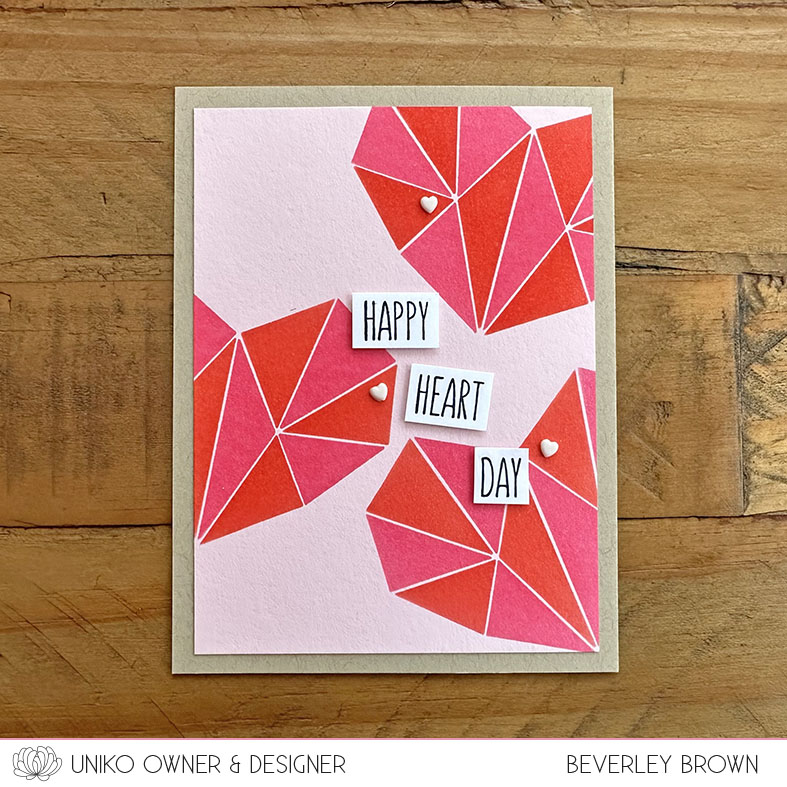
It’s rare I choose to use a coloured card layer to ink on, but I loved how this turned out and how it paired with a Kraft card base too.

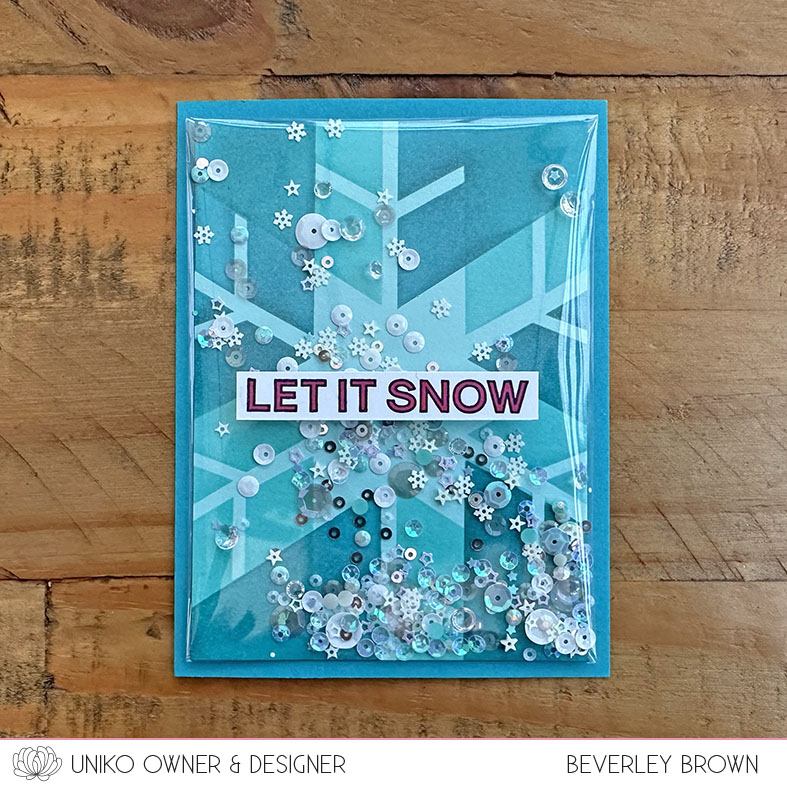
Lastly, for today! I went for a traditional window shaker card.

To create this card I used the background layer of the stencil on its own. Inking in Honeysuckle, cleaning & then flipping to ink with Poppy.

I then used a craft knife to cut out my window to create the shaker. Again this was easy with the straight edges.

What a mammoth blog post, but hopefully it has given you a taster of the creative possibilities this two layer stencil has.

Thanks for stopping by.

Crafty Hugs

Uniko 12th Birthday Card Linky Party & Brand Ambassador Blog Hop

Hello, Happy Sunday & Happy Official 12th Birthday Uniko šŸŽ‰

12 years today Uniko officially opened their virtual doors to the public and I am so happy & proud to still be here.

So as tradition holds during Uniko’s Birthday Celebrations today we have a fun party everyone can join in on, Uniko’s 12th Birthday Card Linky Party & Brand Ambassador Blog Hop. Hopefully you have hopped on over from HERE. As usual the Brand Ambassadors have an array of beautiful birthday inspiration, so be sure to hop on over, along and leave a comment. The link up, rules and prize information can be found there too.

For my card today I dusted off Balloon Bash and like my cards I shared HERE, yesterday. I was inspired to use Uniko Brand colours.

In the past when using the balloons, I have masked them to create a bundle, but for this card I decided to just layer them with the trio of turquoise inks. Because when thinking about it, balloons are most often see through to a degree.

The sentiment I used is another peek at something being introduced next week for our 12th Birthday/February 2024 Release.

That’s all from me today, but be sure to head on over HERE to the start of the blog hop for all the Brand Ambassador blog links. You will also find the rules, prize details and link up for your Uniko birthday cards.

Happy Hoppin’ and Happy Crafting!
Crafty Hugs

January 2024 Non-Release Brand Ambassador Blog Hop & GIVEAWAY!

Hello & Happy Thursday.

Welcome to theĀ January 2024 Non-Release Brand Ambassador Blog Hop & GIVEAWAY! With a New Year in full swing I thought it would be a good time to bring back some of the fun and inspiration that has slipped away over time.


So I am pleased to bring back the Non- Release month blog hops.Ā ForĀ those of you who are new around these parts I will explain what this post is all about…


Here at Uniko HQ it is just myself behind the screen, blogging, designing, packaging stamps & orders through the Uniko online shop, customer service and all the things in between. I *usually* release new product every other month for a number of reasons, but mainly so I can keep up with everything!


On non – release months like this month I like to set myself and the Brand Ambassadors a challenge to look back at a previously released product and give it some more love. Plus, I think it’s always nice to revisit older setsĀ andĀ provideĀ more inspiration and not just from me.
So without further ado, lets see the products I decided upon for January…

Beautiful Blooms I and Designer Dies Beautiful Blooms IĀ 

So let’s have a look at my new creations I made using these…

First up I decided to use a technique that I haven’t used for ages, partial die cutting. I think I avoid this technique as it can be more time consuming than straight forward die cutting!

I started by stamping the large bloom in Honeysuckle ink. I then created a mask to place my die over the stamped image. I create a mask as these dies are one of my first sets and they are solid dies, meaning you can’t see through them.

I then worked out where I wanted to die cut too, 7.5 cm up from the bottom of my card. To die cut, place just the top section of the die inside the die cutting plates, up to the measurements. Once you die cut, use a cutting knife to trim across the straight edges.

On my base card I used the Background Blocks Linear stamped in VersaFine Clair Morning Mist. I then adhered the die cut panel using foam adhesive. I then finished with a sentiment from Simply Said Blocks and a few enamel dots.

For my second card I decided to use just the stamps and another fun technique, spotlight stamping.

Again, this was a little trickier and takes a bit of patience. I placed both layers in my stamping platform and used low tack masking tape on the base card when stamping the images on the square. I then removed the tape and square layer to stamp the image in a lighter shade of pink.

Again the top square layer is adhered using foam adhesive. This time I used a sentiment from Everyday Sentiments and kept the card free from any embellishment.

That’s all from me today, but be sure to head on over HERE to the start of the blog hop for all the Brand Ambassador blog links. If you comment along the hop you will be in the chance to win a Ā£15 eGift Code to spend in store. Commenting closes for the giveaway Thursday 25th January 2024.

Happy Hoppin’!
Crafty Hugs

December 2023 NEW Release, Brand Ambassador Blog Hop & GIVEAWAY!

Hello, Happy Friday AND Happy New Release Day!

I hope you have enjoyed the introductions this week and I’m super excited you have stopped by so I share these new products with you. They are NOW available to purchaseĀ HEREĀ on the website.

Hopefully you have hopped on over from HERE where I have introduced the new products and you will also find the links to the Brand Ambassador blogs.

Here’s what I came up with for today…

First up I decided to ink up Background Blocks Perspective and pair it with Mid Century Modern Florals. I started by stamping my favourite combo of stamps to create the flower, which I fussy cut out.

I then stamped the block which I coloured with two shades of orange and grey. I originally wasn’t going to fussy cut the block out, but I smudged my stamping and so had no choice but to cut it out and adhere it using foam tape!

My sentiment choice is from Bauhaus Blocks and I finished the card with enamel dots.

Keeping with the floral theme, I added some Beautiful Blooms II flowers to the Background Blocks Layered Stripes.

I started by stamping the block in Dove ink across the top of the card. You might be able to guess that I have hidden the join in my stamping with the beautiful blooms! My sentiment is from Simply Said Blocks II.

For my last card today I inked up the Stencil – Ink & Flip Snowflake. This card didn’t turn out how I intended either, sometimes it just goes that way after mishaps!

I started out being inspired by The Pantone Colour for 2024, Peach Fuzz. So I inked up the snowflake with Grapefruit and then Sorbet.

I then stamped the sentiment from Snowflake Serenade, which I accidentally dropped on the top of my card. Hence why the most of my snowflakes and embellishments are at the top of the card to cover my mishap!

I hope you have enjoyed this last release of 2023 šŸ˜Š


Now I have announced all the happy news, I have some not so happy news šŸ˜ž
At the end of last month my manufacturer informed me of an increase in prices (again) as of January 2024. I have resisted increasing my product prices for the last couple of manufacture increases and it has been quite a number of years since I last increased them.Ā 
I know the cost of living is affecting so many people and I hate to do this. But to keep Uniko going & bringing fresh, unique designs I unfortunately have little choice.Ā 
As of Monday 8th January 2024, Ā product prices will be as follows…
StampsSmall (A7) – Ā£6.50Medium (A6) – Ā£11.50Large (A5) – Ā£16 (Price Remains Unchanged)
Stencils – Ā£4.50


I thank you all for your custom & support here at Uniko.
Crafty HugsĀ 

Introducing… Ink & Flip Snowflake

Happy Thursday.

Welcome to the last day of the December 2023 mini release introductions. Today we are introducing the next addition to our unique Ink & Flip Stencil series, Ink & Flip Snowflake.

Just like the previously released Stencil – Ink & Flip Star, which you can see in action HERE. The result, a beautiful geometric snowflake. You might recognise this product from some peeks I shared of the Uniko Stamping Retreat a few months ago. The attendees of the retreat were the first to test the stencil & receive it as their free gift.

Here is some inspiration using this new design…

You know me, I can’t resist rainbow colours and at least one make with a new product has to be in that colour scheme!

I used Concord & 9th inks for stencilling and my sentiment choice is from Christmas Wishes.

Along with rainbows, it is almost certain I will make a shaker card! I am loving these full panel shaker cards, they are so much quicker to make.

I used an Aqua Sky base to ink the snowflake and for the first ink through I used Oceanside. I then cleaned and flipped the stencil & applied Peacock for the second side.

I decided for this shaker to add my sentiment from Festive Sentiments Outlined, to the outside of the shaker. Definitely a hand deliver card as this makes it a little bulky.

That’s all I have today. This stencil, along with all the products we’ve introduced this week will be available tomorrow, 9am GMT Friday 8th December 2023. 

Crafty Hugs

Introducing… Background Blocks Perspective

Happy Wednesday. 

Welcome to day two of the December 2023 mini release introductions. Myself and the Uniko Brand Ambassadors are here to get you over the festive mid week hump with LOTS of beautiful inspiration.

This release we are adding to the popular Background Blocks series and the next addition to the series is  Background Blocks Perspective, let’s have a look at it in action…

This background block is such a fun design and perfect for masculine cards. I was scrolling through Pinterest the other week and came across lots of Zentangle and I was inspired to add this to the background. Along with a rainbow of colours of course!

This was not only fun to make, but also relaxing. My sentiment choice is from Simply Said Blocks II and Simply Said Blocks III.

Next up I went for something a little more clean and simple, but still with a masculine vibe.

I chose a bold red and grey to colour the block. I then fussy cut the block out and sliced it in two along the longest length. This was so I could frame the Happy Birthday sentiment from Floral Vines.

That’s all I have today using this new background block, I will be sharing more on Friday and I have some non masculine makes! To see more, be sure to hop on over HERE and see what each of the Brand Ambassadors have made.

Crafty Hugs

Introducing… Background Blocks Layered Stripes

Happy Tuesday.

Welcome to the first day of the December 2023 mini release introductions. This release we are adding to Uniko’s popular Background Blocks series. I love pattern and I love quick, clean & simple cards. Background Blocks fit the bill for all these and prove to be such versatile additions.

This next addition to the series is Background Blocks Layered Stripes, let’s have a look at it in action…

I’m still in FULL on Christmas mode and although I didn’t create this background with Christmas in mind, it is easily adaptable for all occasions.

For this card I went for a really non traditional Christmas colour scheme, Honeysuckle, Marmalade & Nectar. I used all 3 colours on the background block, using my MISTI to repeat stamp.

I then trimmed the block pattern out and adhered it to my base card using foam tape. I’ve embellished with a few Winter Foliage & Natures Treasures II die cuts, along with a heat embossed sentiment from Festive Sentiments Outlined.

Keeping with the festive theme for my next card, I wanted to show how the background looks repeat stamped and this time I offset the design towards the left hand side of my card.

I used Poppy ink to stamp the background and my ‘trick’ here to hide the join is to cover with a sentiment and embellishments! I used a cluster of images from Winter Foliage and a sentiment from Simply Said Blocks Christmas.

For my final card today using this background I wanted to show that you don’t have to use the full background.

Here I stamped the background in Oceanside and then again with VersaMark to heat emboss with WOW! Clear Sparkle embossing powder. I then used a stitched square frame die to cut out a section of the background to resemble a gift box.

I’ve adorned the box with a Poppy red bow from Mid Century Modern Wreath Builder, again heat embossed with Clear Sparkle EP. My sentiment is from Floral Vines, making this card suitable for Christmas or a wintery birthday.

That’s all I have today using this new background block, I will be sharing more on Friday and I have some non festive makes! To see more, be sure to hop on over HERE and see what each of the Brand Ambassadors have made.

Crafty Hugs

October 2023 Release in Review, Brand Ambassador Blog Hop & Giveaway

Happy Weekend!

Welcome to our October 2023 Release in Review, Brand Ambassador Blog Hop & Giveaway. As the Brand Ambassadors didn’t receive their goodies in time to join me for the October Release introductions, I thought it would be nice to have another blog hop to celebrate the release.

If you missed the original release day blog hop & formal introductions, you can catch up HERE. The giveaway is closed on that post, but to keep tradition I have another giveaway listed at the end of this post. Be sure to hop on over HERE for all the Brand Ambassador blog links.

Enough talk, let’s get to the inspiration. I am sharing the cards in the order I made them.

First up Remembrance. I’ve been seeing a trend across social media recently with these beautiful fretwork frames using those offcuts/strips of card and it’s been on my creative list to give it ago.

I started with a top fold card and used a pencil & ruler to mark out a frame to cut out using my craft knife. I don’t have aa rectangle die that would give me an equal sized frame all the way round and in my mind that’s what I wanted!

I’ve been saving up strips of white card and used double sided tape to adhere them. As you might see, I weaved the strips to give the fretwork frame a bit more stability.

As you can see I stamped and coloured one of the Poppies with alcohol markers, fussy cut it out and adhered it using glue to the framework. I finished with a sentiment from Simply Said Blocks II and some enamel dots.

Keeping with a poppy theme I reached for Uniko Style to pair with Big & Bold thank/s/ful to create this card.

I’ve been wanting to dust off Uniko Style since it came back in stock and it has paired beautifully with this bold sentiment.

I used a variety of Altenew inks in shades of pink and red to stamp these blooms. I did use my Misti Stamping Tool so I could repeat stamp the solid flowers where necessary.

I used my Misti to stamp the thanks sentiment too, fussy cut it out and adhered using foam tape. The friend part of the sentiment is also from the set and I finished with some Ebony Nuvo Drops.

Next I turned my attention to Autumn with Autumn Serenade for another fun frame card and a bit of spotlight stamping of sorts.

This time I did use a die to cut the window for my top layer. The frame is a little thicker this time so I was able to stamp & fit a little more of the serenade of falling leaves on it.

Again I used my Misti to stamp sections of the serenade on the opposing corners on the top frame layer and then again on my base card. I added the sentiment and a few of the smaller single leaves and a few enamel dots to finish.

Lastly for today I inked up Framed Snowflakes to create a fun sparkly shaker card.

I’m a little addicted to these full panel shaker cards! If you missed it, I shared one HERE in my 12 Days of Christmas Inspiration & Giveaways Day 6 video on YouTube.

I didn’t want the frame of the snowflakes to be inked, so I trimmed my panel of Oceanside card to 8.5 x 12cm. I then used Peacock ink to add shading around the panel to create a spotlight effect before partial stamping the lower half of the Framed Snowflakes in VersaMark ink and heat embossing. I stamped this lower part of the frame on the top and bottom of the panel. In hindsight I wished I had used black ink to stamp & heat emboss like I did for the single accent snowflake.

My shaker mix is a mix of sequins, snowflake sequins and glitter glass. My sentiment is from Simply Said Blocks Christmas.

Now to the Giveaway, simply comment along the hop for your chance to win a Ā£20 eGift Code to spend in store. You have until midnight Sunday 5th Nov 2023 to comment and the winner will be announced Monday 6th.

One more treat before I go…

Crafty Hugs

October 2023 NEW Release, Brand Ambassador Blog Hop & GIVEAWAY!

Hello, Happy Saturday, Happy World Card Making Day AND Happy New Release Day!

Wow! Could the weekend be any better? 

I hope you have enjoyed my introductions this week and I’m super excited to share these new products with you. They will be available to purchase at 9pm BST tonight HERE on the website.

Hopefully you have hopped over from HERE where I have formally introduced the NEW products and you will find links to all the Brand Ambassador blogs.

And now I have some more inspiration for you using them in order of introduction.

First up, BIG & BOLD thank/s/ful.

On Tuesday when I introduced this clear stamp set, I mentioned another sentiment combination this set would provide and here it is. Though, there is a tiny catch, you do need to have the previously released BIG & BOLD You clear stamp for this one.

I’ve gone for soft pastel shades for this card, using Pebble for the sentiment. I used my stamping tool to stamp this, so I could get a really crisp and even stamped image.

For the flowers which are the poppy heads from Remembrance, fussy cut out I ink blended Grapefruit and Sorbet onto some scrap white card and stamped them in black.

The leaves are from BIG & BOLD Thanks and I did the same, ink blended some Aqua Sky onto scrap card before cutting out.

You might need sunglasses šŸ˜Ž for this next card the green is quite bright.

I created a DL card to showcase Autumn Serenade this time and I have stamped the falling leaves 4 times around my card to fill the space.

I added glitter to the open leaves for that frosty sparkle and chose the Fall Breeze and Autumn Leaves sentiment this time.

Next we have Remembrance and this time I used a sketch from Freshly Made Sketches seen HERE and below for my layout.

I loved the overlapping circles on the sketch and I instantly pictured overlapping poppy flowers.

I used a trio of Stampin’ Blends to colour the poppies before fussy cutting them out.

I used foam adhesive to give them a little lift off the card and added the Thinking Of You sentiment from Simply Said Blocks II.

Lastly, and by no means least we have Framed Snowflakes. This time I wanted to give the smaller stamps a whirl, quite literally!

I’ve not used my Altenew Stamp Wheel for a bit, so dusted it off for this card. It made stamping the mandala of snowflakes really easy.

That’s all I have to share for today, I hope you have enjoyed this release šŸ˜Š Don’t forget the products will be available on the website tonight at 9pm.
Crafty HugsĀ 

2023 July/August Reveal, Release, Brand Ambassador Blog Hop & GIVEAWAY!

Hello, Happy Sunday AND Happy New Release Day!

I’m super excited to share these new products with you and they are now officially available to purchase over HERE on the website. For the formal introductions and all the Brand Ambassador blog links, head on over HERE.

Be sure to leave some comment love either on their blogs or social media. I will be randomly selecting a winner to win the entire release and will announce the winner Saturday 26th August 2023.

Let’s have a look at these products in action a bit more…

I’m starting with Mid Century Modern Wreath Builder and I wanted to show how these clear stamps have more than a festive use to them. The wreath as you can see can be used for more than just Christmas, I also see sunshine rays!

And I was inspired to pair it with our Stencil – Cloud 9 and a sentiment from Sunshine & Rainbows.

This lead me onto my next card.

Still thinking of sunshine, it reminded me of flowers and sunshine, so I had to pair it with Mid Century Modern Florals.

And I think they pair pretty nicely, even if I do say so myself. As you can see I added some glitter to the inside of the outline wreath.

Keeping with the non festive theme and wreaths on the brain, I turned the Mid Century Modern Christmas triangle geometric into a rainbow wreath for this fun birthday card.

It’s not very often I make a slimline card, but I had so much fun making these wreaths I made two! The centre is decorated with the bow from Mid Century Modern Wreath Builder which are stamped in black and hear embossed with stardust embossing powder.

My sentiment is from Floral Vines paired with the NEW Everyday Family.

For my second card I wanted to recreate this card HERE, paring the same stamp as above with the Bauhaus Blocks.

I overhung the triangles off the edge of my card, keeping them the same size on the left, but altering the size on the right. I then left space at the bottom for one of the blocks and a sentiment.

Lastly for today I had to get festive with my cards. First using Mid Century Modern Baubles, firstly creating a monochrome one layer card.

A simple bit of masking and Copic colouring finished with some clear Wink of Stella.

My next bauble card was inspired by Vinita’s second card HERE, to combine the Stencil – MOD Background Builder.

I started by lightly stencilling the design in the background using Pebble ink. I then stamped and coloured 3 baubles using the reverse masking technique again.

Finally I embellished the baubles with some more elements from the set and mixed and matched a sentiment using the Happy from Mid Century Modern Frames.

One last card as I couldn’t not use the new Ink & Flip Stencil or the Background Block Arts DĆ©coratifs Christmas, so combined them on one card. This was inspired by one of Steph’s cards today HERE.

I started by inking the stencil just the once on my standard size card 10.5 x 14 cm in Poppy ink. But I wanted it slightly darker so went over softly with Cranberry ink.

I then inked and stamped the background block twice so I could colour and fussy cut the main focal Christmas tree out. Which after selectively colouring some of the second stamped background block red, I adhered the Christmas tree with foam tape. And lastly added the fussy cut bow from MCM Wreath Builder, coloured in red.

My aim was to create a card that looked like a gift with a gift tag & bow.

Phew! What a mammoth post. I hope you have enjoyed this release?

Happy shopping and hope to see you over on Facebook at 7pm this evening. I will be taking a look at the new products, along with making a card or two in the live. Don’t worry if you can’t make it or you don’t do Facebook, I will be saving and uploading the video to YouTube.
Crafty HugsĀ