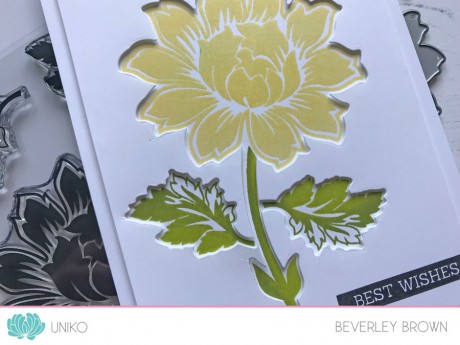
Blog Hop (Page 14)

October 2018 Reveal, Design Team Blog Hop & GIVEAWAY!

Woohoo!

Finally the day has arrived and the October 2018 Reveal, Blog Hop & GIVEAWAY is here! The Release will be available to purchase HERE at a NEW time of 9pm GMT tonight.

Hopefully you have hopped on over from HERE, where I have formally introduced all the NEW products. Now I have a couple more cards to share using some of the new stamps & stencils.

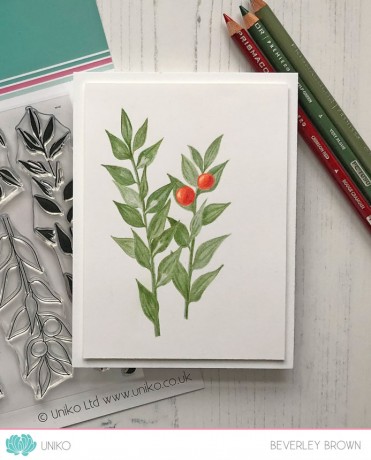
First up I have a card using Winter Botanicals: Sweet Broom…

IntroWBsweetbroom3

I thought I’d try my hand at some more no line colouring, using my trusty Prismacolor pencils. This card took me about 3 nights to finish! Considering I only get from around 8/8:30 pm – 10:30/11:30 pm to work, that wasn’t bad for me. Plus, I usually loose patience and ditch what I am colouring!!

IntroWBsweetbroom3a

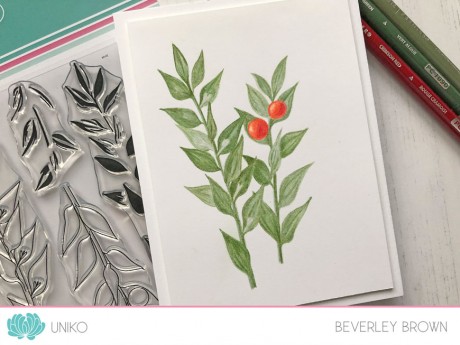
Once I had finished colouring I let it be and simply mounted it onto my card base using foam adhesive and kept it clear of a sentiment so I can use it for any occasion, not just Christmas.

Lastly for today (unfortunately my creative time is limited this week with The Beans off nursery for half term) I reached for one of my new favourite stencils, Quilted…

IntroStencilQuilted2

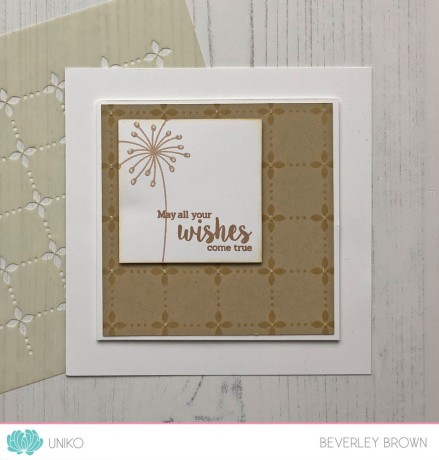
I wanted to try some tone on tone ink blending and thought it would pair nicely with Organic Wishes, which I did for this card.

IntroStencilQuilted2a

After assembling my card I went in and added some White Blizzard Nuvo Glitter Drops to the Dandelion ends and to the centres of all the flowers of the inked stencil.

That’s all I have to share with you for today, but I know that the team have an abundance of inspiration to show you using the new products.

Carol 

Be sure to comment along the hop for your chance to win the ENTIRE Release!! You have until Midnight (GMT) Friday 9th November 2018 to comment and the winner will be announced soon after.

Happy Hopping!

Hugs


Introducing… BIG & BOLD Merry and Background Builders: Christmas 2018

Hey!

Welcome back to day 4 of the October 2018 Release product introductions.
This is the fun part, you now get to see all the sneak peeks in action. The Design Team have worked their socks off and created an abundance of inspiration to share with you over the coming days 🙂

Thank you for all the comment love yesterday here and on social media. If you missed the first 3 days of introductions, you can catch up HERE, HERE and HERE.

Today we are introducing the final two clear stamp sets, BIG & BOLD Merry and Background Builders: Christmas 2018.
IntroBBchristmas2018a
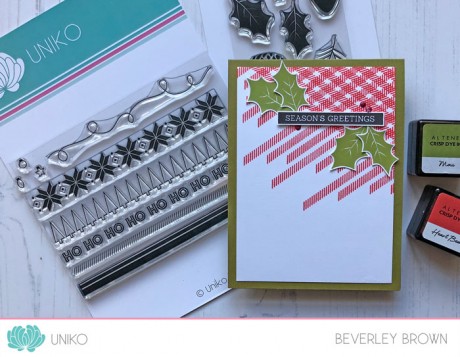
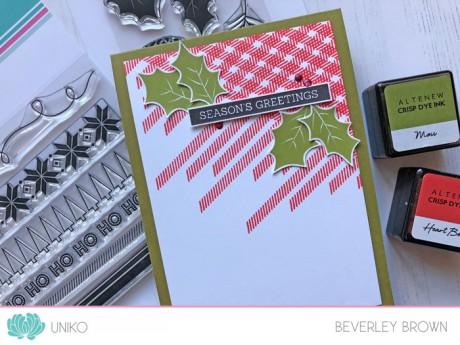
This card was totally inspired by one the lovely Keren Baker shared on Instagram HERE. I loved how Keren had weaved the paper strips and so I wanted to recreate this with stamps. One of the stamps in Background Builders: Christmas 2018 is a line of small diagonal lines. Which when stamped & overlapped, it creates a plaid style effect.
IntroBBchristmas2018bThe sentiment is from the new Simply Said Blocks Christmas and I added in the holly leaves from Winter Foliage. I used Nuvo Drops to create the holly berries.
As usual my AWESOME Design Team have created projects to share with you all too. Be sure to hop along, commenting along the way. You never know, I might just pick some random comments to WIN some prizes this release 😉

Sarah P

WOW! This has been a fun few days of product introductions and I for one have loved seeing how my Design Team bring the products to life. So, we have reached the end of the product introductions, which means tomorrow is the BIG day!

We will have our usual Reveal, Design Team Blog Hop & GIVEAWAY at 9am tomorrow here on the blog AND the RELEASE will go LIVE at 9pm GMT over HERE on the website.

Hugs


Introducing… Stencils Scandinavian Christmas & Christmas Folk Snowflake AND Simply Said Blocks Christmas

Hey!

Welcome back to day 2 of the October 2018 Release product introductions.

This is the fun part, you now get to see all the sneak peeks in action. The Design Team have worked their socks off and created an abundance of inspiration to share with you over the coming days 🙂

Thank you for all the comment love yesterday here and on social media. If you missed yesterday, you can catch up HERE where myself and the Design Team re-introduced Background Builders: Christmas and Jolly Christmas clear stamp sets.

Today we are introducing 2 new stencil designs Scandinavian Christmas & Christmas Folk Snowflake AND 1 new clear Stamp Set, Simply Said Blocks Christmas! Hopefully you have hopped on over from the beginning of the hop HERE. Be sure to pop over if not to have a look at how I used the Christmas Folk Snowflake Stencil.

Here are a couple more cards using todays products…

IntroStencilScandi1

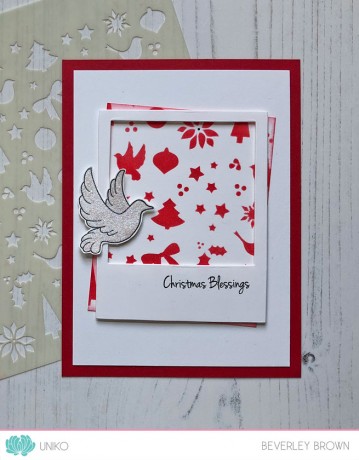
This stencil features lots of motifs that are from previously released clear stamp sets, such a Peace On Earth, Rustic Christmas & Background Builders: Vines Winter Additions.


I kept my card pretty simple when it came to inking through the stencil, I feel as though I am still a beginner when it comes to using them in my card making! Again I used Candid Apple DI and left off the sparkle this time, as I knew I wanted a sparkly dove from Peace On Earth. The sentiment is also from Peace On Earth and the die cut polaroid frame is Lawn Fawn.

IntroStencilScandi1a

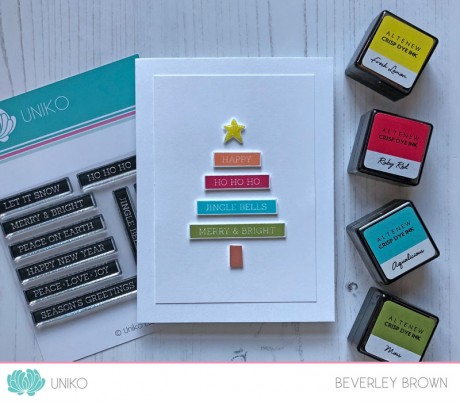
Next up I had an idea to use Simply Said Blocks Christmas on it’s own, to form a bright and modern looking Christmas tree…

IntroSSBchristmas1

I did ‘cheat’ a little as the HAPPY sentiment & tree stump is from Simply Said Blocks and the star is from Jolly Christmas! I kept the rest of the card super white & simple so that the bright colours, sentiments and design took centre stage.

IntroSSBchristmas1a

All the tree elements are adhered to the card using foam adhesive and I added a little Nuvo Glitter Drops in White Blizzard to the star.

I hope I have inspired you a little, but I know my AWESOME Design Team will with what they have created. Be sure to hop along, commenting along the way. You never know, I might just pick some random comments to WIN some prizes this release 😉

Sarah P

WOW! That was another inspirational hop, so many new ideas of how to use these new stencils and sentiment stamps. I hope you enjoyed the hop & will come back tomorrow for the next product introductions.

Hugs


Re-Introducing… Background Builders: Christmas AND Jolly Christmas

Hey!

Welcome to the first day of the October 2018 Release product introductions.
This is the fun part, you now get to see all the sneak peeks in action. The Design Team have worked their socks off and created an abundance of inspiration to share with you over the coming days 🙂
Today we are re-introducing Background Builders: Christmas AND Jolly Christmas clear stamp sets. These two clear stamp sets were first introduced WAY back in October 2013 HERE and HERE. You can also find more ‘old’ inspiration using the clear stamps HERE and HERE on Pinterest.

Hopefully you have hopped on over from HERE at the start of the hop. I have shared a couple of new cards there using these 2 re-released clear stamp sets.

I’ve made a couple more cards to hopefully inspire you…

IntroBBChristmas2

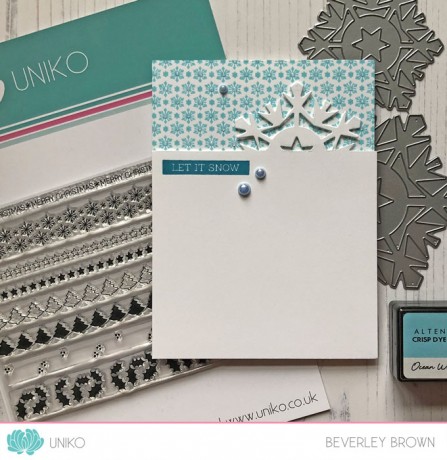
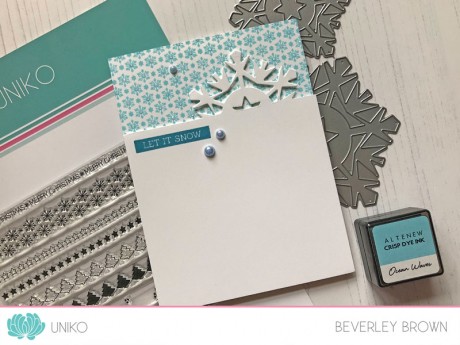
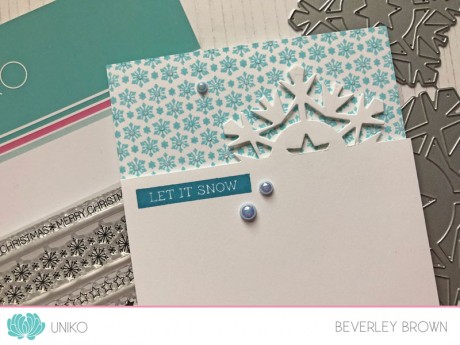
Firstly I wanted to pair the snowflake builder stamp with the Designer Dies Snowflake Trio. I tried my hand at some partial die cutting too!

IntroBBChristmas2a

After stamping the snowflake background I added tiny drops of Nuvo Glitter Drops in White Blizzard to all the snowflake centres for a little bit of subtle sparkle. The sentiment is a new one from another clear stamp set we will be introducing later this week. The pearls are from Little Things By Lucy’s Crystal Collection – Sweet Pea.

IntroBBChristmas2b

I was having so much fun getting reacquainted with Background Builders: Christmas, that I used it for my second card to share with you today too!

IntroBBChristmas3

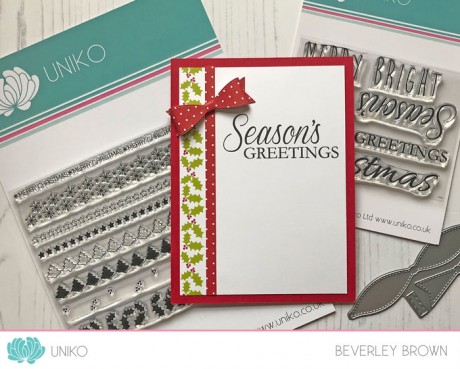
Even though I absolutely LOVE snowflakes, I think the 2 step stamp holly in this set trumps the snowflakes! It is beautifully festive and pairs with other Uniko clear stamps, such as this sentiment from All Occasion Sentiments #4.

IntroBBChristmas3a

After a busy few weeks I was feeling a little tired and ‘meh’ so I treated myself to some more Altenew inks and this little ‘Lil Inker Bow Die. It is too darn cute and pairing it with some old Papertrey Ink polka dot paper was the perfect finish to this clean and simple card.

As usual my AWESOME Design Team have created projects to share with you all too. Be sure to hop along, commenting along the way. You never know, I might just pick some random comments to WIN some prizes this release 😉

I hope you enjoyed the hop & will come back tomorrow for the next product introductions!

Hugs

September 2018 Design Team Blog Hop & GIVEAWAY!

Hey!

It’s time for another Uniko Design Team Blog Hop & GIVEAWAY – Whoohoo!! Apologies for my lateness in posting, I simply ran out of time before vacation to prep and didn’t have the energy on a night whilst away to work!

 Anyway, this month I couldn’t decide on the product and as a team we randomly selected a stamp set and then I went a little polka crazy and added in some popular sentiment sets too…

Large Background Scattered Polka Dots

Large Background Scattered Polka Hearts

Simply Said Blocks

Simply Said Blocks II

Stencil Scattered Polka Dots

These clear stamp sets and stencils are perfect for all sorts of backgrounds for all sorts of occasions that the Design Team will show you. They are a perfect addition to anyones crafting arsenal!

Here is what I decided to make…

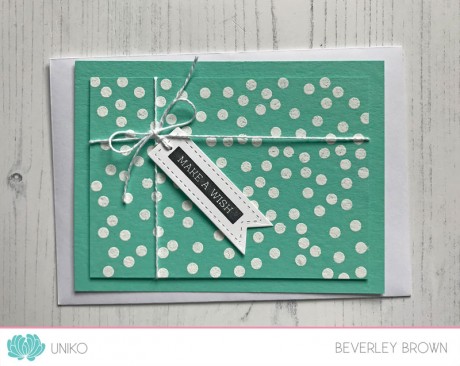
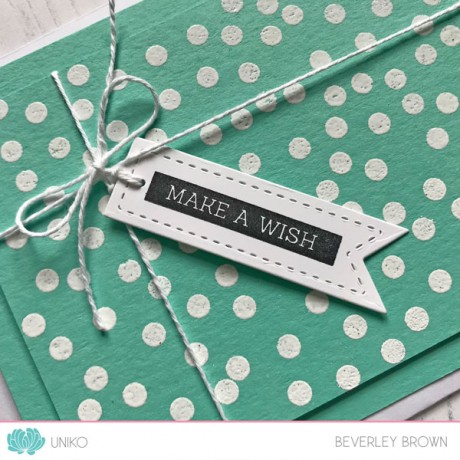
I was inspired to use the Large Background Scattered Polka Dots and Large Background Scattered Polka Hearts to create a couple of cards to look like wrapped presents.

UnikoSeptRV1

I started with the Large Background Scattered Polka Dots, stamping it in VersaMark ink and embossing in white onto my favourite Coastal Cabana card stock. I then wrapped white bakers twine around as you would with string around a present and secured it in a bow. I’ve then mounted the panel to a matching card base using foam adhesive. The sentiment from Simply Said Blocks II is stamped onto a Pretty Pink Posh die cut tag and adhered to the card.

UnikoSeptRV1a

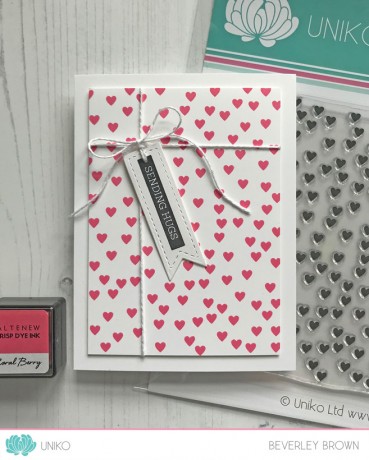
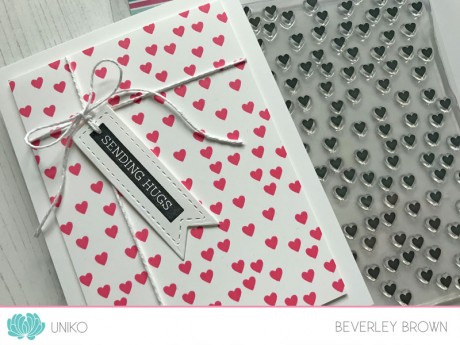
I used the same design process for my next card using the Large Background Scattered Polka Hearts, but this time I changed the orientation to portrait.

UnikoSeptRV2

This time I stamped the polka hearts in Altenew Coral Berry ink and again the sentiment is from Simply Said Blocks II.

UnikoSeptRV2a

That’s all from me, but let’s see how the design team have been inspired to use the products and be sure to comment along the hop for your chance to win a Uniko £20 eGift Certificate. You have until Midnight (GMT) until midnight BST Saturday 22nd Sept 2018 to comment.

Happy Hopping!

Hugs

Introducing… BIG & BOLD Hello and Framed Florals

Hey!

Welcome back to day three of the August 2018 Release product introductions. Thank you for all the lovely comments and support around social media for yesterdays introductions, I do love reading them all 🙂

Today we are introducing another 2 new clear stamp sets, BIG & BOLD Hello and Framed Florals. Hopefully you have hopped on by from the Uniko Blogspot blog HERE, where I have shared cards using the new stamps.

Here are a couple more I have made. First up, BIG & BOLD Hello…

IntroB&Bhello2

This was another one of the card designs I created for the Uniko Summer Stamping Retreat, however, this is a different colour way from the original as I actually mailed that card out!!

IntroB&Bhello2a

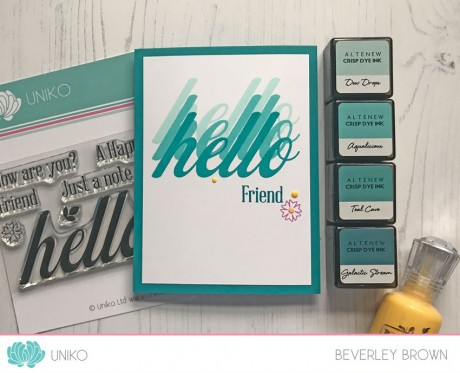
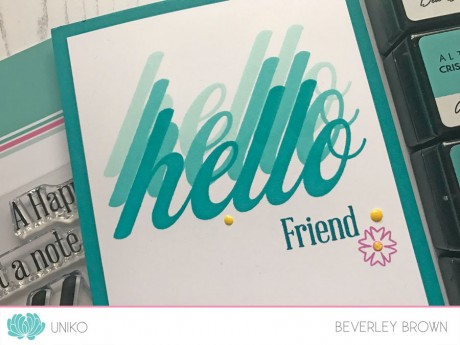
The bold sentiments in the BIG & BOLD series are so fun to create ombre shadow effects like I have on this card. Plus, the beauty of having a stamping tool like the MISTI makes it a breeze! Again, I have used Altenew inks as they really do take the thinking out of matching colours 😉 I’ve used the Sweet Dreams collection on this card.

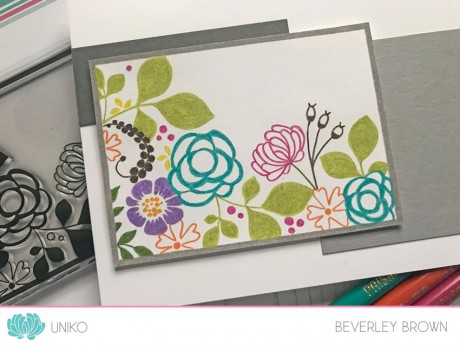
Next up is a card using Framed Florals…

IntroFflorals2

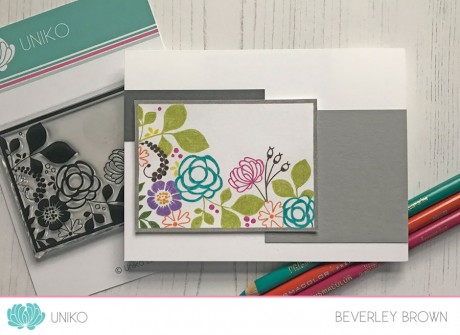
This time I have used the ‘no line’ colouring technique using Prismacolor Pencils and I was a little unsure as to how it would turn out when I started, but I am rather pleased with the result.

IntroFflorlas2a

I started out by stamping the image onto white card using Altenew Limestone ink. I then simply coloured over the stamped image with my pencils.

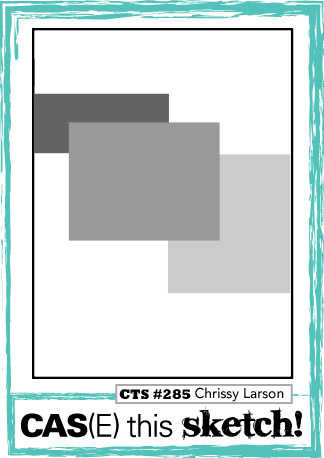
The layout of my card is inspired by the current sketch over at CAS(E) this Sketch! seen HERE and below. I had to turn the orientation of my card for the image to fit with the sketch.

CTS_285

Ok, that’s all I have to share with you today using these new sets, but why not grab a cup of your favourite beverage and hop along with myself and the team…?

Well, I thoroughly enjoyed that hop and I am all inspired to get inky! I’d love to know your thoughts on these clear stamp sets and which is your favourite of the two, that is if you can decide?!

That’s all from myself and the Design Team today and all 5 of the new clear stamp sets have been introduced, which means…. TOMORROW is RELEASE DAY!!

Hope to see you then for the full reveal, release, Blog Hop & GIVEAWAY!!

Hugs


Introducing… Background Builders: Happy Hexagons & Beautiful

Hey!

Welcome back to day 2 of the August 2018 Release product introductions.

This is the fun part, you now get to see all the sneak peeks in action. The Design Team have worked their socks off and created an abundance of inspiration to share with you over the coming days 🙂

Yesterday myself and the Design Team re-introduced the ‘So Much’ mini clear stamp set HERE, be sure to check out all the inspiration and comment along the hop 😉

Today we are introducing 2 new clear stamp sets, Background Builders: Happy Hexagons & Beautiful. Hopefully you have hopped on from the start HERE, where I have shared a couple of projects using the new stamps.

Now I have some more inspiration to share using Background Builders: Happy Hexagons…

IntroBBhappyhex3


Have you noticed the stamp design in the Background Builders Geometric collection that appears in each set? I’ve used it on this first card, if not! I love the garland style of this stamp and as I want all the sets to work as a collection, apart from the correlation of them being geometrics I wanted something to flow between them and this stamp design works perfectly.

InroBBhappyhex3a

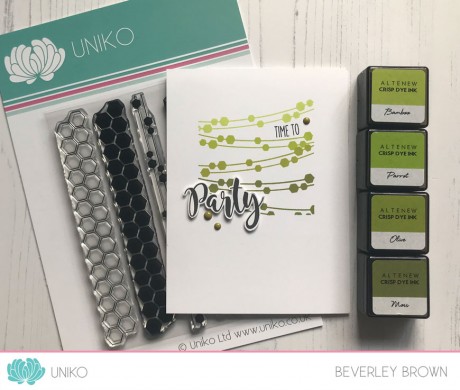
On this first card I started by die cutting a square window mask to stamp the hexagon garland. It is such a fun stamp and with it being long and thin, it can be easily manipulated on a stamping block or in a stamping tool to be curved or made into a wavy design. Again, I used Altenew inks and paired it with a sentiment from Birthday Sentiments.

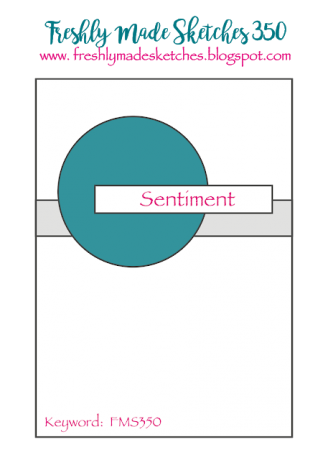
Next, I was inspired by the current challenge over at Freshly Made Sketches seen HERE and below.

FMS Final 350-001

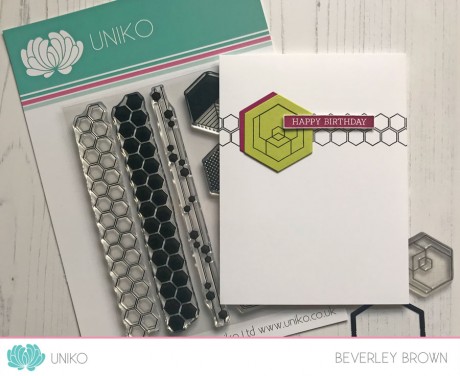
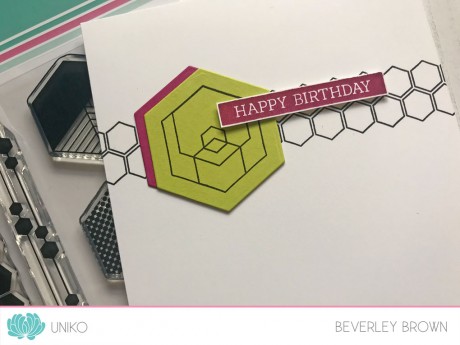
I used the open hexagon strip stamp across my base card, stamping it in VersaFine Onyx Black ink. I then used my Diamond Press Hexagon Dies (purchased from Crafters Companion) to die cut 2 hexagons, one from Lemon Lime Twist and one from Berry Burst, I just love this colour pairing!

IntroBBhappyhex2

I stamped one of the larger hexagons onto the Lemon Lime Twist die cut and layered it slightly onto the Berry Burst die cut. The sentiment is one of my faves from Simply Said Blocks.

IntroBBhappyhex2a

Lastly, but by no means least I have a card to share with you using Beautiful…

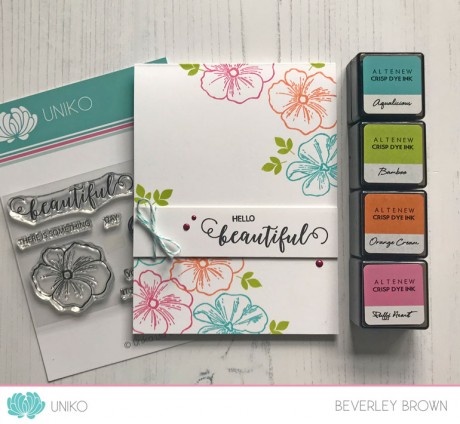
IntroBeautiful2

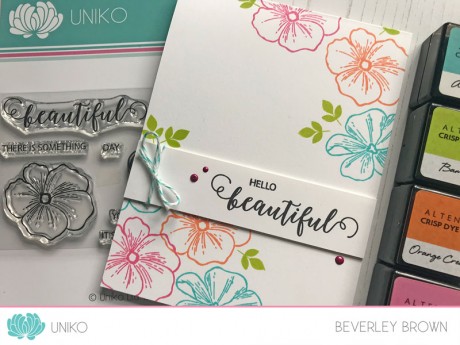
This is another card from the Uniko Summer Stamping Retreat and I think my favourite! I love the juicy bright colours and added little leaf sprig from a clear stamp set being introduced tomorrow 😉 The sentiment is another of the mix and match options in the set and I have added some Bakers Twine & Nuvo Drops to embellish the sentiment strip.

IntroBeautiful2a

That’s all I have to share with you today using these new clear stamp sets, but I know the Design Team have created even more fabulous inspiration to showcase them, be sure to hop along!

Well, I thoroughly enjoyed that hop and I am all inspired to get inky! I’d love to know your thoughts on these clear stamp sets and which is your favourite of the two, that is if you can decide?! That’s all from myself and the Design Team today, but be sure to come by tomorrow for even more product introductions 🙂

Hugs


Introducing… So Much

Hey!

Welcome to the first day of the August 2018 Release product introductions.

This is the fun part, you now get to see all the sneak peeks in action. The Design Team have worked their socks off and created an abundance of inspiration to share with you over the coming days 🙂

Today we are introducing So Much a mini clear stamp set, which was the limited edition December 2017 Release Freebie. From Sunday 19th August, it will officially be available to purchase for those that didn’t get their inky mitts on the limited supply back then!

Hopefully you have hopped on over from the Uniko Blogspot Blog HERE, I’ve shared a previous card using this set over there.

Here is a couple of new cards using this little set…

IntroSoMuch1

This little set features a lovely floral bouquet and you will recognise the flowers as a version from Flower Power #6 and the leaves & foliage are from Originally Organic. Along with the main floral image there are a couple of mix & match sentiments.

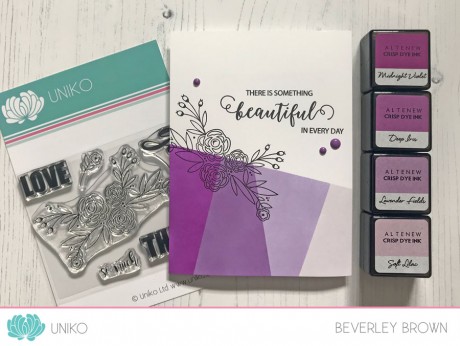
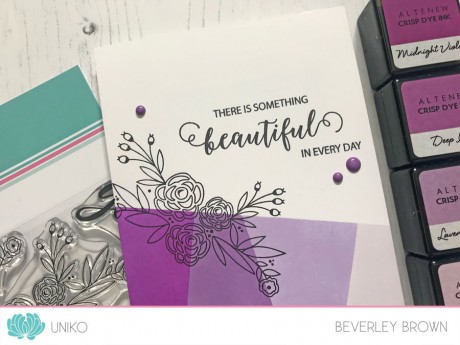
For this first card I decided to create a fun ink blended colour block section. I was inspired by Pantone’s colour of 2018, Ultraviolet and I opted for a sentiment from another new clear stamp set being introduced tomorrow 😉

IntroSoMuch1a

I used Post-it Notes to mask off the bottom section of my one layer card and to keep it interesting I angled the section too. I then randomly sectioned off each block, also at an angle and simply applied each of the Altenew Purple ink colours.

The floral bouquet and sentiment are stamped in VersaFine Onyx Black ink and I added some Altenew enamel dots to finish the design off.

Next, I decided on a little colouring and fussy cutting…

IntroSoMuch2

I started out by stamping the floral bouquet onto Stampin’ Up! Whisper White card in Memento Tuxedo Black ink, I then used some Copic Markers to colour the image in. I then decided to fussy cut the image out, it is a fussy cut, but it is something I find quite therapeutic on a night once The Beans are asleep in bed!

IntroSoMuch2a


The sentiment is one of the mix and match options from the set and I still prefer to stamp my sentiments in VersaFine Onyx Black ink as I think it gives such a nice crisp finish. The floral bouquet is adhered to the card using foam adhesive and I trimmed the left hand side edge that overhung the card base.

Ok, that’s all from me, but how about some more inspiration, why not grab a cup of your favourite beverage and hop along with the team…?

Well, I thoroughly enjoyed that hop and I am all inspired to give the set even more inky love! I’d love to know your thoughts on this clear stamp set AND if you own it already I’d love you to share some of your projects with me using it!

That’s all from myself and the Design Team today, but be sure to come by tomorrow for even more product introductions 🙂

Hugs


Surprise Stencil Release!

Hello!

Today at Uniko we have a surprise stencil release!

Earlier this month Uniko was at Stamp Magic in Doncaster and I had 3 NEW stencil designs available to purchase at the show and I am super pleased they are NOW available HERE on the website.

Let’s have a look at the 3 new designs…
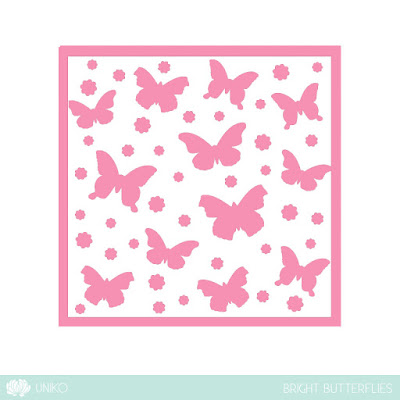
Uniko Stencil Bright Butterflies £4.50, Copyright Uniko Ltd 2018, www.uniko.co.uk

Uniko Stencil Scattered Polka Hexagons £4.50, Copyright Uniko Ltd 2018, www.uniko.co.uk

Uniko Stencil Mehndi Mandala £4.50, Copyright Uniko Ltd 2018, www.uniko.co.uk

Like with any new release here at Uniko we have a blog hop to celebrate and show you beautiful inspiration using the new products. I am super duper pleased to have a wonderful, talented and all round lovely crafter joining me and the Uniko Stencil DT us as our Guest Designer…. Ruth from Crafting While The Baby Naps. Hopefully you have hopped along from Ruth’s blog, but if not be sure to check out Ruth’s amazing inspiration HERE.

And as with all the Uniko Blog Hops we have a GIVEAWAY too! Simply comment along the hop for your chance to win one of the three stencil designs being released and as there are 3 new designs, I will randomly pick 3 lucky winners!!

Ok, how about some inspiration from myself using the new designs…
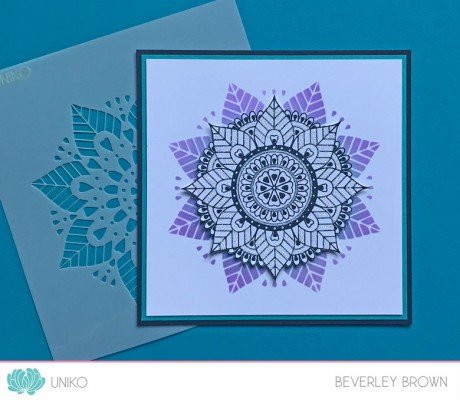
IntroMandalaStencil2

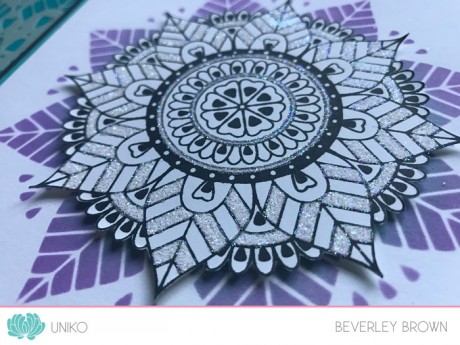
First up is the card in my sneak photo over on the Uniko Blogspot blog! I wanted to show how the Mehndi Mandala stencil can be paired with the large mandala clear stamp from Marvellous Mehndi.
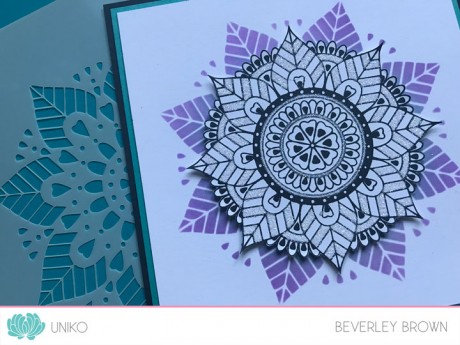
IntroMandalaStencil2a

I started by inking my Mehndi Mandala with Distress Oxide Inks, in Wilted Violet and Peacock Feathers. I then stamped the mandala from Marvellous Mehndi, fussy cutting it out and adding some Stampin’ Up! Dazzling Diamonds glitter to various sections. I’ve adhered it to my stencilled layer using 1mm thick foam adhesive.
IntroMandalaStencil2c

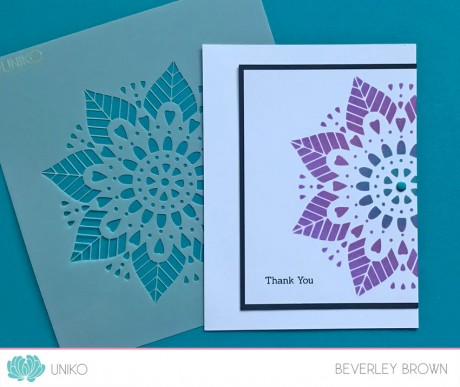
I’ve used the Mehndi Mandala stencil for my next card too, this time showing you more of the design…
IntroMandalaStencil1

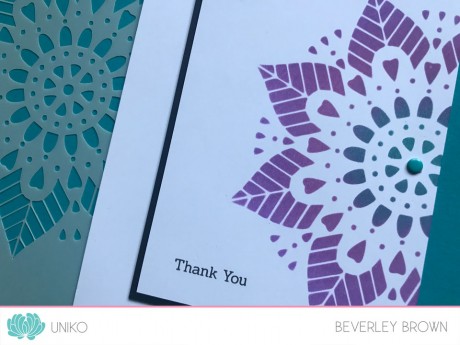
Again I used Distress Oxide Inks, this time Wilted Violet, Picked Raspberry and Peacock Feathers. I offset mounted my stencilled layer with some black card and onto a white card base. The sentiment is from Simply Said and I added an old Stampin’ Up! embellishment.
IntroMandalaStencil1a

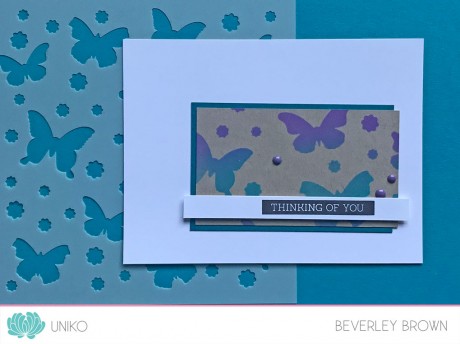
As I was on a roll with the colour combo of Wilted Violet and Peacock Feathers I decided to use if for my Bright Butterflies card…
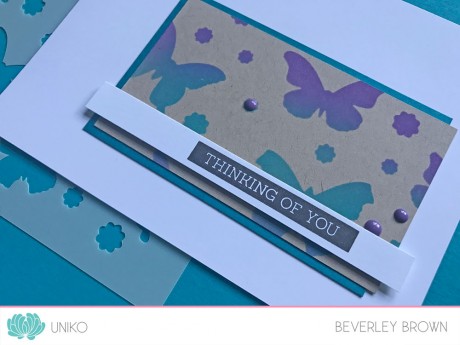
IntroBButterflyStencil1

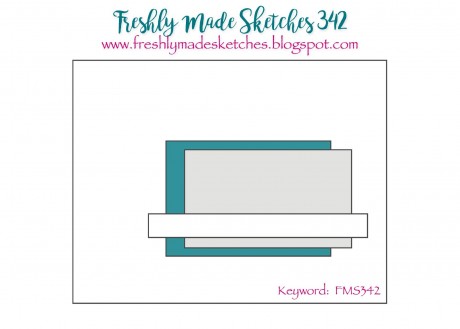
I’d had the SU! Crumb Cake card stencilled with the design since Stamp Magic, but I didn’t know how I wanted to use it, until I saw this weeks Freshly Made Sketches sketch seen HERE and below!
FMS Final 342-001

I layered my stencilled section with some scrap turquoise card from my stash and paired it with a sentiment from Simply Said Blocks II.
IntroBButterfliesStencil1a

Lastly, but by no means least I inked up the Scatted Polka Hexagons stencil…
IntroSPHstencil1

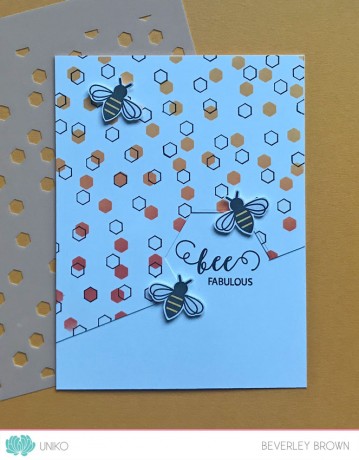
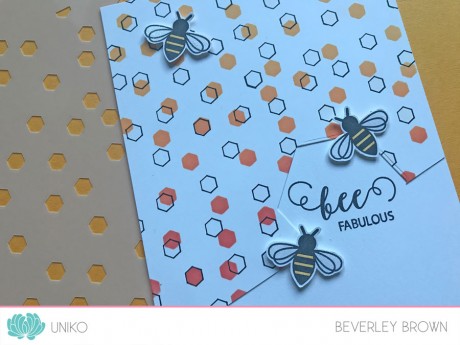
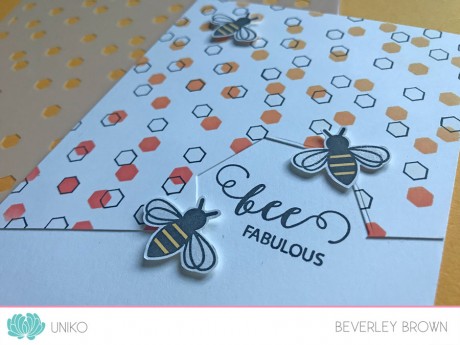
This is a fun geometric stencil and it pairs beautifully with the recently released Bee Happy clear stamp set. This time I used my new Catherine Pooler inks to blend through the stencil.
IntroSPHstencil1a

I used Tiara, Tiki Torch and Tutti Frutti from top to bottom. I then moved the position of the stencil slightly and used a fine liner to draw inside the polka hexagons to create a fun pattern.
IntroSPHstencil1b

To finish the design I trimmed my stencilled panel on the diagonal, die cut a large hexagon, big enough for my chosen sentiment from Bee Happy, which is stamped onto my base card. I’ve then embellished the card with a trio of fussy cut bees.

That’s all the inspiration I have to share with you today, but be sure to hop around the Stencil Design Team blogs below for even more. Don’t forget to comment too, to be in the chance of being a lucky winner!

Thanks for stopping by today.

Hugs

June 2018 Design Team Blog Hop & GIVEAWAY!

Hey!

It’s time for another Uniko Design Team Blog Hop & GIVEAWAY – Whoohoo!! For those of you who are new around these parts I will explain what this post is all about…

Here at Uniko HQ it is just myself behind the screen, blogging, designing, packaging stamps & orders through the Uniko online shop, customer service and all the things in between. I *usually* release new product every other month for a number of reasons, but mainly so I can keep up with everything!
On non – release months like this month I like to set myself and the Design Team a challenge to look back at a previously released product and give it some more love.
Usually I choose just one product that was released the previous year or a once favourite that hasn’t seen much air time. However, this time I couldn’t choose between the clear stamps in the Beautiful Blooms range, so I challenged the Uniko DT to use all 3 OR their favourite!

Beautiful Blooms I Clear Stamp Set

Beautiful Blooms I Designer Dies

Beautiful Blooms I can be bought as a clear stamp set and designer die bundle HERE.

Beautiful Blooms II

Beautiful Blooms III

My thinking / reasoning of designing the Beautiful Blooms series was to have some modern blooms that didn’t necessarily reflect a particular flower. They are open for interpretation as to what YOU the stamper believes the flower to represent. I feel this allows for more creativity and individuality to stampers projects.

Now I had to be fair, so I made one card using each of the clear stamps…

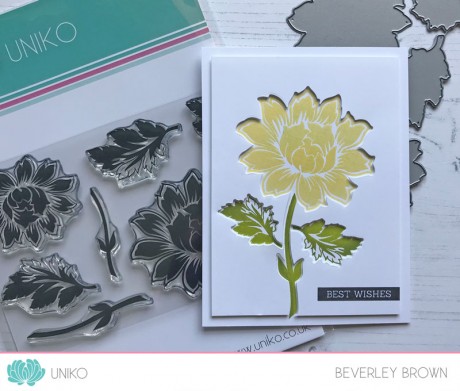
First up is Beautiful Blooms I and I decided to use both the clear stamps and matching designer dies. My card is heavily inspired by some of  Jennifer McGuire’s recent makes.

UJuneBH1a

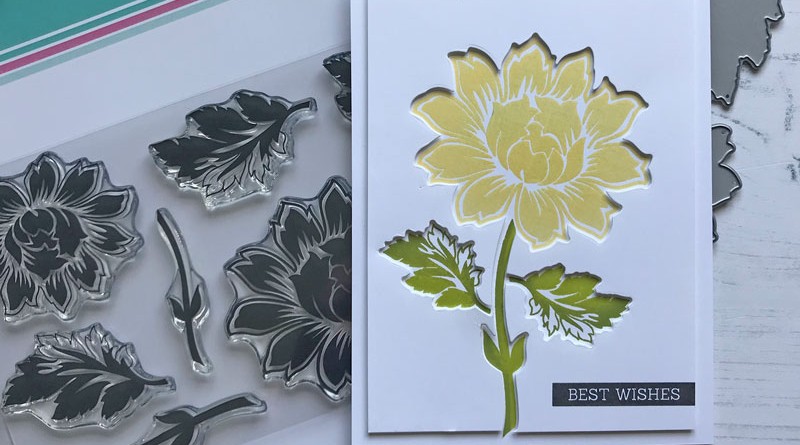
I started by die cutting the largest bloom, largest stem and 2 small leaves from a piece of white card. I then temporarily adhered it to my card base whilst I stamped the coordinating images to the die cuts. I used my MISTI tool to stamp too.

UJuneBH1b

I used Altenew inks to stamp and the sentiment is from Simply Said Blocks II. Once I had completed all my stamping the die cut panel was adhered using foam adhesive.

Next, I decided to have a play with Beautiful Blooms II and created a super CAS card…

UJuneBH2

I started by stamping the outline blooms in Altenew inks, then I ‘off stamped’ the bloom centre details before stamping inside the outline, as I wanted a fairly light shade to the blooms. I then used Lawn Fawn rectangle dies to die cut the layer before adding my sentiment from Just Because. The pane is adhered to a Stampin’ Up! Grey Granite card base using foam adhesive.

UJuneBH2a

Lastly, I dusted off Beautiful Blooms III to create a similar style card to my CC&S card last week HERE.

UJuneBH3

I used my MISTI tool again for this card, because there is quite a bit of masking and layering of stamps. I used Altenew inks again, as they really do take the hard work out of choosing colours to layer! I tried to show a few of the different layering options with the blooms on this card too.

UJuneBH3a
That’s all from me, but lets see how the design team have been inspired to use the products and be sure to comment along the hop for your chance to win your choice from the 3 clear stamp sets being featured. You have until Midnight (GMT) Monday 18th June 2018 to comment.

 Hugs